
Considering a skylight installation in Perth is a fantastic way to capitalise on the city’s endless sunshine, turning dim, forgotten rooms into bright, welcoming spaces. High-quality suppliers, like Vivid Skylights, are able to supply our range of double glazed skylights all over Australia including to Perth for easy installation to your home or project. This kind of accessibility means upgrading your home with natural light is more straightforward than ever before.
Why Skylights Are a Bright Idea for Perth Homes
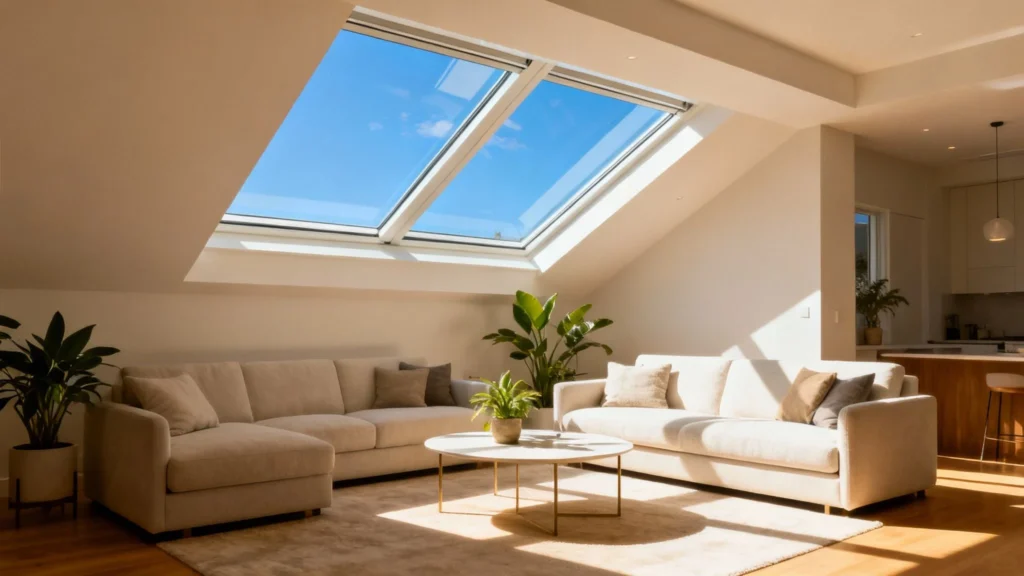
Perth homes are perfectly placed to take advantage of natural light, and popping in a skylight is one of the most effective ways to bring the outdoors in. It’s about more than just lighting up a room; skylights completely change the feel of a space, making it seem larger, more open, and better connected to the world outside.
This simple addition can dramatically slash your reliance on artificial lighting during the day. And that’s not just a small perk—it translates into real savings. We’ve seen real-life examples from across Western Australia showing households achieving up to a 15% reduction in their monthly energy bills just by installing energy-efficient skylights. You can get more details on how skylights contribute to energy savings over on our blog.
More Than Just Light
The benefits go well beyond your power bill. Bringing consistent, natural daylight into your living areas has been proven to boost mood and improve overall well-being. It can also give your property’s market value a serious bump, as light-filled homes are always a huge draw for potential buyers.
A well-placed skylight isn’t just a window in the roof; it’s an architectural feature that adds character and a sense of luxury to any room, from a previously gloomy hallway to a central kitchen.
Options for Every Perth Home
Thinking about what kind of skylight you need is the next logical step. The choices are pretty varied, so there’s a perfect fit for any situation:
- Fixed Skylights: These are your simplest option, designed purely to let in as much light as possible. They’re ideal for spots like living rooms or hallways where you don’t need extra ventilation.
- Vented Skylights: Perfect for kitchens and bathrooms, these units can be opened either by hand or with a remote. They provide fantastic airflow, helping to release trapped heat and humidity.
- Solar-Powered Models: These clever options often come with features like automated blinds and rain sensors, offering top-notch convenience and energy management without needing any extra electrical wiring.
Getting to know the different benefits of skylights can help you figure out which type is best for your home. Ultimately, a successful skylight installation in Perth starts with choosing a quality product built to handle the Aussie climate.
Planning Your Perth Skylight Project
A successful skylight installation in Perth really comes down to solid planning. I’ve seen it happen: people get excited and jump straight to cutting a hole in the roof, only to run into headaches with poor light, structural problems, or leaks. A bit of careful thought upfront makes all the difference and ensures you get the beautiful, functional result you’re after.
The first, and most crucial, step is figuring out exactly where it should go. This is about more than just finding the centre of the room. You need to think like the sun, considering its path across the sky and how that interacts with your home’s layout. It’s a puzzle involving what’s happening inside, what’s on the roof, and what’s in between.
Finding the Perfect Spot
The direction your roof faces will completely change the quality of light you get. Here in Perth, a north-facing skylight is usually the top choice. It delivers bright, consistent light all day long without that harsh, direct glare you get from the overhead sun.
On the flip side, a south-facing skylight offers a much softer, ambient glow, which can be perfect for spaces like bedrooms or art studios. East-facing units will give you an intense burst of morning sun, while west-facing ones capture that strong afternoon heat and light—something you might want to manage with blinds.
Before you fall in love with a particular spot, it’s time for a reality check. You need to hunt for obstacles.
- Roof Trusses and Rafters: Pop your head into the attic. Are there any major structural beams right where you want to put the skylight? Cutting through those isn’t a simple job; it often requires an engineer and adds significant cost.
- Electrical Wiring and Plumbing: Have a good look for any pipes or cables running through the ceiling cavity. Having to reroute these services will complicate the project and your budget.
- Exterior Obstructions: Don’t forget to look outside. Are there big trees or a neighbour’s second storey that could cast a shadow over your skylight at certain times? There’s no point installing a skylight that sits in the shade for half the day.
Choosing the Right Skylight for Your Needs
Once you’ve scouted the perfect, obstacle-free location, it’s time to pick the right type of skylight. The best way to decide is to think about how you use the room.
For a living area or a dark hallway where the goal is simply to bring in as much daylight as possible, a fixed skylight is a fantastic, budget-friendly option. They are sealed units designed purely to let the light in.
But if you’re putting a skylight in a kitchen or bathroom, a vented or opening skylight is the way to go. These are brilliant for letting out steam, cooking smells, and trapped hot air, giving you a major boost in ventilation. Many of the newer models even come with rain sensors that automatically shut them when the weather turns.
Remember, the right skylight does more than just let in light. It should complement the room’s function, improve comfort, and stand up to the local climate.
As you plan, it’s also smart to think about how you’ll handle that direct sunlight, especially during a Perth summer. Looking into options like a guide on how to block sunlight from windows can give you some great ideas, such as integrated blinds that offer instant shade.
Navigating Perth’s Building Requirements
Getting your head around local regulations is a must. For most straightforward skylight installations that don’t mess with the main roof structure, you likely won’t need a specific permit from the council.
However, there are big exceptions. If your home is heritage-listed, you’ll almost certainly need to get the green light. The same goes for any project that involves cutting major roof trusses or significantly altering the roofline—that will require engineering approval and proper building permits. When in doubt, always give your local Perth council a call.
Skylights have been a popular choice in Perth architecture for over 25 years, with a clear preference for robust designs that meet Australian standards. With a huge range of sizes available, from 400x400mm up to 2350x2350mm, finding a solution for any space is easier than ever.
Finally, materials matter—a lot. Especially under our intense WA sun. Investing in double-glazed units with a Low-E coating is one of the smartest moves you can make. This technology is designed to block harsh UV rays and dramatically reduce heat transfer, which keeps your home cooler and your power bills down. It’s a non-negotiable feature for any skylight installation Perth homeowners should consider.
Budgeting for Your Skylight Installation Costs
Before you get carried away picturing a sun-drenched living room, it’s smart to get a handle on the full financial picture of a skylight installation in Perth. Getting a realistic budget sorted from the get-go is the best way to avoid any nasty surprises down the track.
The final price isn’t just the sticker price on the skylight itself. It’s a combination of the unit you choose, the professional labour to get it installed perfectly, and any interior finishing work needed to make it look like it’s always been there.
What Influences the Final Price
Every project is a little different, but a few key things always steer the overall cost. Understanding these helps you see exactly where your money is going and where you might have some flexibility.
- Skylight Model and Size: Your most budget-friendly option is a smaller, standard-sized fixed unit. The price tag climbs as you look at larger sizes, models that open (vented), or ones with clever features like solar power and rain sensors.
- Roof Type and Pitch: Putting a skylight into a standard-pitch Colorbond roof is generally more straightforward—and therefore cheaper—than tackling a steep, tiled roof. Tiles require much more detailed work with cutting and flashing to guarantee a watertight, leak-proof finish.
- Structural Modifications: This is a big one. If your dream spot for the skylight means cutting through a major roof truss or rafter, the complexity (and cost) immediately jumps. You’ll need a qualified builder to frame in new supports, adding a fair bit to the labour and materials bill.
- Interior Finishing: The job isn’t done when the skylight is on the roof. You need to account for building the light shaft down to your ceiling, then plastering and painting it for a seamless finish. The higher your ceiling, the longer the shaft, which means more materials and time.
Think of the total investment for a Perth skylight installation as three key parts: the skylight unit, the complexity of the roof work, and the interior finishing. A good, honest quote should break down all three.
Real-World Cost Scenarios
So, how does this all play out in practice? A basic job—say, a small fixed skylight on an easy-to-access, single-storey home with a Colorbond roof—will land on the lower end of the price scale. This kind of installation usually involves minimal structural changes and simple flashing.
On the other hand, a complex project is a different story. Installing a large, vented skylight on a two-storey house with a steep, tiled roof is firmly at the higher end. This involves more risk for the installers, specialised gear like scaffolding, tricky tile work, and a much more involved plastering job inside.
Let’s talk numbers. The cost of a skylight unit itself in Western Australia can range anywhere from $650 to $3,600. Installation adds another $300 to $3,000 on top of that, all depending on the factors we’ve just covered.
To help you visualise this, we’ve put together a sample budget for different project tiers in Perth.
Estimated Cost Breakdown for Skylight Installation Perth
This table gives you a ballpark idea of what to expect for different types of skylight projects, helping you plan your budget more effectively.
| Project Tier | Skylight Type | Estimated Unit Cost (AU$) | Estimated Installation Cost (AU$) | Total Estimated Cost (AU$) |
|---|---|---|---|---|
| Entry-Level | Small Fixed Skylight (e.g., hallway) | $650 – $1,000 | $300 – $800 | $950 – $1,800 |
| Mid-Range | Medium Vented Skylight (e.g., kitchen) | $1,200 – $1,900 | $1,200 – $1,900 | $2,400 – $3,800 |
| Premium | Large Electric/Solar Skylight with Blinds | $1,900 – $3,700+ | $1,900 – $4,000+ | $3,800 – $7,700+ |
Remember, these figures are estimates. The only way to get a firm price is to get a few detailed, itemised quotes from reputable local installers. This lets you compare apples with apples and see exactly what’s included.
For a more thorough look at what goes into the pricing, check out our complete guide on skylight installation cost. It’s packed with more detail to help you budget properly for your Perth project.
Your Guide to a DIY Skylight Installation
For the confident and skilled DIYer, tackling a skylight installation in Perth can be an incredibly rewarding project. It’s a serious job, no doubt about it—one that demands real experience with roofing, framing, and interior finishing. But the payoff? Flooding a room with natural light you brought in with your own two hands is tough to beat. This guide will walk you through the process, focusing on safety, precision, and getting that professional, leak-proof result you’re after.
Before you even think about getting on the roof, let’s talk safety. It has to be priority number one. Working at heights has obvious risks, and cutting a hole in your home’s main weather shield requires absolute focus. Always use a sturdy, properly-placed ladder, wear the right gear like non-slip boots and gloves, and if you can, have someone on the ground as a spotter. Never, ever work on a wet or windy roof.
Gathering Your Tools and Materials
Having everything you need on hand before you start is the secret to a smooth project. A frantic dash to the hardware store halfway through is not only frustrating but leaves your roof exposed for longer than necessary.
Here’s a solid checklist to get you started:
- Safety Equipment: Safety glasses, gloves, harness, and sturdy footwear.
- Measuring & Marking: A good tape measure, carpenter’s square, chalk line, and a few pencils.
- Cutting Tools: You’ll want a circular saw for the roof deck, a reciprocating saw for any rafters, and a drywall saw for the ceiling.
- Drills and Drivers: A reliable power drill with a variety of bits is a must.
- General Hand Tools: Hammer, pry bar, utility knife, and a caulking gun.
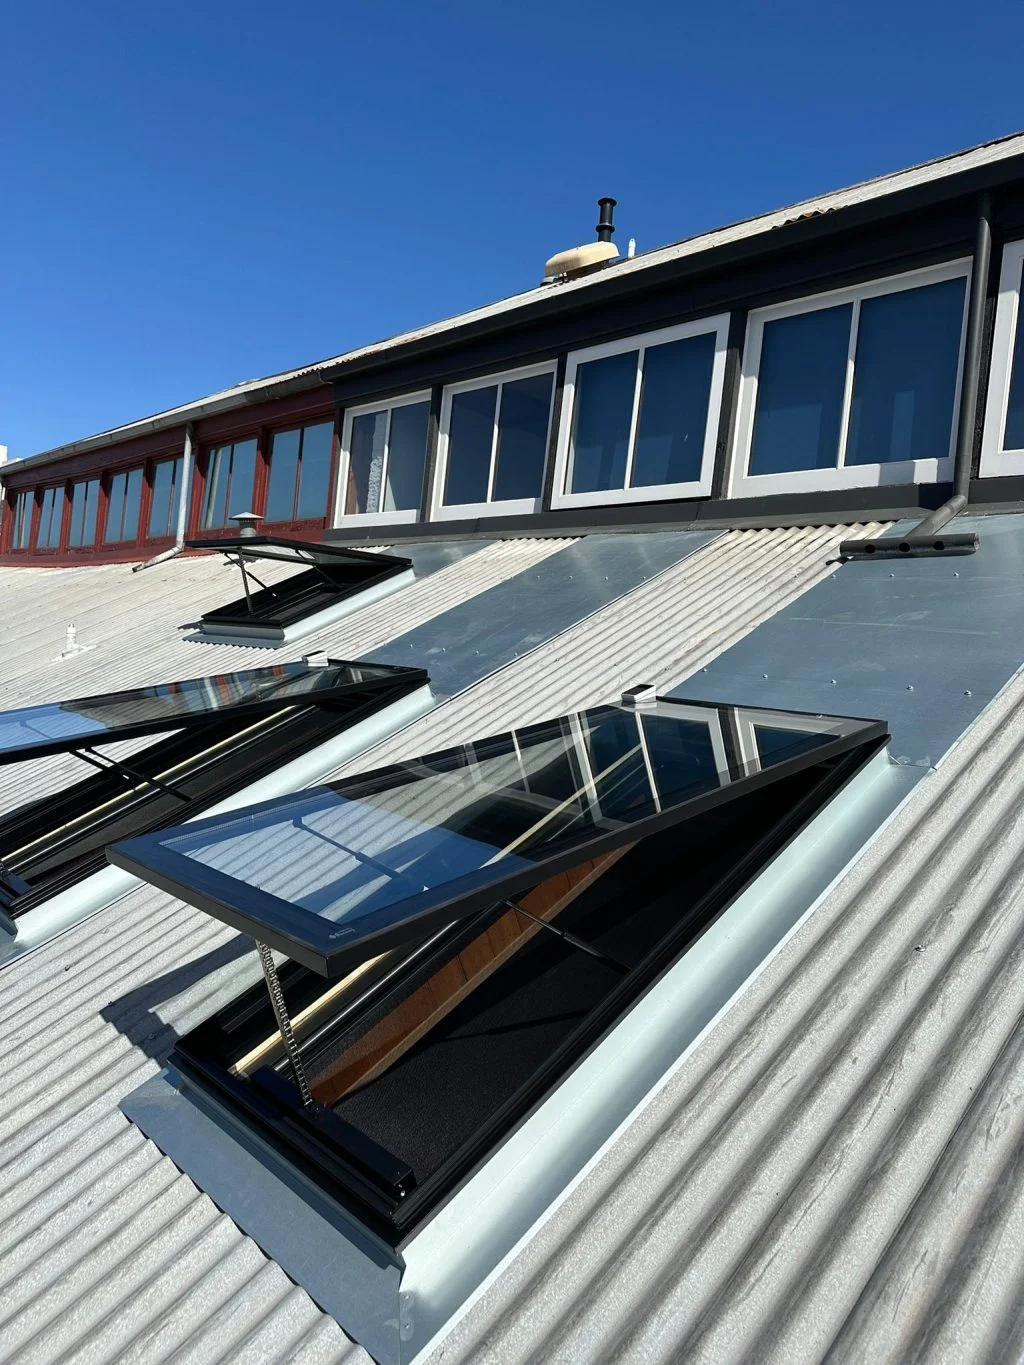
- The Skylight Kit: This is the star of the show. It must include the skylight unit itself and the correct flashing kit for your specific Perth roof, whether it’s tile, Colorbond, or something else.
Vivid Skylights are able to supply our range of double glazed skylights all over Australia including to Perth for easy installation to your home or project. This way, you get a quality unit built for Australian conditions, delivered right to your door.
Marking and Cutting the Openings
Precision is absolutely everything here. Any mistakes now will create major headaches later on, so measure twice, cut once. The goal is to create two perfectly aligned openings: one in your interior ceiling and one on the roof above it.
Start from inside. Once you’ve picked the perfect spot, drill a small pilot hole up through each corner of your intended ceiling opening. Now, pop your head into the attic space and check that these holes haven’t run into any surprises like wiring or plumbing you might have missed.
If the coast is clear, go ahead and cut the ceiling opening with your drywall saw. From there, you can use a plumb bob or a laser level to transfer those corner points straight up to the underside of the roof deck. This is how you guarantee your light shaft will be perfectly vertical. Drill up through these new points to the exterior, then you can get on the roof, connect the dots with a chalk line, and cut the roof opening.
A classic rookie mistake is cutting through a structural roof truss or rafter without reinforcing it. If your planned opening interferes with a truss, you must frame a proper header and footer to transfer the load. Skipping this step can seriously compromise the structural integrity of your roof.
Setting and Weatherproofing the Skylight
This is it—the most critical part of any skylight installation in Perth. A poorly sealed skylight is a guaranteed leak, and believe me, water damage is a nightmare you want to avoid. The secret to a watertight seal is all in the flashing.
First, lay down a layer of self-adhering waterproof membrane (often called an ice and water shield) around the entire roof opening. Make sure it extends under the surrounding shingles or roof sheets. This is your first line of defence.
Next, carefully set the skylight unit into the opening you’ve prepared, making sure it’s level and securely fastened to the roof deck, following the manufacturer’s instructions to the letter.
Now for the flashing. Flashing kits are designed for specific roof types, so double-check you have the right one for your Perth home.
- For Tiled Roofs: This involves fitting a base flashing around the unit, then weaving step flashing into each course of tiles. A saddle flashing sits at the top and an apron flashing at the bottom.
- For Colorbond Roofs: The flashing is usually a single-piece system profiled to match your roof sheet’s design. This needs to be sealed meticulously with high-quality roofing silicone and fastened securely.
The golden rule of flashing is simple: work from the bottom up. Each piece must overlap the one below it. This method lets gravity do the work, shedding water away from the opening and creating a durable, leak-proof barrier.
This visual guide breaks down the key stages of budgeting for a skylight project, from the unit itself to the final touches.
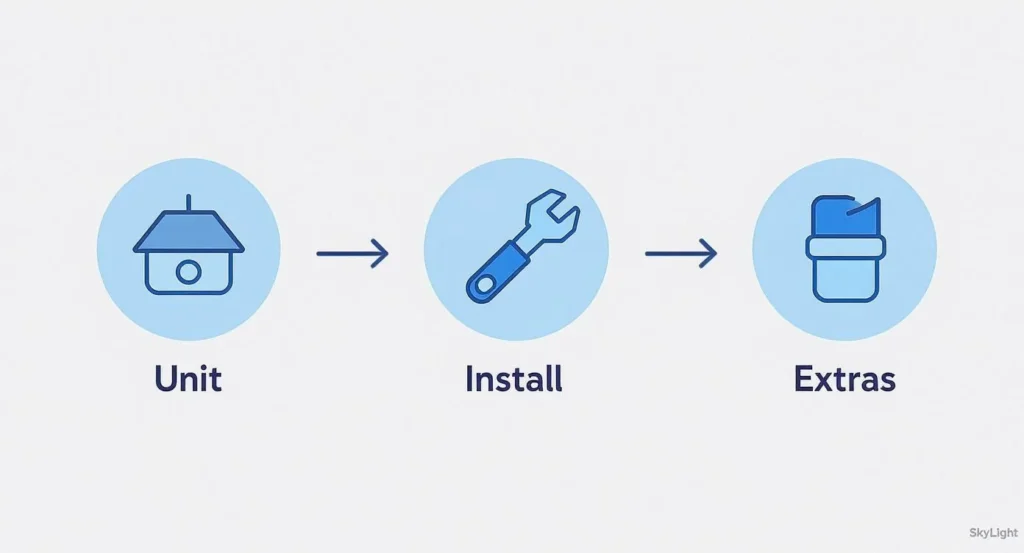
The infographic illustrates that the total cost is a sum of the skylight unit, the professional installation, and any extra finishing work.
Finishing the Interior
With the skylight securely installed and weatherproofed on the roof, it’s time to bring it to life from the inside. This means building the light shaft, insulating it, and then finishing it all off with plasterboard and paint.
First, build a frame for the light shaft to connect the roof opening down to your ceiling opening using standard timber. You’ll need to decide if you want a straight shaft or one that’s flared, which helps spread the light more widely across the room.
Once the frame is built, it’s absolutely crucial to insulate the light shaft cavity properly. Good insulation prevents condensation from forming and helps maintain your home’s overall energy efficiency.
Finally, line the shaft with plasterboard, tape and plaster the joints for a perfectly smooth finish, and paint it to match your ceiling. This is the last step that creates that seamless, professional look, making the skylight feel like it was always meant to be there. For a more detailed walkthrough, our DIY skylight installation guide has some extra insights that will help you along the way.
How to Hire a Skylight Installer in Perth
While tackling a DIY installation can be a rewarding project, for most homeowners, bringing in a professional for a skylight installation in Perth is the best path to a perfect, leak-free result. There’s real peace of mind in knowing an expert has handled the tricky structural work and crucial weatherproofing.
Finding the right person for the job, however, means doing a bit of homework. You’re not just hiring someone to cut a hole in your roof; you’re trusting them with the integrity of your home. A top-notch installer ensures the skylight not only performs flawlessly but also looks like it was always meant to be there.
What to Look For in a Perth Installer
Before you even start ringing around for quotes, you need to know what separates a true professional from the pack. The best installers in Perth will have no problem showing you their credentials and will have a solid portfolio to prove their expertise.
Here are the absolute must-haves:
- Proper Licensing and Registration: Make sure your installer has the required builder’s registration or contractor’s license for work in Western Australia. This is the first signal that they’re running a legitimate business.
- Comprehensive Insurance: They must carry public liability insurance to cover any accidental damage to your property, plus workers’ compensation for their crew. Don’t hesitate to ask for their certificates of currency.
- Proven Skylight Experience: General roofing experience is good, but specific expertise with skylights is what you really want. Ask to see photos of their past work, especially on roofs similar to yours.
When you’re ready to hire a professional, it’s helpful to understand the qualities of reputable roofing contractors who handle this kind of work. This knowledge will make vetting candidates much easier.
Key Questions to Ask Potential Contractors
Once you have a shortlist of installers, it’s time to dig a little deeper. Their answers to these questions will tell you a lot about their workmanship, customer service, and the quality of products they use. A good contractor will welcome your questions.
Ask which brands they recommend and why. An installer who trusts quality products, like Vivid Skylights, understands the importance of durability and performance in the harsh Perth climate. Our range of double glazed skylights can be supplied across Australia, including to Perth, ready for your chosen professional to install.
A confident and experienced installer won’t just give you a price; they’ll offer advice on placement, sizing, and the best type of skylight for your specific needs, ensuring you get the maximum benefit from your investment.
Also, be sure to ask about their warranties. You should get two: one from the manufacturer covering the skylight itself, and another from the installer covering their workmanship. A contractor who stands by their work will always offer a solid guarantee against leaks.
How to Read Quotes and Spot Red Flags
Getting at least three detailed, written quotes is standard practice for a reason. It lets you compare not just the bottom line but also what’s included in the price. A vague, one-line quote is a huge red flag.
A professional quote should clearly break down:
- The exact model and size of the skylight.
- The cost of all materials, including the flashing kit.
- Labour costs for both the roof work and interior finishing.
- Any extra costs, like structural modifications or rubbish removal.
- The estimated start and completion dates.
Watch out for quotes that are dramatically lower than the others. While it might look tempting, a rock-bottom price can be a sign of corners being cut, cheap materials being used, or an uninsured installer. It’s always better to invest a bit more for a quality job that will last for decades.
Choosing the right installer is the final, crucial step in ensuring your skylight installation in Perth is a complete success. Taking the time to vet properly will pay off with a beautiful, light-filled space and the confidence that the job was done right.
Keeping Your New Skylight in Top Shape
Alright, the installation is done, and your Perth home is now bathed in that beautiful, natural light you were after. So, how do you keep it looking and performing its best for years to come? The good news is, it doesn’t take much—just a few simple habits to protect your investment.
The easiest win is a regular clean. Over time, the Perth sun, dust, leaves, and that coastal salt spray can build up, dimming the light coming through. For a safe and effective clean, all you need is a soft cloth or sponge with a bit of mild, non-abrasive soap and water. Steer clear of harsh chemicals or anything abrasive that could scratch the glass or damage any special coatings.
Proactive Checks and Care
Beyond just cleaning, a quick inspection now and then is the key to catching small issues before they turn into big headaches. This is especially true after one of Perth’s heavy downpours or a big storm.
Every six months or so, just take a couple of minutes to look over a few things:
- Seals and Flashing: Have a peek at the seals and flashing on the outside. You’re looking for any signs of cracking, peeling, or gaps. A watertight seal is your number one defence against leaks.
- Debris Build-Up: Clear away any leaves, twigs, or other gunk that’s gathered around the frame. This stops water from pooling up and ensures it can drain away properly.
- A Quick Look Inside: Glance up at the ceiling and the light shaft from inside your home. Any water stains or discolouration is an early warning sign that something needs a closer look.
Honestly, a five-minute visual check a couple of times a year is all it takes. It’s the best way to catch potential problems early, saving you a fortune on repairs and making sure your skylight remains a brilliant, worry-free part of your home.
If you’ve got a skylight that opens, whether it’s manual or motorised, there are just a couple of extra points. Make sure the opening mechanism is free of any blockages and give the remote or wall switch a test every so often. If it runs on batteries, just get into the habit of swapping them out once a year to keep it working when you need it.
Got Questions About Skylight Installations?
Thinking about a skylight installation in Perth is exciting, but it’s totally normal to have a few questions pop up. Getting the right answers upfront helps you plan your project without any guesswork. We’ve put together some of the most common queries we get from Perth homeowners just like you.
Do I Need Council Approval for a Skylight in Perth?
Good news—for most standard skylight jobs, you probably won’t need to get council approval. This is usually the case when the skylight fits neatly between your existing roof trusses and doesn’t involve major structural surgery on your roofline.
But, there are exceptions. If your home is heritage-listed or the installation requires cutting into those structural roof trusses, then approval is almost certainly required. The safest bet is always to have a quick chat with your local Perth council before any work kicks off.
The rule of thumb is pretty simple: if it’s a cosmetic addition that works with the existing structure, you’re likely good to go. If it involves changing the structure, you’ll need to follow the formal approval process.
What Kind of Glazing Is Best for the Perth Climate?
With Perth’s brilliant (and intense) sunshine, you can’t go past double-glazing with a Low-E (low-emissivity) coating. This isn’t just a fancy feature; it’s a game-changer for our climate. This specific technology is engineered to block the harshest UV rays and seriously cut down on heat transfer.
What does that mean for you? Your home stays much cooler in summer, and you’ll notice the difference in your air conditioning bills—all without sacrificing that beautiful natural light. For comfort and energy efficiency here in WA, it’s an absolute must-have.
Can I Install a Skylight on Any Roof Type?
Pretty much, yes! Modern skylights are incredibly versatile and can be installed on almost any roof you’ll find in Perth, whether it’s Colorbond, classic metal sheeting, or traditional tiles. The real secret to a perfect, long-lasting seal is using the right flashing kit.
Every roofing material has a flashing kit designed specifically for it, ensuring a completely watertight fit. Any professional installer worth their salt will identify your roof type and match it with the correct flashing to guarantee a leak-proof finish for your skylight installation Perth project.
At Vivid Skylights, we supply our full range of double-glazed skylights across Australia, including right here in Perth, ready for easy installation in your home. Take a look at our options to find the perfect fit at Vivid Skylights.