
A skylight leak usually shows up at the worst possible time. Brisbane gets a hard summer downpour, the ceiling starts staining, then you hear the drip. At that point, most homeowners want one answer fast. Is this a quick seal job, or is the whole skylight system failing?
That's the right question. In skylight repairs and leak prevention Brisbane homes, the leak you can see often isn't the actual problem. Water can travel around the roof cavity, enter through failed flashing, pool behind an old acrylic dome, or work through brittle sealant that gave up seasons ago. A tidy bead of caulk might slow it for a week, but it won't fix poor water-shedding.
Queensland guidance is clear that skylights here must be designed and installed to handle strong winds and heavy rainfall, and properly specified units can also improve efficiency, with one regional example reporting a 15% reduction in monthly energy bills after modern skylights with automated features were installed, according to Queensland skylight performance guidance.
Table of Contents
That Dreaded Drip What to Do When Your Skylight Leaks
A leaking skylight feels personal because it hits two things at once. Your roof is letting water in, and the room that should feel bright and open suddenly feels exposed. If the leak starts during a storm, the first job is simple. Protect the room, catch the water, and avoid rushing into a bad repair.

Put down towels or a bucket. If the plaster is sagging badly, keep clear of it. Then wait until conditions are safe before inspecting anything. Climbing onto a wet roof to smear on sealant is how minor leaks turn into injuries and repeat call-outs.
The first goal is finding the entry point
Most skylight leaks fall into a few familiar categories:
Failed surface seals around the frame or dome
Flashing defects where the roof should direct water around the skylight
Debris build-up that slows drainage and causes ponding
Aged acrylic domes that crack, craze, or move too much under weather stress
Roof-system problems nearby that only appear to be skylight leaks
Practical rule: Treat a skylight leak as a water-management problem, not just a gap-filling problem.
That distinction matters in Brisbane. Summer storms test every weak point in the roof assembly. If the flashing geometry is wrong, or the unit was installed without proper regard for roof pitch and runoff, no surface patch will make it weather-tight for long.
Repair, maintain, or replace
The right next step depends on the cause. A small localised seal failure may be manageable. A brittle old dome with recurring leaks usually isn't. If you're comparing your symptoms to common failure points, Vivid's guide on how to fix a leaking skylight is a useful starting reference.
A calm inspection saves money and stress. It also tells you whether you're dealing with a modest repair, a maintenance issue, or a full upgrade to a more storm-proof skylight system.
Your Leak Detective Checklist Diagnosing the Problem
The most reliable workflow is inside-to-outside. Brisbane skylight installation guidance notes that incorrect flashing is a “surefire” path to water damage because the roof system must shed stormwater around the opening, not funnel it into it, as explained in Brisbane skylight installation guidance.

Start inside before you touch the roof
Don't begin outside. Start where the evidence is easiest to read.
Look at the ceiling around the shaft
Water stains that spread from one side of the skylight opening often point to runoff entering from above and travelling along framing before it appears.Check the timing
If moisture appears only during or just after rain, think leak. If it appears on cool mornings and clears later, condensation may be part of the issue.Inspect the plaster and trim
Bubbling paint, swollen trim, or staining at corners can show where water is tracking.Examine the inside edge of the frame
A torch helps here. Look for visible gaps, blackened sealant, mould spots, or water beads collecting at one point.
Water rarely drops straight down from the point of entry. It follows framing, insulation, and the easiest path available.
Check the skylight unit itself
Homeowners often spot whether the leak is age-related at this stage.
Look closely for these signs:
Cracked or crazed acrylic dome that has gone brittle
Clouding between glass layers on insulated units
Shrunken or split gaskets around the frame
Movement in the frame when gently pressed
Old patch repairs where someone has added multiple layers of sealant over time
Acrylic domes are a common trouble spot on older homes. Once they age, they can become less forgiving under heat, UV, and heavy rain. If the dome is visibly deteriorated, more sealing may only delay replacement.
Inspect the roof side carefully
Only inspect externally when the roof is dry and access is safe. If your roof is steep, high, or slick, stop there and book a professional inspection.
From outside, focus on what controls water flow:
Flashing condition
Look for lifting edges, gaps, corrosion, loose sections, or flashing that appears more decorative than functional.Sealant condition
If you see brittle, peeling, or patchy sealant, note it. Don't assume it's the main failure.Debris around the uphill side
Leaves and grime can trap water where it should be shedding away.Roof materials around the unit Broken tiles, cracked bedding, or damaged roof sheets near the skylight can be the actual cause.
A useful rule on-site is this: if the leak path suggests water is entering from the top or sides of the roof penetration, flashing becomes the prime suspect before the glass does. That's why many “skylight leaks” are really roof integration failures.
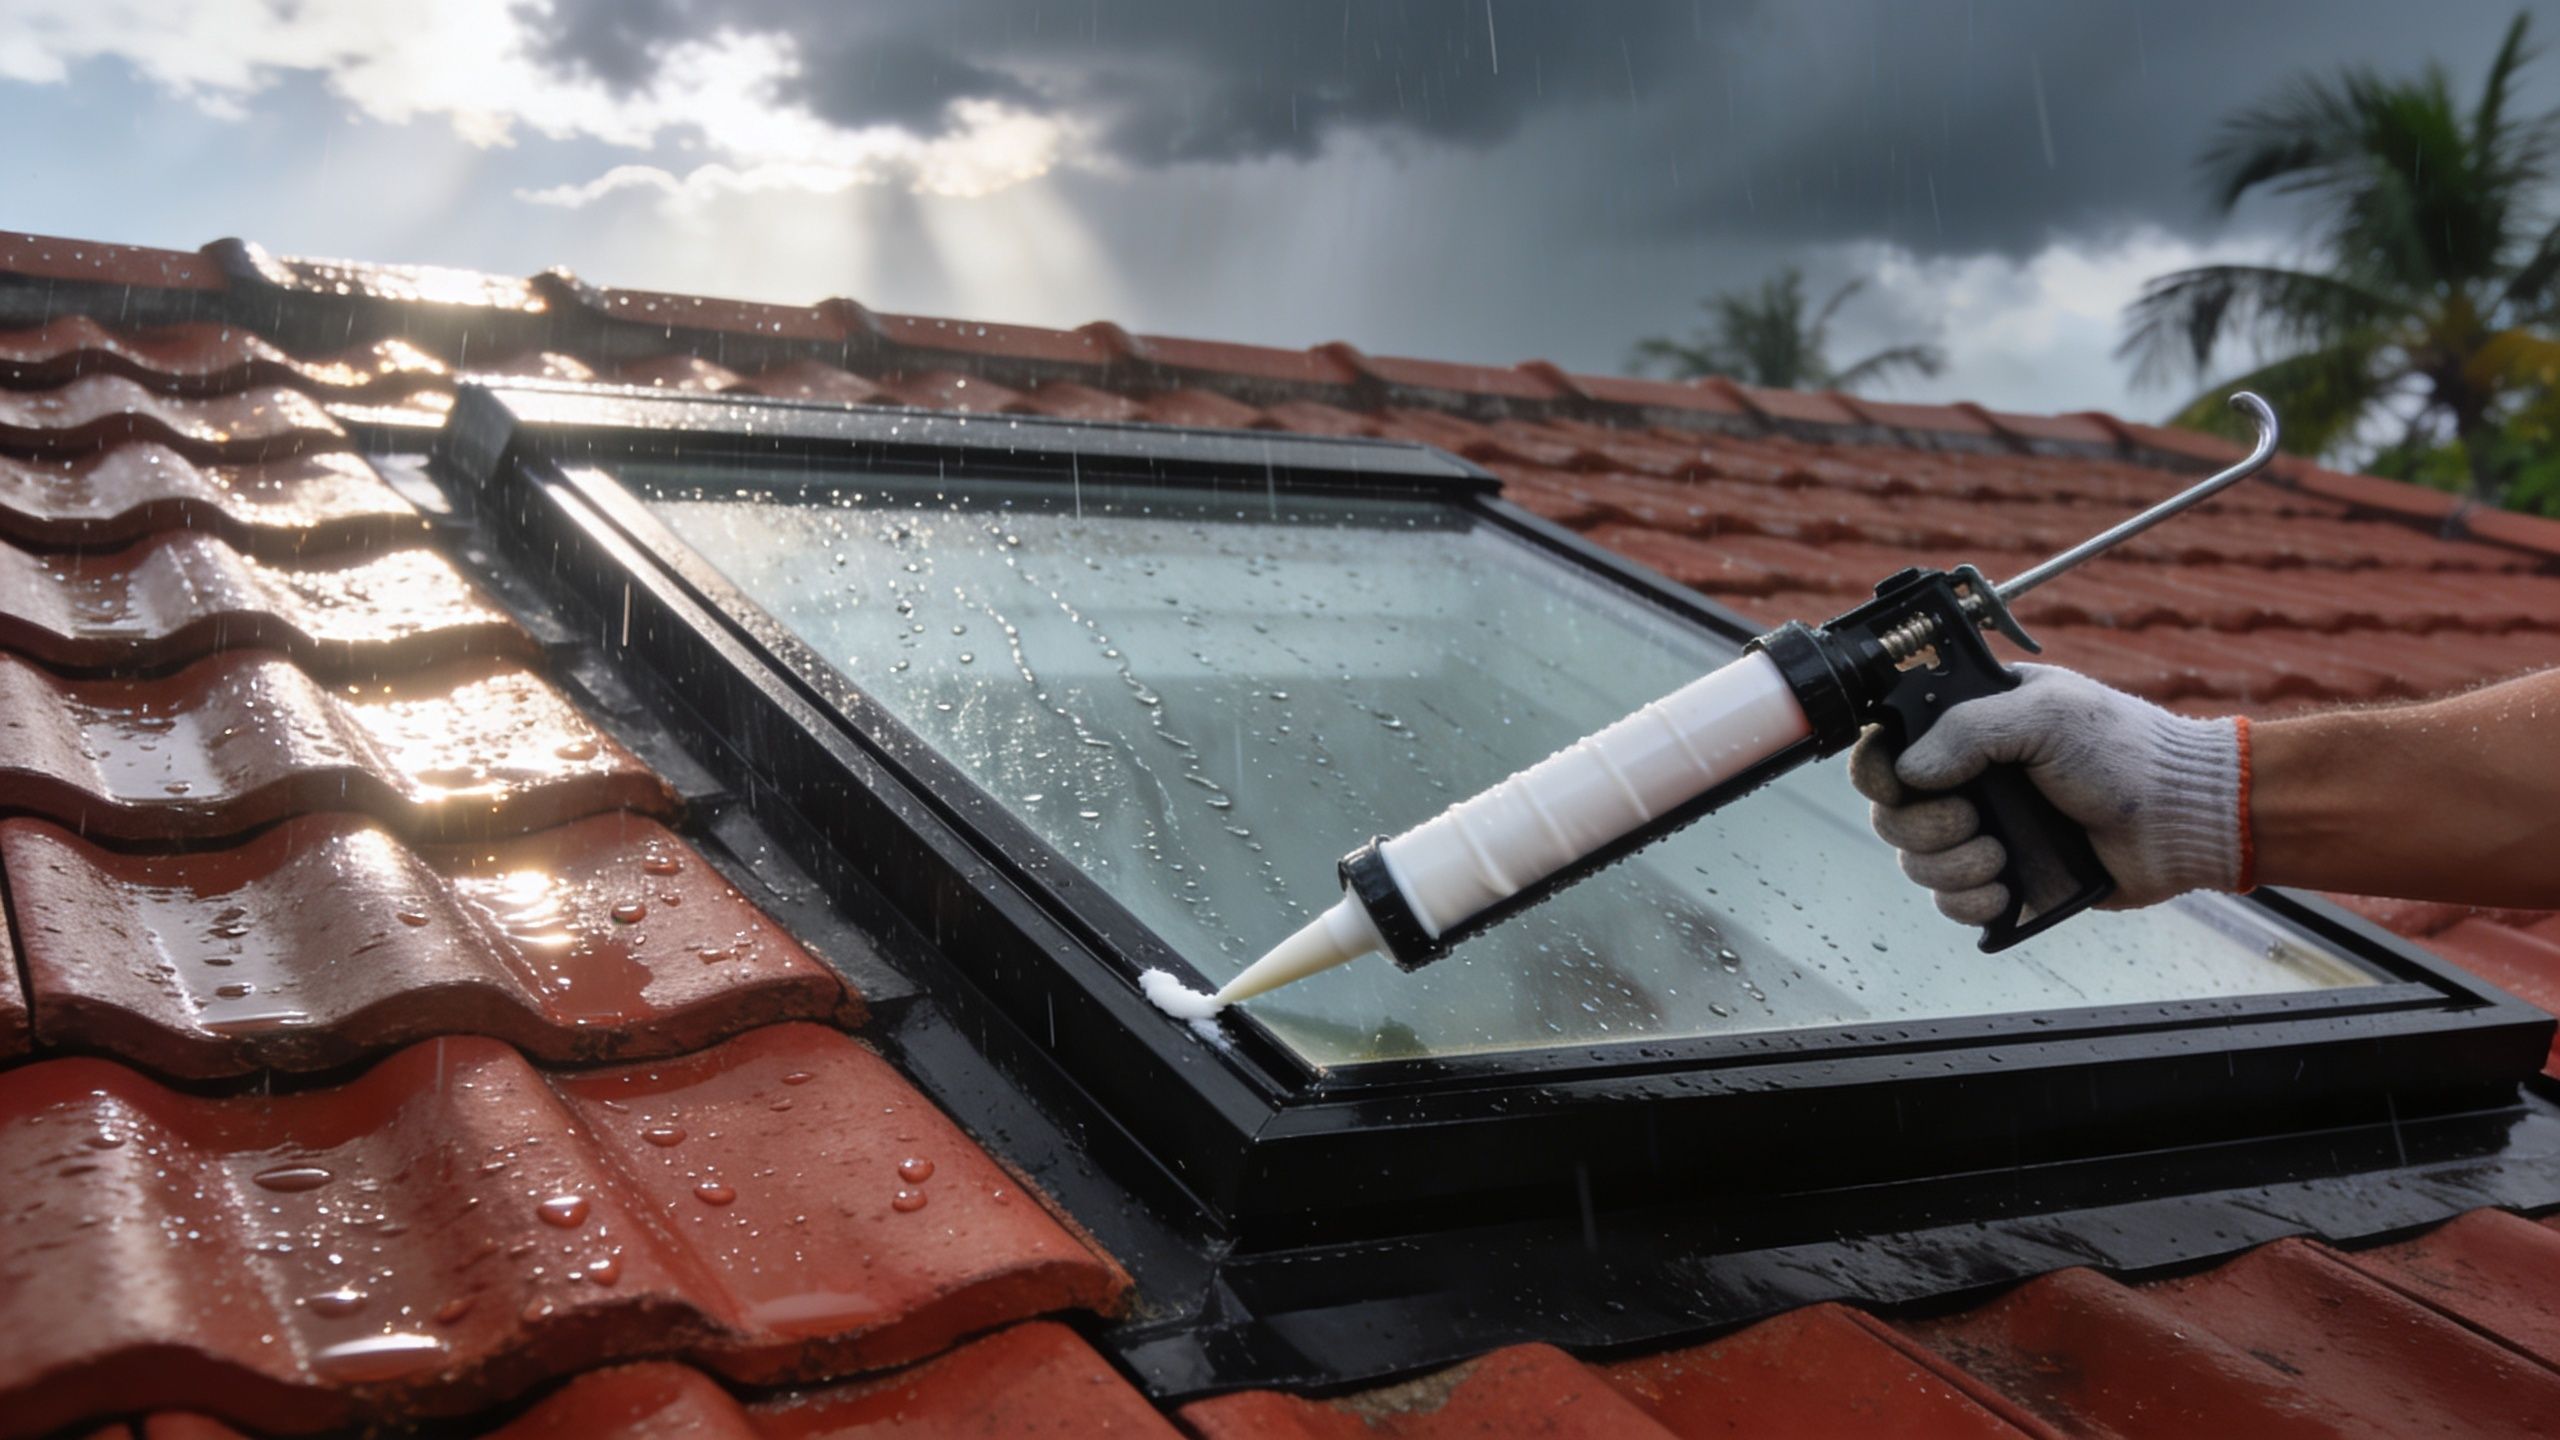
A Guide to DIY Skylight Resealing
DIY resealing has its place. It works when the problem is small, visible, and limited to a failed surface seal. It does not work when water is getting behind flashing, under roofing, or into a deteriorated skylight assembly.
When resealing is a reasonable DIY job
A homeowner can usually handle resealing when all of these are true:
The leak is minor and localised
The skylight frame is sound
The glazing or dome isn't cracked
The flashing looks intact
Access is safe from a stable platform
You'll need a few basics. A scraper or sealant removal tool, clean cloths, a brush, compatible cleaner, and a UV-resistant silicone sealant suited to external roofing use. If the gap is wide, backer rod helps support the sealant bead instead of letting it sag into the void.
For a more detailed walkthrough of the process, Vivid's article on how to seal a skylight covers the practical steps clearly.
How to reseal without making the leak worse
Good resealing is mostly preparation.
First, remove the failed sealant fully. Don't smear fresh silicone over dirty, cracked material and expect it to bond. Old sealant often lifts at the edges first, and that's enough to let water back in.
Next, clean the area properly. The frame, glazing edge, and adjacent roof surface need to be dry and free of dust, residue, and loose material. If the substrate isn't clean, the new bead won't adhere consistently.
Then apply a continuous bead, not broken dabs. Keep it even, press it into the joint, and avoid overbuilding. Thick, messy sealant often traps water or peels early.
A sensible order looks like this:
Remove failed material
Clean and dry the joint
Fit backer rod if the gap is too wide
Apply a continuous silicone bead
Tool the bead neatly
Allow proper cure time before rain exposure
Watch for this trap: If you need a large amount of sealant to “build” a waterproof edge, the real problem probably isn't the sealant.
Don't attempt DIY resealing if the leak returns after one careful repair, if the skylight has visible structural movement, or if you suspect the roof around it is directing water the wrong way. That's where patching stops being maintenance and starts hiding a larger failure.
Preventive Maintenance to Storm-Proof Your Skylight
Emergency skylight calls often come from neglect, not sudden failure. A skylight can stay serviceable for years if the surrounding roof area stays clean and the small warning signs get picked up before storm season.
Brisbane leak-prevention guidance highlights three high-value tasks: keep the perimeter and nearby roof valleys clear of debris, inspect sealant twice yearly for UV-related cracking, and verify flashing integrity, as outlined in Brisbane roof leak prevention advice.
The checks that matter most
You don't need a complicated schedule. You need a routine that gets done.
Clear leaves and debris before storm season
The uphill side of the skylight and the nearest drainage paths matter most. If water can't move away freely, it sits where the roof is most vulnerable.Check visible sealant for cracking
UV exposure hardens and splits sealants over time. You're looking for shrinkage, separation, or brittle edges.Look for signs of flashing movement
Anything lifting, warping, or appearing loose deserves attention before the next run of rain.Watch the ceiling after major weather
A small stain that appears after one storm is much easier to deal with than a saturated shaft weeks later.
What homeowners often miss
The common mistake is focusing only on the skylight lens. The perimeter matters more. Water reaches the skylight as part of the roof system, so the nearby valleys, overlaps, and runoff paths need to stay open.
A clean skylight can still leak if the roof around it is holding water.
This is especially important in homes with overhanging trees. Debris builds gradually, then one heavy storm turns a slow drainage problem into active ingress. A simple visual inspection from the ground after bad weather can catch a lot before it becomes internal damage.
Preventive work isn't glamorous, but it's what keeps a skylight weather-tight when Brisbane's summer rain arrives sideways.
Knowing When to Call a Professional Brisbane Contractor
There's a point where DIY stops being sensible. If the leak involves flashing, roofing materials, repeated water entry, or an old dome that has reached the end of its life, a professional inspection is the safer move.
In Brisbane, minor, localised roof leak repairs typically cost around AUD 250–600 when caught early, which is a useful benchmark for acting before the issue spreads into bigger roof or interior damage, according to Brisbane roof leak repair cost guidance.
DIY Repair vs. Professional Help Checklist
| Symptom | Likely Cause | Recommended Action |
|---|---|---|
| Small visible split in external sealant, no roof damage seen | Localised seal failure | Careful DIY reseal may be reasonable |
| Minor drip only in one corner after heavy rain | Early seal or bedding issue | Inspect closely, then decide if reseal is enough |
| Water staining spreads beyond skylight opening | Water tracking from flashing or roof area | Call a professional |
| Cracked or brittle acrylic dome | Age-related skylight failure | Professional assessment, likely replacement |
| Leak keeps returning after caulking | Hidden flashing or roof-system defect | Call a professional |
| Visible tile damage or roof sheet issues near skylight | Surrounding roof failure | Call a roofer or skylight specialist |
| Significant water ingress during storms | Major weather-tightness failure | Urgent professional repair |
Why early action usually costs less
A leak rarely stays in one place. Water moves into insulation, timber, paint, and plasterboard. Once that happens, the skylight repair is only part of the bill.
That’s why calling a contractor early isn’t admitting defeat. It’s basic risk control. If the symptoms point to installation faults or full replacement, you can review local replacement options such as Brisbane skylight installation services and compare that against repeated patching.
When you hire someone, check three things first:
Licensing and insurance so you’re not exposed if something goes wrong
Skylight-specific experience rather than general handyman work
A diagnosis that explains the leak path, not just a promise to “seal it up”
The right contractor should tell you why the water is getting in, where it’s travelling, and whether repair has a realistic chance of holding through the next storm season.
The Ultimate Fix Upgrading to a Modern Vivid Skylight
If you’ve already resealed once, cleaned the area, and still tense up every time dark clouds roll in, replacement becomes a practical decision rather than a cosmetic one.
Modern systems change the risk profile because they address the weaknesses older skylights commonly have. Homeowners weighing repair versus upgrade often look at double-glazing, improved flashing kits, and 10-year leak-free warranties as the key difference between another patch and long-term risk reduction, as noted by Brisbane skylight replacement guidance.

What a modern replacement changes
A newer skylight system can solve several recurring issues at once:
Better glazing for durability and indoor comfort
Purpose-built flashing designed to shed water cleanly
Cleaner frame design that reduces places for water to sit
More reliable opening options for ventilation when needed
One current option in the market is Vivid Skylights, which supplies double glazed fixed and operable skylights, including electric and solar powered opening models, along with Australia-wide delivery. For rooms where a traditional roof skylight can’t be installed, the AuraGlow LED skylight range is another pathway, and replacement components such as skylight diffusers and upgrade parts are also available.
If you want to see how a modern roof window changes a room in practice, this video is a helpful reference.
Replacement makes the most sense when the old unit is brittle, repeatedly leaking, badly flashed, or no longer worth protecting. At that point, the job isn’t about stopping one drip. It’s about restoring weather-tightness properly.
If you’re dealing with an active leak or trying to decide whether your skylight needs resealing, repair, or full replacement, Vivid Skylights is worth a closer look for practical product information, replacement options, and weather-focused skylight solutions for Australian homes.