
A successful skylight installation in Brisbane lives or dies on the homework you do before a single tool touches your roof. It’s about so much more than just letting in some light; you’re choosing a solution that has to work with your home’s design and stand up to our unique subtropical climate. Nailing this initial planning phase is what prevents those costly “I wish I’d known…” moments and makes sure your new skylight is a genuine asset, not a future headache.
Matching Your Skylight to Your Brisbane Home
Picking the right skylight is a careful balance of looks, practicality, and climate smarts. Get this bit right, and you’re set for years of beautiful, problem-free natural light. If you rush it, you could be dealing with serious heat gain, annoying leaks, or a skylight that just doesn’t do what you hoped it would.
Pinpointing the Perfect Position
Where you put your skylight is just as critical as which one you buy. Its orientation has a massive impact on the quality of the light and, crucially, how much heat comes along with it.
For most Brisbane homes, a south-facing skylight is the gold standard. It delivers soft, consistent, indirect light all day long, minus the harsh glare and intense heat you get from direct sun. This is absolutely perfect for living areas, kitchens, and home offices—places where you need bright, usable light without feeling like you’re sitting under a grill.
On the flip side, a north-facing skylight will catch a lot more direct sun. While that’s great for warming up a room in our mild winters, it can turn that same room into an oven during summer. If you do go for a north-facing spot, a model with integrated block-out blinds isn’t just a nice-to-have; it’s pretty much essential for managing that intense summer sun. East-facing gets you the morning sun, while west-facing cops the brutal afternoon heat, which is one we usually tell people to avoid.
Understanding Brisbane Roof Types and Flashing
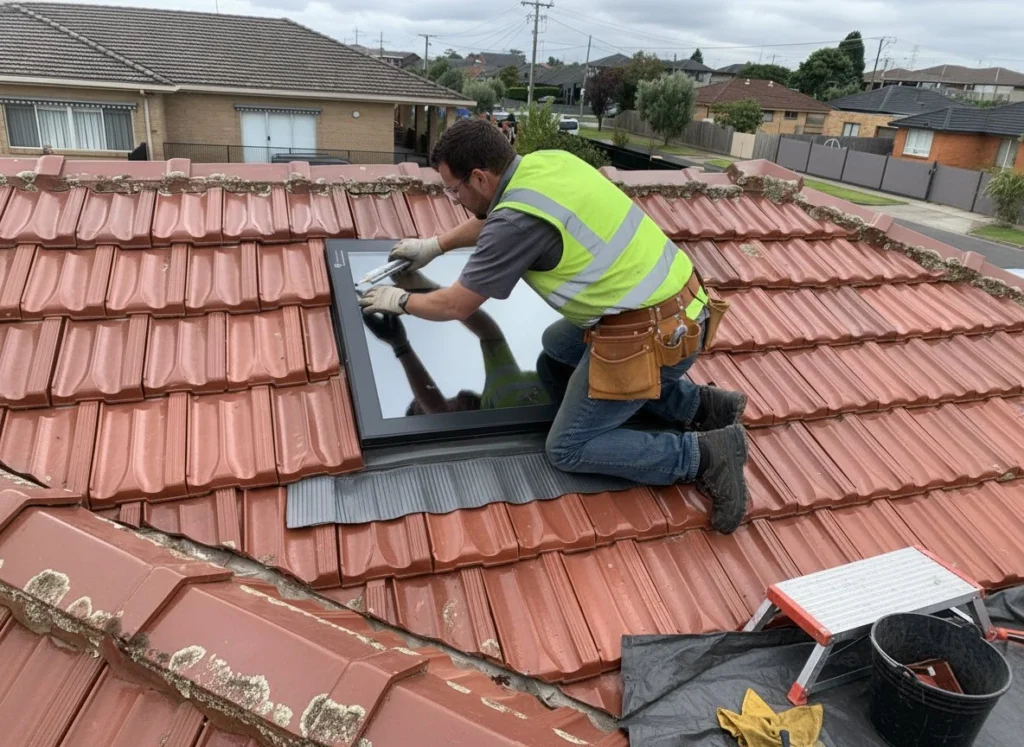
Brisbane’s suburbs are a mixed bag of architecture, from classic Queenslanders with their corrugated iron roofs to modern builds topped with concrete tiles. Your roof type is the single biggest factor dictating the kind of flashing kit you’ll need. This is one piece of the puzzle you absolutely cannot guess.
- Corrugated Metal Roofs: A true Brisbane staple, these roofs demand a specific flashing profile that moulds perfectly to the ribs and valleys of the metal sheeting. This is what creates that all-important watertight seal.
- Tiled Roofs (Concrete or Terracotta): With tiles, you need a flashing system designed to integrate with the way they overlap. The flashing is carefully layered under the upper tiles and over the lower ones, cleverly channelling water away from the opening.
The flashing kit is your skylight’s number one defence against leaks. Using the wrong type for your roof is a surefire way to find water damage after the next big Brisbane downpour. Every reputable skylight manufacturer provides flashing kits designed specifically for different roofing materials.
A common mistake we see is people thinking there’s a ‘one-size-fits-all’ flashing. The reality is that the specific profile of your roof—whether it’s Trimdek, Custom Orb, or a certain type of tile—needs a perfectly matched flashing kit to guarantee a leak-proof result for years to come.
Choosing the Right Skylight Model
Once you’ve sorted out the placement and your roof type, it’s time for the fun part: picking the skylight itself. The choice usually boils down to three main types, and each has its own pros.
Fixed Skylights: Just as the name suggests, these are non-opening units purely for letting in light. They’re the most common and budget-friendly option, perfect for bringing life to hallways, living rooms, or anywhere you just need more daylight without needing ventilation.
Manual Opening Skylights: These models open up using a simple crank handle or a telescopic rod. They’re a fantastic middle-ground option for bringing in both light and fresh air, making them ideal for kitchens and bathrooms where you want to vent steam and cooking smells.
Electric or Solar-Powered Skylights: This is the premium choice, giving you a skylight that opens with the touch of a button. Many solar-powered versions even come with built-in rain sensors that automatically shut the skylight when it starts to rain—an absolute godsend in Brisbane’s unpredictable storm season. If you want to dig deeper into what these models offer, you can learn more about the different types of skylights and their features in our detailed guide.
Getting to Grips with Brisbane Council Permits and Building Codes
Any project that touches your roof structure means you need to get familiar with the local rules. For a skylight installation here in Brisbane, that involves understanding the requirements from both the Brisbane City Council and the National Construction Code (NCC). This isn’t just about ticking boxes; it’s about making sure your installation is safe, legal, and won’t cause headaches later on.
So, do you even need building approval? That’s the big question. Generally, if your installation is straightforward and doesn’t involve cutting or changing major structural parts like roof trusses or rafters, you might be in the clear. But the second you need to modify those supports to fit a bigger skylight, the game changes. It becomes a structural alteration, and building approval is mandatory.
When You Need a Building Certifier
If your plans do involve messing with the roof structure, you’ll need to bring a private building certifier on board. It’s their job to go over your plans, check them against the NCC and any Queensland-specific rules, and perform inspections to sign off on the work. For any structural work, this step is non-negotiable.
Your certifier is going to ask for some specific documents to assess the job. You’ll typically need to have these ready:
- Architectural Plans: Clear, detailed drawings that show exactly where the skylight is going and its dimensions.
- Structural Engineering Details: If you’re cutting a truss, an engineer has to provide plans showing how the roof’s strength will be maintained.
- Product Specifications: Paperwork from the skylight manufacturer that proves it complies with Australian Standards.
Trying to sidestep this process is a bad idea. It can lead to some serious problems, like enforcement notices from the council or major hold-ups when you eventually decide to sell your home. A fully compliant installation is a secure investment.
Queensland-Specific Building Requirements
Brisbane’s weather definitely throws a few curveballs, and our building codes are written to handle them. One of the absolute must-haves is ensuring any product you install has a cyclonic wind rating. With our intense storm season, every single component on your roof has to be proven to stand up to high winds and driving rain.
Another crucial first step is checking for heritage overlays on your property. If you live in a character or heritage-listed home, the Brisbane City Council has very strict rules about external changes. This can impact the size, style, and placement of your skylight, and you might even need a separate development application. As you plan, it’s also helpful to get your head around the broader essential building codes and regulations to make sure all your bases are covered.
Ventilated Skylights and the NCC
The NCC has specific rules for ventilating rooms, which has a direct impact on your choice of skylight in Brisbane. For example, if you’re putting a vented skylight in a bathroom or another habitable room, it has to meet minimum ventilation area calculations to be compliant.
A standard 600 x 600mm vented skylight might need to provide a vent area of 0.104 m² or a BCA vent area of 0.270 m², depending on which standard is being applied. This level of technical detail really shows why picking products that are designed for our local codes is so important.
The complexities of different roof types, particularly pitched roofs, add another layer to all this. Making sure the installation is watertight and structurally sound on a sloped surface requires real expertise. You can get more detail on this in our guide covering the unique challenges of a pitched roof with skylights and how it changes the installation process. Bringing in a professional ensures every detail, from structural integrity to waterproofing, is handled correctly from the start.
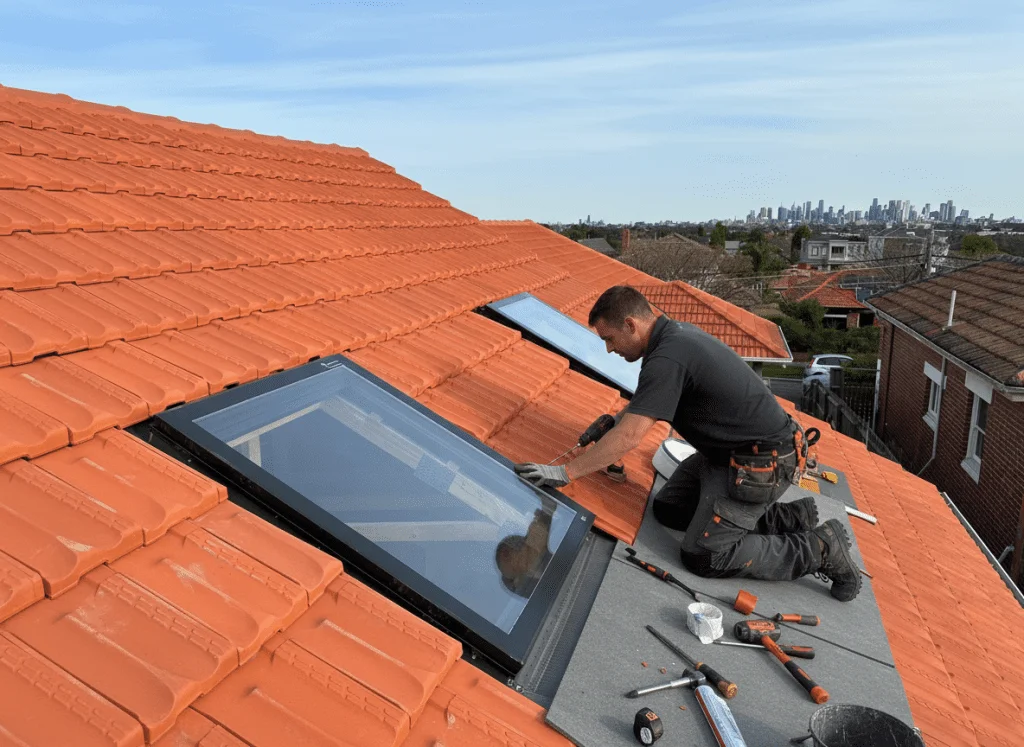
Alright, you’ve done the groundwork and picked out your skylight. Now for the fun part: getting it into your roof. A successful skylight installation in Brisbane is all about being methodical. It’s a job where precision and safety are your two best mates, from the first cut to the final lick of paint.
Let’s be clear before we go any further: worksite safety isn’t optional. Your ladder needs to be on solid, level ground. If you’re up on the roof, you need a harness and proper fall protection. And always, always wear your PPE—gloves and safety glasses are the bare minimum.
Marking and Cutting the Opening From Inside
First things first, we need to pinpoint exactly where this skylight is going to live. This starts from inside the room. You’ll drill a small pilot hole straight up through the ceiling plasterboard and right through the roofing material. This single hole is your anchor point for everything else.
Once that’s done, head up into the roof cavity. Clear away any insulation around the pilot hole and use it as your guide to mark out the full dimensions for the rough opening. You’ll then frame this out with timber, building a box that matches the specs from your skylight’s manufacturer.
Transferring Measurements and Preparing the Roof
With the inside framed, it’s time to take those measurements outside. The old-school trick is still the best: drive long screws up through the four corners of your new timber frame until they just poke through the roof.
Now, when you get up on the roof, you’ll see four shiny screw tips. These are your perfect guides for marking the cutting lines. It’s a beautifully simple way to make sure the hole you cut outside lines up perfectly with the frame you built inside.
How you cut depends on your roof type:
- On a metal roof? You’ll be reaching for a good pair of tin snips to cut along your marked lines.
- Working with tiles? It’s a bit different. You’ll need to carefully remove the tiles inside the marked area. You’ll almost certainly have to cut some of them to fit neatly around the opening later on.
Before you start any installation, it’s a good idea to have your tools and materials laid out and ready to go. Nothing slows a job down more than having to climb up and down a ladder for a tool you forgot.
Essential Tools and Materials for Your Skylight Project
| Tool/Material Category | Specific Items | Pro Tip |
|---|---|---|
| Safety Gear | Safety glasses, gloves, harness, non-slip footwear | Don’t skimp on safety. A fall from a roof is no joke. Check your harness before every use. |
| Measuring & Marking | Tape measure, chalk line, spirit level, framing square | “Measure twice, cut once” isn’t just a saying; it’s the golden rule of roofing. |
| Cutting Tools | Circular saw, angle grinder (for metal), tile cutter, utility knife | Make sure your blades are sharp. A dull blade is a dangerous blade and gives a messy cut. |
| Fastening & Assembly | Cordless drill, hammer, caulking gun | Keep spare batteries for your drill charged and ready to go. |
| Materials | Timber for curb/framing, flashing kit, roofing sealant, screws/nails | Use only high-quality, exterior-grade sealant designed for roofing applications. |
Having this checklist sorted will make the whole process smoother and safer.
Constructing the Curb and Fitting the Unit
On most pitched roofs, your skylight won’t sit directly on the roof sheeting. Instead, it rests on a curb—a raised timber frame built around the opening. The curb’s job is to lift the skylight up, giving you a solid surface to mount it to and, crucially, helping with the waterproofing.
You’ll build this frame directly onto the roof decking. It absolutely must be square and level. Once you’re happy with it, the skylight unit can be lifted into place, set on top of the curb, and fastened down as per the instructions.
Think of the curb as the foundation for your skylight. A poorly constructed or un-level curb is a primary cause of future leaks, as it prevents the flashing from sitting correctly and forming a proper seal. Take your time to get this step exactly right.
Waterproofing With Precision Flashing
Welcome to the most important stage of the entire job, especially with the kind of downpours we get in Brisbane. Your flashing kit is a set of pre-formed metal pieces engineered to guide water away from your skylight. Get this wrong, and you’ll be dealing with leaks for years.
It’s all about layering, like building a weather-proof shield.
- The bottom sill flashing goes on first, along the lower edge of the curb.
- Next, step flashing pieces are layered up each side, overlapping like tiles to shed water.
- Finally, the top saddle flashing slides in place, tucked underneath the roofing material above the skylight.
This sequence guarantees that water flows around the skylight, not into it. It’s also where following local Brisbane compliance comes in—making sure everything is up to code is non-negotiable.
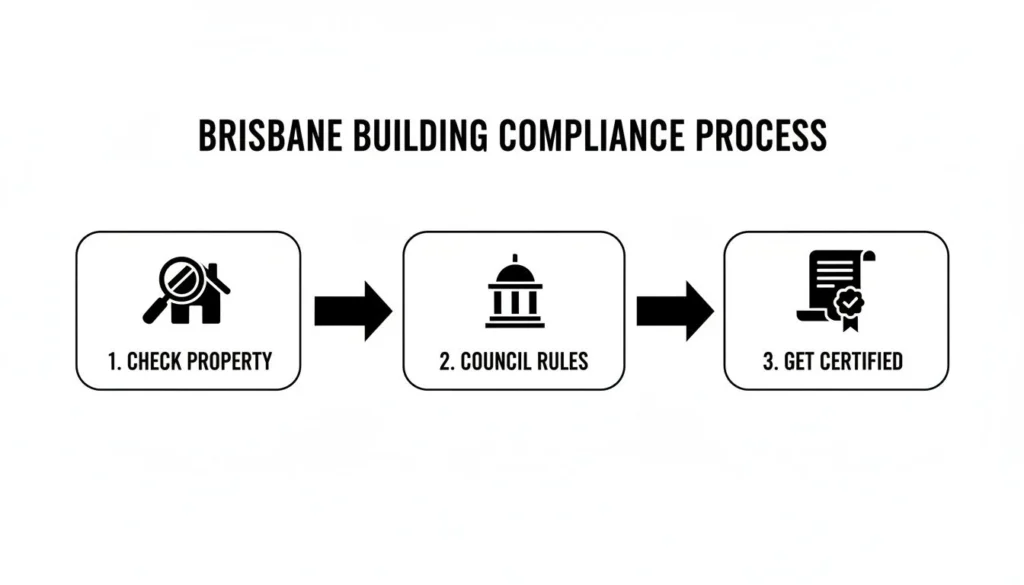
This simple flow—checking property specifics, understanding council rules, and getting certified—is the backbone of a successful and legal installation.
Finalising the Interior Finishes
With the skylight secure and watertight on the outside, it’s time to head back inside to finish the job. This involves building the light shaft—the tunnel connecting the skylight in the roof to the ceiling below.
Typically, you’ll frame the shaft with timber, insulate it well, and line it with plasterboard. You can play with the angles here; a straight shaft gives you a direct, focused column of light, whereas a flared shaft spreads the light out for a softer, wider glow.
Once the plasterboard is up, it’s all about the finishing touches: taping the joints, plastering, sanding, and painting. This is what makes the skylight look like it was always meant to be there, seamlessly integrated into your home.
DIY Skylight Installation vs Hiring a Brisbane Pro
So, you’re ready for a skylight. Now comes the big question: do you grab your tools and tackle it yourself, or call in a professional? This is the classic home reno dilemma—saving a few dollars versus the peace of mind that comes with hiring an expert.
Let’s be frank: a skylight installation in Brisbane isn’t a small weekend job. You’re cutting a hole in your roof, and that’s a decision you want to get right the first time. The right choice really boils down to your own skills, what tools you have in the shed, and how much risk you’re comfortable with.
Thinking About a DIY Install?
Going the DIY route can be incredibly satisfying. There’s a real sense of pride in completing a project like this with your own two hands, not to mention the money you’ll save on labour costs.
But before you get carried away with the idea, you need to have an honest chat with yourself about what’s involved. This job needs a specific skill set that goes way beyond hanging a picture frame.
Are you genuinely comfortable with:
- Working safely at heights? This isn’t just about not being scared of ladders. It means knowing about fall protection and feeling confident moving around on a pitched roof.
- Structural carpentry? You’ll be cutting into your roof and ceiling, framing out a light shaft, and possibly even modifying roof trusses. That requires some serious precision.
- Waterproofing like a pro? Getting the flashing kit installed correctly is absolutely crucial. It’s a meticulous process, and one wrong move could mean leaks down the track.
If you’re a seasoned DIYer with some roofing experience under your belt, you might be up for the challenge. For a really detailed look at what’s involved, check out our comprehensive guide to DIY skylight installation. It breaks down every single step.
The Case for Hiring a Brisbane Professional
On the other hand, bringing in a licensed Brisbane installer has some serious perks that often make the extra cost well worth it. You’re not just paying for labour; you’re paying for experience.
A professional installer knows the local building codes and Brisbane City Council regulations inside and out, making sure your project is compliant from the get-go. They’ve seen every quirky roofline and dealt with every unexpected issue that Brisbane’s diverse homes can throw at them.
But the single biggest reason people choose a pro? The warranty. A reputable installer guarantees their work, offering a leak-free warranty that lets you sleep soundly every time a classic Brisbane storm rolls through.
This professional touch also pays dividends down the line. The quality of the installation, backed by a licensed and insured pro, has a direct impact on your home’s value. A properly installed skylight is a major selling point in the competitive Brisbane market, so you can be confident you’re making a smart investment.
How to Vet Your Local Installer
If you decide the professional route is the way to go, don’t just pick the first name you find. Choosing the right contractor is key to a stress-free experience.
Here’s a quick checklist for vetting potential installers:
- QBCC Licence: First thing’s first, make sure they hold a current licence with the Queensland Building and Construction Commission.
- Insurance: Always ask for a copy of their public liability insurance. This protects you and your property.
- Portfolio and References: Ask to see photos of similar jobs and, if possible, speak to some of their past clients here in Brisbane.
- Detailed Quote: A good quote will clearly break down the cost of the skylight itself, all materials, and the labour involved.
Ultimately, it’s about weighing your own skills and budget against the security and expertise a professional brings to the table. Take your time, do your homework, and you’ll make the right call for your home.
Breaking Down Skylight Installation Costs in Brisbane
Let’s talk numbers. When you’re budgeting for a skylight installation in Brisbane, it’s crucial to know where every dollar is going. The final quote is much more than just the price tag on the skylight itself; it’s a blend of the product, the specialised labour to fit it, and a few other variables unique to your home.
The first thing to get your head around is that the cost is split into two main buckets: the unit and the installation. Many Brisbane homeowners are surprised to find that the labour often makes up the biggest slice of the pie. This is especially true for complex jobs that demand more time and expertise up on the roof.
Across Australia, a standard fixed skylight installation can set you back anywhere from AUD 1,200 to over AUD 5,000. Here in Brisbane and across Queensland, these figures hold true, often because the skilled labour costs more than the skylight unit. For planning purposes, keep in mind that a typical fixed skylight takes about 1-2 days to install. You can get more detailed pricing insights on skylight installation from vividskylights.com.au.
Estimated Costs by Skylight Type
The type of skylight you pick is the single biggest driver of the initial product cost. Naturally, the more features and complexity, the higher the price.
- Tubular Skylights: These are often the most budget-friendly choice, ideal for smaller nooks like hallways, walk-in robes, or bathrooms. In Brisbane, you can expect the supply and installation to start from around $800 – $1,500.
- Fixed Skylights: A non-opening glass skylight is a classic choice for living areas where you just want more light. A standard-sized, professionally installed fixed unit usually falls into the $1,800 – $4,500 bracket.
- Ventilating Skylights (Manual or Electric): Adding the ability to open the skylight for a bit of fresh air bumps up the cost. A manual model might land between $2,500 – $4,500, while a solar-powered or electric version, complete with a rain sensor, can push the price to $4,000 – $6,000+.
The Hidden Variables That Affect Your Final Quote
Beyond the skylight model, several factors tied to your Brisbane property will influence the final invoice. Any good installer will assess these during a site visit before locking in a quote.
It’s a common oversight to budget only for the skylight you see in a showroom. The real cost is in the skilled work required to make that skylight a seamless, leak-proof part of your specific roof. Accessibility, roof pitch, and interior finishing are where costs can vary significantly from one house to the next.
Think about how these elements might apply to your place:
- Roof Pitch and Material: A steeply pitched roof is harder and slower to work on than a low-pitch one, which adds to labour time. Likewise, cutting into a complex tiled roof can be more labour-intensive than a standard Colorbond or corrugated metal roof.
- Accessibility: Is your roof easy to get to? If installers need to navigate around obstacles or bring in specialised scaffolding for a two-storey home, you can bet the labour costs will rise.
- Structural Work: This is a big one. If a roof truss or rafter is in the way and needs to be cut and re-supported, you’ll need a carpenter and possibly an engineer to sign off. This can easily add $1,000 or more to the project.
- Interior Finishing: Your quote should spell out the level of finish. This includes building and plastering the light shaft on the inside and getting it ready for a painter. A simple, straight shaft is cheaper than a flared one that requires more complex plastering.
By understanding these moving parts, you can set a realistic budget for your skylight project in Brisbane. It also means you can have a much more informed chat with your installer, ensuring there are no nasty surprises when the final bill lands.
Your Top Skylight Questions Answered for Brisbane Homes
As you finalise your plans, a few last-minute questions always seem to pop up. When it’s something as important as a skylight installation in your Brisbane home, you want to be completely sure before the work starts. We’ve gathered the most common queries we get from local homeowners to give you the clear, practical answers you’re looking for.
How Long Does a Typical Skylight Installation Take in Brisbane?
For a standard, straightforward installation by an experienced team, you should set aside one to two full days. It’s definitely not a quick in-and-out job because getting every detail right is absolutely crucial.
Day one is almost always dedicated to the external roof work. This is the heavy lifting, involving cutting the roof opening, building and securing the curb for the skylight to sit on, fitting the unit itself, and meticulously installing the flashing to create a permanent, watertight seal.
Day two is when the focus shifts inside. This is all about constructing the light shaft that connects the roof to your ceiling, insulating it properly, lining it with plasterboard, and prepping it for a painter to finish. If your project is a bit more complex—say, it requires structural changes to the roof trusses or your roof is particularly steep and tricky to access—it could easily stretch to three days or even longer.
Are Skylights a Good Idea for Brisbane’s Climate?
They’re a brilliant idea, but only if you choose a modern, high-performance unit specifically designed for our unique weather challenges. Those old-school plastic domes that used to bake rooms into saunas are thankfully a thing of the past.
The non-negotiable feature for any Brisbane home is double-glazing combined with a low-E (low-emissivity) coating. This duo is fantastic at letting all that beautiful visible light pour in while blocking a huge chunk of the infrared light that causes heat gain. Honestly, you wouldn’t want a skylight without it during a scorching Brisbane summer.
In our subtropical climate, a skylight has to do more than just let in light; it must actively manage heat and stand up to torrential rain. Choosing a product with a high wind rating and features like integrated blinds gives you the control you need to make a skylight a true asset, not a liability.
Flawless flashing installation is also critical to handle the intense downpours we get during storm season. And for ultimate control, smart additions like built-in blinds or solar-powered openers with rain sensors are fantastic investments. They give you complete command over light, heat, and ventilation, making them perfectly suited to the Queensland lifestyle.
Will a Skylight Increase My Home’s Value in Brisbane?
Without a doubt. A well-placed, professionally installed skylight is a highly desirable feature in the competitive Brisbane property market. The impact it has goes way beyond just looking good.
Natural light has a huge psychological effect, making indoor spaces feel bigger, more open, and genuinely more inviting. This really resonates with potential buyers searching for bright, airy homes. On a practical level, it also cuts down the daily need for artificial lights, which is an energy-saving perk that smart buyers definitely notice and appreciate.
The key factor here is the quality of the installation. A perfect, leak-free skylight offers the best return on investment. A shoddy job, on the other hand, can be a major red flag during a building inspection, so it really pays to get it done right.
What’s the Best Direction for a Skylight to Face in Brisbane?
For most homes here in Brisbane, a south-facing orientation is the sweet spot. This position delivers consistent, soft, and indirect light all day long, without the harsh glare and intense heat gain you get from direct sun. It’s the perfect setup for living areas, kitchens, and studies where you want beautiful light without the downsides.
Here’s a quick rundown of the other options:
- North-facing: Great for capturing direct sun for passive heating in our mild winters, but it can lead to overheating in summer. If you go north, integrated blinds are a must-have.
- East-facing: Perfect for catching that gentle morning sun.
- West-facing: This orientation is exposed to the brutal afternoon sun and heat, making it the one direction we generally advise avoiding in our climate.
Ready to bring beautiful, natural light into your home? The expert team at Vivid Skylights can help you choose the perfect solution for your Brisbane property. Explore our range and get a customised estimate today. https://vividskylights.com.au