
A lot of homeowners start looking into the installation of skylight after living with the same frustration for years. The hallway stays dark even at midday. The kitchen feels closed in. The bathroom needs the light switched on from morning to night. You know a skylight would change the room, but once you start reading about roof cuts, flashing kits and permits, the project can feel bigger than expected.
That reaction is fair. A skylight is one of those upgrades that looks simple from inside the room and is anything but simple on the roof. The good news is that some parts are straightforward if you’re organised and comfortable with carpentry. The hard parts are always the same: placement, structural judgement, flashing, weatherproofing, and finishing the shaft so it looks like it belonged there from day one.
Table of Contents
Before You Begin Your Skylight Installation
A leak-free skylight job is usually won before the roof is cut. Most failures come from rushed planning, poor roof matching, or choosing a unit that suits the room on paper but not the actual structure above it.
Check the roof before you choose the unit
Start outside. Look at the roof shape, the roof pitch, the roofing material, and how easy it is to access the work area. A single-storey pitched roof is usually much more straightforward than a steep roof over a double-height void.
Tiled and metal roofs need different thinking. Tiled roofs often require more care around lifting, trimming and refitting tiles, while metal roofs depend heavily on profile matching and neat weather seals. If the roof is older, brittle, patched, or already showing signs of movement, treat that as a warning sign rather than an inconvenience.
The skylight itself has to suit the roof it’s going into. That includes the pitch range, flashing type and opening method. If you’re comparing product styles, different skylight types for pitched and low-pitch roofs will help narrow the field before you get anywhere near a saw.
Practical rule: if you can’t identify how water will run past the opening and off the roof, you’re not ready to cut it.
Size the opening to suit the room
Bigger isn’t always better. Oversized skylights can make a room feel harsh in summer and out of balance visually. Australian guidance is a good starting point: total skylight glazing area should generally stay within 5% of floor area in rooms with multiple windows, and can go up to 15% in rooms with few or no side windows according to Australian skylight sizing guidance.
That rule is useful because it gives you a practical ceiling without overcomplicating the decision. A kitchen with decent side glazing usually needs restraint. A central hallway, walk-in robe or internal bathroom often benefits from pushing closer to the upper end.
| Room Floor Area (m²) | Recommended Skylight Area (m²) | Example Vivid Skylight Sizes |
|---|---|---|
| 10 | 0.5 to 1.5 | One compact unit or a small pair |
| 20 | 1.0 to 3.0 | One medium unit or two smaller units |
| 30 | 1.5 to 4.5 | One large unit or a balanced pair |
| 48 | 2.4 to 7.2 | Multiple units spaced across the room |
Those room calculations follow the same Australian sizing guidance above. After that, layout matters more than maths. Two smaller skylights often spread light better than one oversized unit dropped in the middle.
If you’re budgeting at the same time, it helps to review typical skylight materials and labor costs so the opening size you choose still fits the actual scope of the work.
Don’t skip permits and lead times
A lot of homeowners assume the only question is whether the unit fits between rafters. That’s only one part of it. Structural compliance, local council expectations and the need for building approval can all affect timing.
Verified installation guidance notes that building permit requirements in Victoria can add 1 to 2 weeks to project timelines for structural compliance verification through the project timeline guidance here. That doesn’t mean every job becomes a drawn-out process. It means you shouldn’t plan a cut for this weekend if approvals are still a guess.
Before ordering, confirm these points:
Roof structure: Find out whether the opening will affect rafters, battens, ceiling joists, or services.
Room finish: Decide if you want a vertical shaft, flared shaft, or a cleaner square reveal.
Access: Work out whether ladders are enough or whether scaffold access makes more sense.
Weather window: Don’t open a roof unless you have a reliable dry period and contingency cover.
Gathering Your Tools and Preparing for Safety
The right tool kit doesn’t make the job easy on its own, but it does stop a simple install from turning into a messy one. Most delays come from having to improvise halfway through a roof opening.
Build your install kit properly
For a standard installation of skylight, I’d want the following ready before setup begins:
Measuring and marking gear: Tape measure, framing square, straight edge, pencil, chalk line.
Cutting tools: Circular saw, reciprocating saw, utility knife, tin snips where flashing or metal trimming is involved.
Fixing tools: Drill-driver, impact driver, suitable driver bits, fixings matched to the roof and frame.
Weatherproofing materials: Roofing sealant approved for the application, underlay materials where required, flashing components, and replacement roof pieces if breakage is likely.
Interior tools: Plasterboard saw, insulation knife, screws, joint materials, sanding gear.
Access equipment: Stable ladders, roof brackets where appropriate, and edge protection if the site calls for it.
A roof pitch check belongs in the first part of setup, not after the unit arrives. If the skylight and flashing are selected for the wrong slope, the installation starts with a mismatch. A simple roof pitch calculator for skylight planning helps confirm that detail early.
Roof safety is not optional
People underestimate roof work because the actual cut might only take a short time. The risk is everything around it. Carrying tools up a ladder, moving across tiles, and leaning over an opening are where jobs go wrong.
Use proper PPE and wear it the whole time:
Helmet or hard hat: Especially if someone is working below or passing tools up.
Non-slip boots: Roof grip matters more than comfort.
Eye and hearing protection: Saw cuts and metal edges don’t give second chances.
Gloves: Useful for flashing, sheet edges and tile handling.
Fall protection: Essential where the roof height, slope or exposure demands it.
Don’t work a roof just because the morning looks clear. Wind and passing showers change the job fast, especially in coastal suburbs.
If the roof is steep, fragile, high, or awkward to access, stop treating safety gear as an optional add-on. That’s the point where a professional crew with the right setup is usually the better call.
The Core Installation Cutting and Securing Your Skylight
At this stage, a tidy plan turns into a real opening in the roof. Good installers work slowly here, even when the product is designed for a simpler fit. Most mistakes happen because someone gets confident after the measuring stage and rushes the cut or flashing sequence.
Mark once and confirm from both sides
Always mark from inside and outside. Ceiling alignment can mislead you if the roof framing shifts from the room line below. I prefer establishing the centre point inside, then confirming roof position from above before defining the final opening.
The basic sequence is simple:
Mark the ceiling position inside the room.
Probe for framing, wiring and services.
Transfer the location to the roof.
Remove only enough roofing material to inspect and confirm.
Mark the exact opening size once the structure is understood.
If the opening lands hard against framing, don’t start shaving corners off the skylight size to make it work. Either adjust the position or redesign the framing properly. A compromised opening usually creates a compromised finish.
Flashing decides whether the job succeeds
This is the control point of the whole installation. Verified installation guidance states that the flashing installation sequence is the most technically demanding phase, and that professionals allocate about 40% to 50% of total installation time to flashing and weatherproofing because mistakes here are the main cause of post-install leaks, as outlined in this professional flashing guidance.
That matches what happens on site. Cutting is visible, but flashing is what protects the home.
For any unit, follow the manufacturer sequence exactly. If you’re installing a system that includes a matched kit, use the roof flashing installation guide instead of guessing based on another roof type or an old habit.
The general order matters:
Sill flashing first: This is the lower section and the most vulnerable point for water ingress.
Step flashing next: Each piece needs to overlap correctly so water is guided away, not trapped.
Counterflashing after that: It finishes the assembly and protects the flashing beneath.
Sealant where specified: Sealant supports the system. It doesn’t rescue bad flashing order.
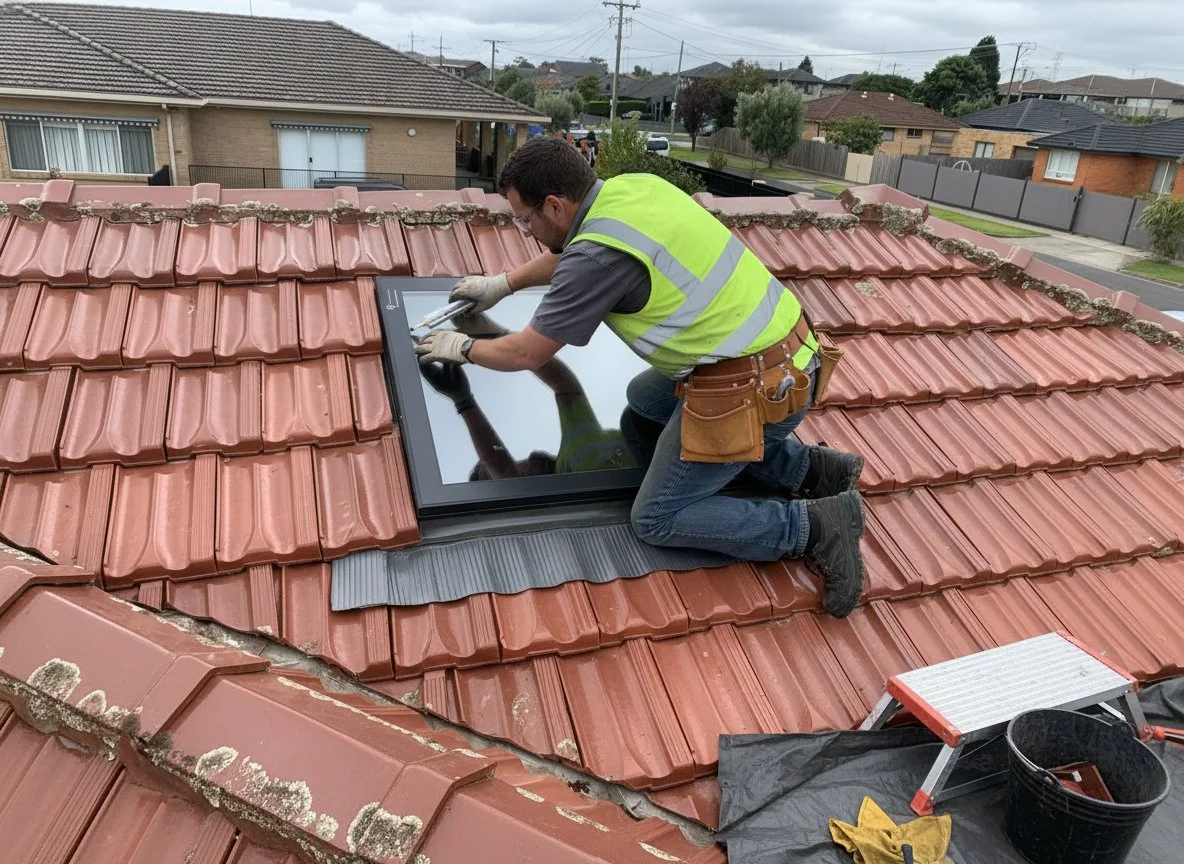
Tiled roofs need extra patience. You’re not just fitting metal to a flat plane. You’re working around contours, overlaps and potential breakage. Standard shingle logic doesn’t transfer neatly to a tiled Melbourne roof.
A skylight rarely leaks because glass failed. It leaks because the water path around the frame was interrupted.
If you want to watch the sequence before doing it, this installation video is worth reviewing:
Seat the frame square and finish the exterior
Once the opening is sound and the flashing base is correctly staged, lower the skylight into place carefully. Dry-fit first. That matters even on products designed for simpler installation, because overtightened fixings or a twisted frame can create stress where you don’t want it.
One practical option for homeowners is Vivid Skylights, which supplies double glazed fixed and operable units with installation instructions, included flashing for tiled roofs, and nationwide delivery across Australia. Their range also includes electric and solar powered opening models, which changes what you need to plan for inside the ceiling cavity.
When fixing the unit:
Check for square before tightening: Measure diagonals if needed.
Tighten evenly: Don’t drag one side hard down before the others.
Refit surrounding roof material neatly: Tiles and sheets should finish cleanly around the unit.
Inspect the runoff path: Water should shed around the skylight naturally.
A good exterior finish looks calm. No forced trims, no heavy blobs of sealant, no bent flashings trying to hide a mismatch.
Connecting Power and Finishing the Interior
A skylight can be watertight on the roof and still feel unfinished inside if the shaft is clumsy or the controls are poorly planned. The inside work is where the project stops feeling like a roof alteration and starts feeling like part of the home.
Electric and solar models need clean setup
Operable skylights give you more than light. They also bring ventilation and control, which matters in bathrooms, kitchens, and upper-level rooms that trap heat. But the opening mechanism has to be installed cleanly and safely.
For electric models, keep cable routes tidy and planned before the interior lining starts. Don’t leave wiring decisions to the plaster stage. If mains work is involved, use a licensed electrician. For solar models, placement, remote pairing and rain-sensing accessories still need careful setup even though they avoid some hard-wiring complexity.
If you’re selecting an opening model, electric skylight options for residential installations are worth comparing based on access, ceiling height and how often you’ll use the venting function.
The shaft finish shapes the final result
The shaft is what the room sees every day. If it’s too deep, too narrow, or poorly lined, the skylight can feel smaller than it should. A flared shaft spreads light more broadly, while a straight shaft gives a sharper architectural look. Neither is automatically right. It depends on the room and ceiling depth.
The inside sequence usually runs like this:
Frame the shaft: Keep lines straight and corners true.
Insulate around the shaft walls: That helps reduce unwanted heat transfer.
Line with plasterboard: Use clean cuts and minimise awkward joins.
Set, sand and paint: A smooth matte finish usually reflects light well without looking harsh.
For bathrooms and kitchens, think about moisture as part of the finish, not as an afterthought. Use suitable materials and make sure the operable function is easy to reach or control.
Site note: the most convincing skylight interiors don’t draw attention to the shaft build. They just make the room feel brighter and more open.
If you want inspiration for reveal shapes, room placement and how the finished opening sits in a ceiling plane, the gallery on the supplier site is a useful reference before you lock in your plaster set-out.
Beyond Tradition The AuraGlow LED and Operable Skylights
Not every dark room can take a conventional roof window. Some homes have trusses in the way. Others have upper-storey rooms, congested roof spaces, or layouts where a true skylight isn’t practical without major building work.
When a roof skylight isn’t possible
That’s where an alternative like AuraGlow LED skylight solutions makes sense. It’s built for spaces where you want the visual effect of a skylight without cutting through the roof. That can suit hallways, ground-floor internal rooms, apartments, or areas below obstructed roof zones.
The appeal isn’t just that it fits where a roof skylight can’t. It also gives a cleaner design answer than trying to force a traditional unit into a poor location. The changing colour quality through the day helps create a more natural ceiling light effect instead of a flat artificial panel look.
Why opening skylights change how a room feels
A fixed skylight changes light. An operable skylight changes the room. It lets warm air vent, introduces breeze, and gives you another way to control comfort without relying on wall openings alone.
This matters in Australian homes because summer heat management isn’t just about letting light in. It’s about balancing light, glazing choice, ventilation and shading so the room stays usable. Electric and solar-powered opening skylights are particularly useful where ceilings are high or the skylight is out of reach.
The practical trade-off is simple:
| Option | Best suited to | Main consideration |
|---|---|---|
| Fixed skylight | Rooms that only need daylight | Simpler install and fewer moving parts |
| Operable skylight | Bathrooms, kitchens, upper rooms | Needs proper setup for opening system |
| AuraGlow LED | Rooms where roof install isn’t possible | Delivers the skylight effect without roof penetration |
A lot of homeowners focus only on brightness. Comfort usually matters just as much.
Maintenance Troubleshooting and When to Hire a Pro
A new skylight should be tested early, checked after the first proper rain, and looked at again after a change of season. Small issues are easier to correct when they’re caught as finish defects, not after staining appears on the ceiling.
What to check after installation
Run through a simple post-install checklist:
Operate the unit fully: Fixed units still need visual inspection. Opening units should open, close and seal smoothly.
Inspect inside corners: Look for staining, drafts or visible gaps at trim lines.
Check after rain: Pay attention to the lower edge first.
Clean surrounding debris: Leaves and roof grime can affect water flow around the unit.
Condensation isn’t always a leak. Bathrooms and tight homes can collect moisture on glass if ventilation is poor. Drafts can also come from unfinished shaft insulation or trim gaps rather than the skylight itself. If the symptom is inside but the roof area is dry, don’t jump straight to blaming the glazing.
If you do suspect water ingress, act early. A dedicated skylight leak repair service is the right path when the issue needs diagnosis rather than guesswork with extra sealant.
The point where DIY stops making sense
Some installations are within reach for a confident DIYer with strong carpentry skills, safe roof access and the discipline to follow the flashing sequence exactly. Some aren’t. The hard line is structural judgement.
Verified guidance makes that point clearly: generic guides often don’t address the complexity of deciding whether a roof can safely support a skylight without reinforcement, and Australian homes have varied roof styles and load capacities that increase project risk, as noted in this structural assessment discussion.
That’s where professionals earn their keep. They know when an opening needs reframing, how a tiled roof behaves under foot, and how to finish the weatherproofing without inventing details on site.
Professional installation also helps with budgeting. Verified Australian cost guidance indicates that new residential skylight installations commonly fall between AUD 1,500 and AUD 3,000 per unit, while larger or more custom jobs can reach AUD 3,000 to AUD 5,000 or more, with labour often making up 40% to 60% of the total according to this installed cost overview. Those numbers are useful because they show why a difficult roof, heritage detailing, or extra finishing work shifts the quote quickly.
For homeowners in Victoria and Queensland, professional help is also easier to organise if you want the whole job handled properly. Installation services are available in Melbourne and Brisbane, which is often the sensible route when the roof is steep, the ceiling shaft is complex, or the opening unit needs electrical coordination.
If you’re comparing trades before committing, these expert tips for hiring a contractor are a practical checklist for asking better questions and spotting vague quoting.
If you’re weighing up DIY versus professional installation, want advice on fixed, electric or solar opening models, or need a solution for a room where a traditional skylight won’t work, Vivid Skylights can help with product guidance, Australia-wide delivery, and installation support in Melbourne and Brisbane.