
Staring at a dark, gloomy room and wondering how to brighten it up? If you’re exploring ways to get more natural light into your home, you’ve probably thought about Bunnings skylights as a first stop. As Australia’s go-to for so many home improvement jobs, they offer easy-to-grab, budget-friendly options for anyone keen to tackle a DIY lighting solution.
Bringing Natural Light Home with Bunnings Skylights
For countless Aussie homeowners, a weekend project starts with a trip to Bunnings. We love improving our homes, and the retailer’s massive footprint is a testament to that. In fact, our passion for home improvement is clear, with Bunnings reporting sales of AUD 9.963 billion across Australia and New Zealand in just the first half of the 2023/2024 financial year. You can read more about the growth of home improvement retail over on DIYInternational.com.
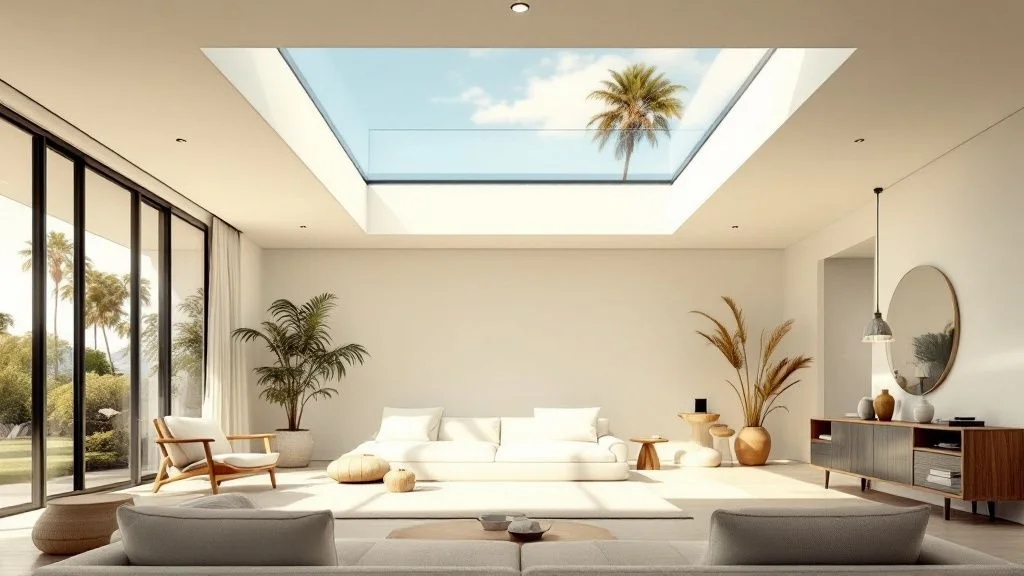
This enthusiasm for home upgrades often leads people down the path of considering skylights. A dark hallway, a windowless bathroom, or a south-facing living room can feel pretty uninviting. A skylight promises to fix that by funnelling sunlight right where you need it most.
Setting Your Expectations
Before you grab a trolley and head to the lighting aisle, it’s really important to understand what you’re getting yourself into. Bunnings skylights are designed, first and foremost, for the competent DIYer. They give you the core components, but the success of the project—from a leak-proof seal on the roof to a clean finish inside—rests squarely on your shoulders.
Think of it like buying the ingredients for a meal versus dining out at a restaurant. You get all the necessary parts, but you’re the chef responsible for putting them together correctly. This guide is your recipe book, designed to walk you through the whole process.
Key Considerations Before You Buy
To make a smart decision, you need to think about more than just the price tag. A few critical factors will determine whether a Bunnings skylight is the right fit for your home and your skill set.
Here are the essential questions you need to ask yourself:
- What type of skylight do I actually need? The main options are tubular skylights (often called sun tunnels or light tunnels) and fixed roof windows. Each serves a very different purpose.
- What’s my roof made of? A tiled roof requires a different installation kit (known as a ‘flashing kit’) than a metal one. Getting this wrong is a fast track to water leaks.
- How confident am I with my DIY skills? Let’s be honest, installing a skylight means cutting a hole in your roof. It demands precision, confidence working at heights, and a solid understanding of waterproofing.
This guide will help you navigate these questions, breaking down the product types you’ll find on the shelf and giving you the real-world rundown of a weekend installation. By the end, you’ll have a much clearer picture of whether this popular DIY solution is the right choice for your home improvement journey.
Choosing the Right Type of Bunnings Skylight
Walking down the skylight aisle at Bunnings can feel a bit overwhelming. With a few different boxes on the shelf, it’s not always obvious which one is the right fit for your home. Getting it right really comes down to what you want the skylight to do, the room it’s going in, and the kind of light you’re after.
Think of it like choosing a light bulb. You wouldn’t use a tiny night light to illuminate your entire kitchen, and you definitely wouldn’t install a powerful floodlight in a small hallway. Each type of Bunnings skylight is a specific tool for a specific job.
For the most part, your decision will come down to two main off-the-shelf categories: tubular skylights and fixed skylights. They each have a very different purpose and create a completely different lighting experience.
Tubular Skylights: The Sun Funnel
A tubular skylight is a wonderfully simple and effective invention. The best way to picture it is as a ‘sun funnel’—a clever device designed to capture sunlight on your roof and channel it down through a super-reflective tube into a targeted part of your home.
These are the go-to solution for bringing daylight into spots that can’t fit a traditional window or a bigger skylight. They work brilliantly in:
- Hallways: Turning a long, dark corridor into a naturally lit walkway.
- Walk-in Wardrobes: Letting you see the true colours of your clothes without flicking a switch.
- Bathrooms and Ensuites: Adding natural light and a feeling of openness in small, private spaces.
- Laundries: Brightening up a utility area that often feels dark and forgotten.
Because the tube is flexible, it can bend around rafters and other obstacles in the attic, which makes installation much more forgiving. It delivers a focused, diffused circle of light, a lot like a standard ceiling light fixture, but with the warm, natural quality of real sunlight.
Fixed Skylights: The Ceiling Window
A fixed skylight, on the other hand, is much more like a ‘window in your ceiling.’ It’s a non-opening panel, usually square or rectangular, built to provide a broad, expansive wash of daylight and a direct view of the sky above.
This type is perfect for larger, open-plan areas where you want to create a dramatic sense of space and light. You’d use a fixed skylight in:
- Living Rooms: Making the main family space feel bigger, brighter, and more connected to the outdoors.
- Kitchens: Flooding your workspace with natural light, which makes cooking and prep so much more pleasant.
- Dining Areas: Creating an airy, inviting atmosphere for meals.
Fixed skylights are less about funnelling light to one spot and more about transforming the entire feel of a room with widespread, ambient light. They are, however, less flexible when it comes to installation, as they need a straight, clear path from the ceiling right up to the roof.
To help you visualise the choice, this flowchart walks through the key questions about your space, your DIY skills, and your budget.
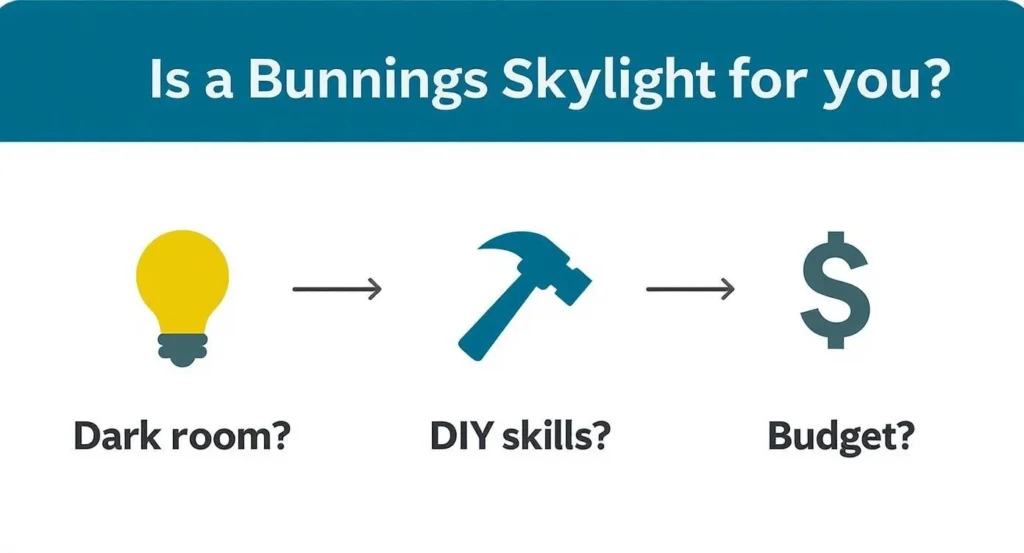
This decision tree makes it clear: the right choice really depends on whether you’re lighting a small, targeted area or a large, open room.
Comparing Common Bunnings Skylight Options
To simplify things even further, let’s break down the main off-the-shelf options you’ll find. This table compares the two most common types to help you match a product to your project.
| Skylight Type | Best For | Typical Cost Range | Light Diffusion | Installation Complexity |
|---|---|---|---|---|
| Tubular Skylight | Small, enclosed spaces like hallways, bathrooms, and walk-in robes. | $250 – $500 | Highly diffused, provides a soft, even circle of light. | Moderate DIY, flexible tube makes it easier to navigate obstacles. |
| Fixed Skylight | Large, open-plan areas like living rooms, kitchens, and extensions. | $400 – $800+ | Direct, widespread light; gives a clear view of the sky. | High DIY, requires a straight, unobstructed shaft and structural work. |
Essentially, your choice comes down to whether you need a targeted ‘light fixture’ powered by the sun (tubular) or a new ‘window’ in your ceiling to open up a room (fixed).
Beyond just the basic type, you’ll also see differences in materials. Most off-the-shelf options at Bunnings will have either an acrylic dome or a flat glass panel. Each has its pros and cons. An acrylic dome, common on tubular models, is tough and budget-friendly but can yellow after 10-15 years. A glass panel, found on more premium fixed skylights, offers superior clarity and UV resistance but comes at a higher price.
Ultimately, understanding the different types of skylights is the first step towards a successful project. Your final decision should be a balance between your budget, what the room needs, and the look you want to achieve.
The Reality of a DIY Skylight Installation
The idea of bathing a dark room in natural light is a powerful one. It’s often that vision that puts you on your roof, tools in hand. But installing a skylight yourself is a major construction project—you’re about to cut a permanent hole in the most critical protective layer of your home. While Bunnings makes it easy to grab a skylight kit in a box, the success and safety of the whole job rests squarely on your shoulders.
This isn’t to scare you off the idea. It’s about going in with your eyes wide open, understanding exactly what the project demands. One small mistake, like a poorly sealed corner or a misjudged rafter cut, can spiral into much bigger headaches like persistent leaks, a weakened roof structure, or ugly water damage down the track.
Beyond the Instruction Manual
The instructions that come with most Bunnings skylights are a decent starting point, but they can’t possibly predict the unique quirks of your roof. The real challenges pop up after you’ve made the first cut. That’s when you might discover hidden wiring, plumbing vents, or awkwardly placed trusses that the manual simply doesn’t account for.
The most common failure point for any DIY skylight installation is improper waterproofing. A leak might not show up after the first rain, but a seal that isn’t perfect can allow slow water ingress over months, leading to hidden mould, rotted timber, and stained ceilings.
Ultimately, your success hinges on mastering the flashing kit—the metal components designed to channel water away from the opening. Every bend, overlap, and seal has to be perfect. This is where professional experience really shows, because a seasoned installer knows exactly how water behaves on a roof and how to build a watertight defence against it.
Tools and Safety Gear You Cannot Skip
A good DIY job starts with the right gear, and this goes well beyond your standard toolbox. You’re tackling roofing, framing, and interior finishing all in one go.
Here’s a non-negotiable checklist of what you’ll need:
- Safety Equipment: A solid, properly positioned ladder is a must. If you’re on a steep roof, add a safety harness. Non-slip work boots, safety glasses, and heavy-duty gloves are mandatory—your personal safety is priority number one.
- Cutting Tools: You’ll need a reciprocating saw or circular saw for the roof sheathing and ceiling plasterboard. A sharp utility knife is also essential for trimming roofing felt and membranes.
- Framing Tools: A hammer, framing square, measuring tape, and level are crucial for building the light shaft or curb that the skylight will sit on.
- Waterproofing Supplies: A high-quality caulking gun and exterior-grade, UV-resistant sealant will be your best friends for creating that bulletproof seal around the flashing.
Having everything ready before you start prevents dangerous shortcuts and ensures you do each step properly. If that list feels a bit overwhelming, it’s a pretty good sign that calling in a pro is the smarter move. You can get a better sense of the job’s complexity in our detailed guide on DIY skylight installation.
Understanding Structural Implications
Installing a skylight isn’t just about cutting a hole; it’s about understanding what you’re cutting into. You are literally removing a piece of the framework holding your roof up.
For smaller tubular skylights, you can often snake the tube between the existing roof trusses without making any structural cuts. But with larger fixed skylights, you’ll almost certainly need to cut at least one rafter or truss. Doing this means you absolutely must reinforce the surrounding structure to redistribute the roof’s load—a step that can sometimes require an assessment from a structural engineer to make sure your roof stays sound.
The line between a manageable DIY task and a job for the professionals is often drawn right here, at the structural work. If you have plenty of home reno experience, are confident working at heights, and genuinely understand roof framing and waterproofing, a basic tubular skylight might be within your skill set.
But if your project involves cutting structural timbers, if you’re working on a steep or multi-storey roof, or if you have even the slightest doubt about getting a 100% leak-proof seal, hiring a professional carpenter or a specialist skylight installer is the safest bet. They bring the experience, specialised tools, and insurance to get the job done right the first time.
Bunnings Skylights vs Specialist Suppliers
Deciding where to buy your skylight is just as crucial as picking the right model. You’re essentially choosing between the convenience of a retail giant like Bunnings and the focused expertise of a specialist supplier. It’s a bit like buying a suit: Bunnings has a great off-the-rack option that fits most standard needs well, whereas a specialist is the tailor, creating a custom-fit experience for a precise result.
Both paths have their place, and the right one for you really boils down to your project’s complexity, your budget, and what you expect in terms of performance and service. Walking into Bunnings for a skylight is straightforward—you see it, you buy it, you take it home. This model is perfect for confident DIYers with standard roof types who know exactly what they’re looking for.
A specialist supplier, on the other hand, works differently. They start with a conversation, aiming to understand your home’s unique lighting challenges. From there, they recommend a solution that genuinely fits, often involving products with higher performance ratings and far more customisation options.
Product Range and Performance
The first thing you’ll notice is the difference in choice. A retailer like Bunnings stocks a well-chosen selection of the most popular, universal sizes and models. This keeps things simple, but it can be a bit of a dead end if you have a non-standard space or specific performance goals in mind.
Specialist suppliers, however, have a much deeper catalogue. They can offer custom sizing, a variety of glazing options (like laminated glass for safety or triple-glazing for incredible insulation), and advanced features you just won’t find on a retail shelf.
Think about these key performance factors:
- Energy Efficiency: Specialists often carry skylights with superior U-values (which measure heat loss) and Solar Heat Gain Coefficients (SHGC), helping you better regulate your home’s temperature and save on energy bills.
- UV Protection: Higher-end models can come with advanced coatings that block over 99% of damaging UV rays, protecting your furniture, art, and floors from fading over time.
- Acoustic Performance: If you live near a busy road or under a flight path, some specialist skylights offer glazing specifically designed to dampen outside noise.
This difference in product depth is a big deal. To get a feel for the variety out there, you can explore different brands in our guide to popular skylight manufacturers.
The Service and Installation Model
This is probably where the two paths diverge the most. Bunnings is, at its heart, a product supplier. They provide the skylight kit and the instruction booklet, but making sure it’s installed perfectly and without leaks is entirely on you or the tradie you hire.
A specialist supplier, in contrast, usually offers a complete, end-to-end service. This often includes an on-site consultation, taking precise measurements, recommending the right product, and handling the professional installation—all backed by a warranty. This integrated approach takes the guesswork out of the equation and dramatically lowers the risk of something going wrong.
When you’re weighing this up, it’s also smart to consider the deep knowledge offered by specialist roofing contractors. They have the specific skills needed for a flawless installation, and their experience with different roof materials and structures is invaluable. This full-service model provides real peace of mind, especially for tricky projects or for homeowners who aren’t keen on the risks that come with a major DIY job.
Making the Right Choice for Your Home
So, which way should you go? It’s not a question of “good” versus “bad”—it’s about what fits your project. To make it clearer, let’s break down the key differences.
Retail vs Specialist Skylights Key Differences
This table lays out what you can typically expect from each option, helping you match the supplier type to your project’s needs.
| Factor | Bunnings (Retail) | Specialist Supplier |
|---|---|---|
| Product Selection | A limited range of standard, common sizes and models. | A wide variety, with custom sizes and advanced features available. |
| Performance | Good, meets basic requirements for bringing in light. | Excellent, often with superior energy, UV, and acoustic ratings. |
| Service Model | Product supply only; heavily focused on the DIYer. | Consultation, customisation, and professional installation services. |
| Best For | Standard projects, confident DIYers, and budget-conscious buyers. | Complex jobs, specific performance needs, or homeowners wanting a complete, worry-free solution. |
Ultimately, your decision comes down to your specific situation.
If you have a straightforward project, like adding a small tubular skylight to a hallway, and you’re comfortable on the tools, a Bunnings skylight is a perfectly practical and cost-effective choice.
However, if your vision involves a large architectural skylight, you’re dealing with a tricky roofline, or you simply want the assurance of an expert installation and a long-term performance guarantee, then partnering with a specialist is by far the wiser investment.
Common Skylight Mistakes and How to Avoid Them
Bringing natural light into your home with a skylight is an exciting project, but it’s easy for good intentions to get derailed by a few common—and costly—mistakes. A successful installation isn’t just about the product you buy; it’s about careful planning to avoid pitfalls that can turn a bright idea into a long-term headache.
Too often, homeowners get caught up in the excitement of buying Bunnings skylights and overlook critical details like sizing, placement, and installation. These oversights can lead to problems far worse than just poor lighting. We’re talking about leaks, energy loss, and even structural damage.
Think of this section as your guide to getting it right the first time. By understanding these common blunders, you can make sure your skylight project delivers all the benefits you imagined, without any of the nightmares.
Mistake 1: Underestimating Size and Placement
Getting the size wrong is one of the most frequent errors we see. It’s easy to assume any skylight will do, but a unit that’s too small for the room creates a “spotlight” effect—just a bright patch on the floor that does little to light up the whole space. It ends up feeling underwhelming and fails to create that airy, open atmosphere you were after.
On the flip side, a skylight that’s too large can completely overwhelm a room. This is especially true for west-facing installations, which can pour in so much solar heat during the afternoon that your living space turns into a greenhouse. Not only is it uncomfortable, but it can also drive up your cooling costs and create a harsh glare.
The key is to think proportionally. A good rule of thumb is that the skylight’s area should be no more than 5% of the floor area for a room with plenty of windows, or up to 15% for a space with few or no windows.
Mistake 2: Ignoring Your Roof’s Direction
Placement isn’t just about where the skylight looks best from inside; it’s about where it sits on your roof. The direction your roof slope faces has a massive impact on the quality and amount of light you’ll get throughout the day.
Here’s a simple breakdown of how orientation changes everything:
- North-facing: This is the gold standard. It provides beautiful, consistent ambient light all day without bringing in too much direct heat, making it perfect for living areas, kitchens, and home offices.
- South-facing: Offers very little direct sunlight. You’ll only get weak, indirect light that might not be worth the effort and expense of the installation.
- East-facing: Delivers lovely, bright morning light. It’s great for waking up kitchens and breakfast nooks but will fade as the day wears on.
- West-facing: Catches the intense afternoon sun. This often brings unwanted heat and glare, which can make a room uncomfortable in the hotter months.
By thinking about your roof’s orientation, you can place your skylight strategically to get the kind of light you want, when you want it, and avoid the downsides.
Mistake 3: Botching the Waterproofing
This is it—the single most critical, and most feared, mistake in any skylight installation. A leak isn’t just a minor annoyance; it can cause catastrophic damage over time. Water seeping in can rot roof timbers, destroy insulation, and lead to ugly ceiling stains and dangerous mould growth.
The overwhelming majority of skylight leaks aren’t because of a faulty product. They happen because the flashing kit—the metal channels designed to direct water away from the opening—was installed improperly. Every single overlap, seal, and screw has to be perfect.
There is absolutely no room for error here. If you have even the slightest doubt about your ability to create a completely watertight seal, hiring a professional is the smartest investment you can make. The cost of an experienced installer is a drop in the ocean compared to the potential bill for repairing extensive water damage down the line. Avoiding these three common mistakes is the key to a project you’ll love for years to come.
Ready to take the plunge? Before you run out the door, it helps to turn all this info into a simple, actionable game plan. A bit of prep work now can save you a world of headaches later, letting you walk into the store with complete confidence.
This final checklist is your roadmap. It’s designed to get you thinking about the practical side of the job, making sure you buy the right product for your home, whether that’s a Bunnings skylight or another option entirely.
Measure and Map Your Space
First things first: get the measurements right. Don’t just eyeball the room—grab a tape measure and get the exact length and width to calculate the floor area. This is key to choosing a skylight that’s the right size, so you can avoid one that’s too small to make a difference or so big it’s overwhelming.
Next, it’s time to head up into your roof space. Pinpoint the exact spot where you want the light to come through and have a good look around for any obstructions. You’ll want to check for rafters, wiring, or plumbing that might be in the way. Trust me, you need to know what your roof structure looks like before you even think about cutting a hole in it.
Identify Your Roof and Pitch
Your roof’s material and slope are two factors you simply can’t ignore. Figure out if you’ve got tiles or metal, because this will determine the type of flashing kit you need to create a permanent, waterproof seal. Get this part wrong, and you’re basically inviting leaks into your home.
You also need to suss out your roof pitch. A steep roof is a whole different ball game to work on compared to a flatter one—it’s tougher and a lot more dangerous. Be really honest with yourself about how comfortable you are working at heights.
Your most valuable tool here is an honest self-assessment. The initial excitement of a DIY project can wear off pretty quick when you’re sweating it out on a steep, hot roof. Knowing your limits before you buy is the smartest move you can make.
Set a Realistic Budget
A proper budget goes way beyond the price tag on the skylight itself. You’ll need to account for a few other things:
- The correct flashing kit for your specific roof type.
- Any tools you’ll need that you don’t already have in the shed.
- Building materials for the light shaft, like timber and plasterboard.
- A little extra cash set aside for any unexpected surprises.
And most importantly, think about the potential cost of calling in a pro if the job gets bigger than you expected. Plenty of tradies buy their supplies from retailers like Bunnings, which has a massive commercial customer base. In fact, trade sales make up about 38% of the company’s total revenue—a figure that includes the very experts you might end up needing. You can see the full breakdown in the Bunnings investor briefing.
Finally, have a quick chat with your local council about any building regulations or permit requirements. This is especially important if your home is heritage-listed or part of a strata complex. Once you’ve ticked off this list, you’ll be good to go.
Got Questions About Bunnings Skylights? We’ve Got Answers.
Even when you think you’ve got it all figured out, a few last-minute questions always pop up before you dive into a project. Let’s tackle some of the most common ones that come up when people are looking at buying and installing Bunnings skylights.
Do I Need Council Approval to Install a Skylight?
For most simple jobs, like popping in a standard tubular skylight that doesn’t mess with your roofline, you probably won’t need to bother the council. It’s a pretty straightforward addition.
However, don’t assume that’s the final word. Every local council has its own set of rules, and they can vary quite a bit. This is especially true if you live in a heritage-listed property or a home managed by a strata title. The smartest move is always to give your local council a quick ring before you pick up any tools. It’s a five-minute call that can save you a world of headaches.
What Is the Lifespan of a Standard Bunnings Skylight?
How long your skylight lasts really comes down to the model you pick and what it’s made of. Those popular acrylic dome skylights you see everywhere are good for about 10 to 15 years. After that, the Aussie sun can take its toll, making the material brittle or giving it a yellowish tinge.
If you opt for a higher-end glass panel skylight, you’re looking at a much longer lifespan, often pushing past 20 years if you look after it. At the end of the day, proper installation and regular cleaning are the two biggest things you can do to get the most life out of whichever skylight you choose.
Think of a skylight as just another window—except it’s on your roof. And just like any window, keeping it clean is key. A clear surface lets in the maximum amount of light and stops grime from slowly eating away at the seals.
Once your Bunnings skylight is in, keeping it clear is part of the job. If you’re planning on handling the upkeep yourself, it’s worth learning a few professional window cleaning techniques to keep the glass looking brand new and help it last longer.
Can I Install a Bunnings Skylight on a Metal Roof?
Absolutely. You can fit a skylight onto almost any common roof type in Australia, from metal roofs like Colorbond to classic terracotta or concrete tiles.
The real secret is in the flashing kit. Each type of roof needs a specific flashing kit designed to create a watertight seal around the hole you cut. Grabbing the wrong one is pretty much a guarantee you’ll have a leak on your hands. Just make sure the kit you buy is explicitly made for your roof material—it’s the only way to ensure a snug, weatherproof fit.
Ready to explore premium, high-performance skylight options designed for Australian homes? Vivid Skylights offers a range of double-glazed fixed and electric opening skylights with a 10-year leak-free warranty. Discover the difference at https://vividskylights.com.au.