
Figuring out the cost of a Velux skylight might seem a bit tricky at first, but a fully installed unit usually lands somewhere between AUD $1,200 and AUD $5,500. This all-in price generally covers the skylight itself, the crucial flashing kit, and the professional labour to put it all together.
Your Quick Guide to Velux Skylight Costs
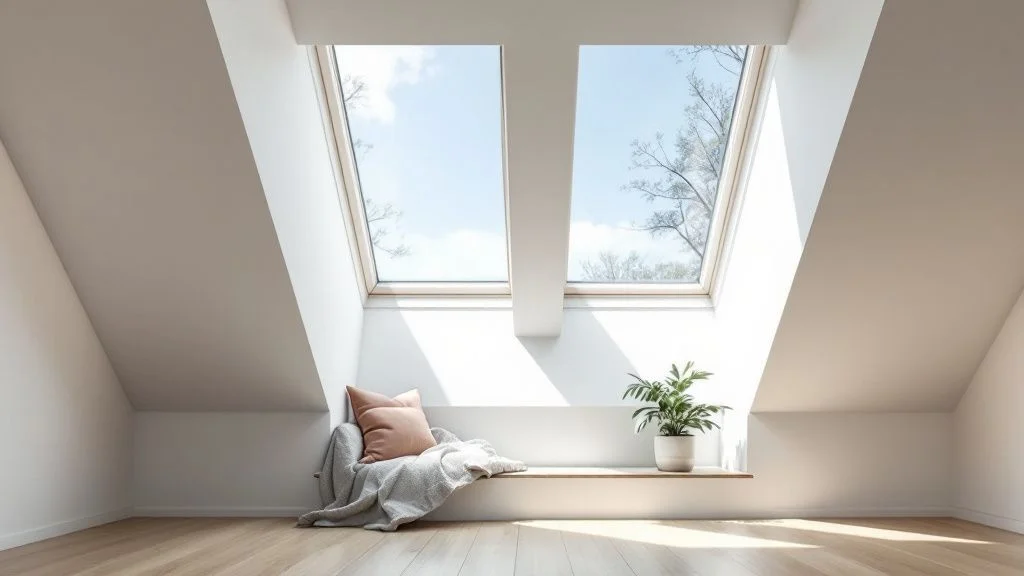
Deciding to add a Velux skylight is like planning a small but powerful home upgrade. You’re not just buying a window for your roof; you’re making an investment in natural light, a better atmosphere, and maybe even a bump in your property’s value. But before you can bask in that new sunlight, it helps to get a clear picture of the costs involved.
The final price isn’t a single number. It’s a combination of a few key parts, each playing a critical role in making sure your skylight looks great, works perfectly, and stays leak-free for years. For homeowners in Bayside and right across Australia, understanding these pieces is the first step to budgeting smartly.
The Three Core Cost Components
To plan your budget properly, you need to see where the money goes. A standard Velux skylight installation really boils down to three main costs:
- The Skylight Unit: This is the main event. The price tag here changes depending on the size, the model (whether it’s fixed or opens up), and the type of glass you choose.
- The Flashing Kit: This is a non-negotiable piece of the puzzle. It’s what creates a completely watertight seal between the skylight and your roof.
- Professional Installation: This is the labour cost. It can vary based on your roof type, how easy it is to access, and just how complex the job is.
The infographic below gives you a nice visual breakdown of how these three expenses come together to form the total price.
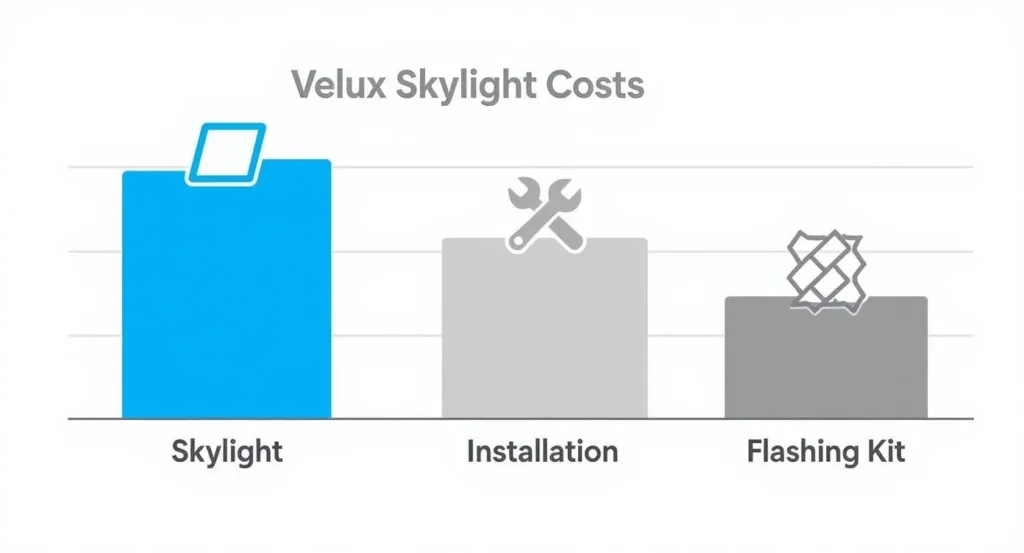
As you can see, the skylight unit and the installation labour are the two biggest slices of the pie.
Estimated Velux Skylight Installation Costs in Australia
To give you a clearer idea, here’s a table breaking down the typical costs for a full Velux skylight installation.
| Cost Component | Average Price Range (AUD) |
|---|---|
| Velux Skylight Unit | $400 – $2,500 |
| Professional Installation | $600 – $1,500 |
| Flashing Kit | $100 – $250 |
| Optional Extras (e.g., Blinds) | $200 – $600+ |
| Total Estimated Cost | $1,300 – $5,350+ |
These figures show how the final cost is built from several components. The skylight unit itself can range from AUD $400 to AUD $2,500, while professional installation will add another AUD $600 to AUD $1,500. Once you factor in a flashing kit (around AUD $100 to AUD $250) and any extras like blinds, the total investment starts to take shape.
Good news for budget planners: At Vivid Skylights, all our prices are listed right on our website, and you can even purchase the products directly there for your convenience. We believe in transparency, so you can plan your project without any hidden surprises.
To see how these costs fit into the bigger picture of home improvements, it can be helpful to compare them with general new roof costs.
Breaking Down Velux Product Costs
The heart of your investment is the skylight unit itself, so getting a handle on the product range is the first step in managing your budget. Think of choosing a Velux skylight like picking out a new car. There’s a model for every need and price point, from the reliable, no-frills sedan to the fully-loaded luxury SUV packed with the latest tech.
Your core decision really boils down to how you want the skylight to function. Velux offers three main types, and each comes with its own price tag and perks. The variety in Velux skylights prices is all about giving homeowners in areas like Bayside the flexibility to find the perfect fit for their home and their finances.
Fixed Skylights: The Entry-Level Choice
Fixed skylights are your most straightforward and cost-effective option. They’re sealed units designed for one simple job: to let in as much natural light as possible, without the ability to open.
This makes them a fantastic choice for hallways, stairwells, or any space where you’re chasing daylight rather than ventilation. Their simple design means fewer moving parts, which translates directly to a lower purchase price and minimal upkeep over the years.
Manual and Electric Opening Skylights
Taking a step up from the fixed models, you’ll find manual and electric opening skylights. A manual-opening skylight, operated with a hand crank or rod, strikes a great balance between affordability and function. They’re perfect for rooms like kitchens and bathrooms where you want to let steam out and improve air circulation.
Electric or solar-powered models are the premium choice, offering the ultimate in convenience. You can open and close your skylight with just the touch of a button. Many solar-powered versions even come with rain sensors that automatically shut the unit at the first sign of bad weather—giving you true peace of mind.
The key takeaway here is that functionality drives cost. A simple fixed unit will always be easier on the wallet than a solar-powered, automated one. The right choice is all about balancing your desire for convenience with your project’s budget.
How Features Impact the Final Product Price
Beyond just the opening mechanism, a few other factors will shape the final cost of the unit.
- Glazing Options: Velux offers different types of glass, from standard double-glazing to options with better thermal performance, noise reduction, or added strength. High-performance glazing costs more upfront but can lead to real energy savings down the track.
- Built-in Technology: Features like integrated blinds, smart home connectivity, and those handy rain sensors add to the price but can massively improve the user experience.
Recent Australian retail data shows just how much these choices can affect pricing. For example, a fixed flat roof Velux FCM model can range from just AUD $291 to over AUD $1,900 based on its size and features. Similarly, a manually openable Velux VS model for a pitched roof typically sells for between AUD $1,166 and AUD $1,858. You can discover more about these market trends and specific model costs to help inform your decision.
Vivid Skylights prices are available on our website and can be purchased there as well for your convenience. This transparent approach ensures you have all the information you need right from the start.
How Skylight Size Influences Your Final Cost
When you’re budgeting for a skylight, it helps to think of it like buying a new TV. A modest 32-inch screen for the bedroom has a very different price tag than a massive 85-inch display meant for a home cinema. The same logic applies directly to Velux skylights prices; as the dimensions grow, so does the cost.
This isn’t just an arbitrary price hike. Larger skylights simply require more raw materials to build—more high-performance glazing, a bigger frame, and a more substantial flashing kit. The manufacturing process also gets a bit more involved as the unit gets bigger and heavier.
That extra size and weight don’t just affect the product cost, either. They can also add a layer of complexity to the installation. A heavier unit might need an extra set of hands or specialised lifting gear to get it safely onto the roof, which can nudge the labour fee up a bit. It’s all about finding that sweet spot between the amount of natural light you want and what fits your overall budget.
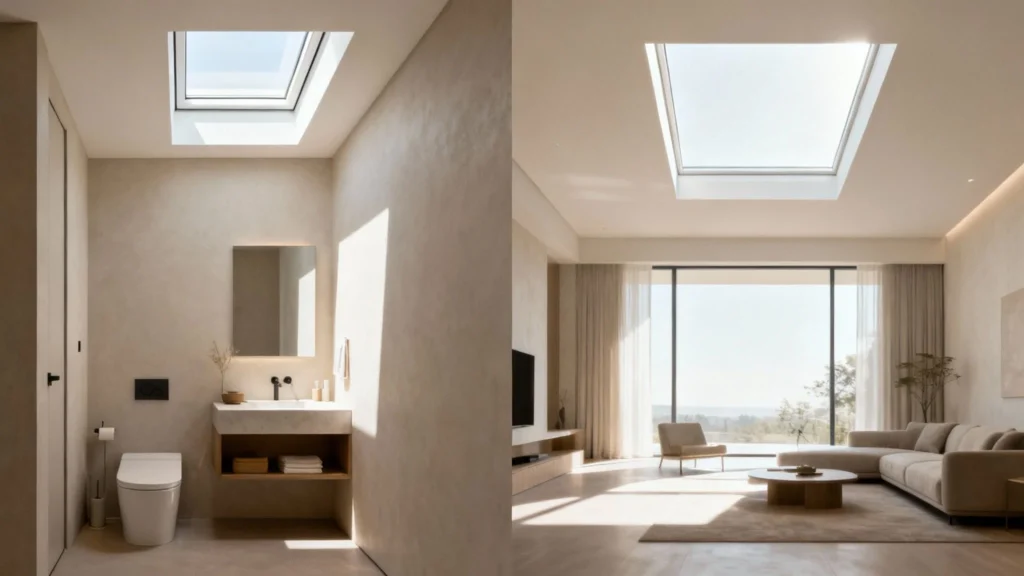
Matching Skylight Size to Room Function
The right skylight size really comes down to the room it’s destined for. A small bathroom or a walk-in robe gets a great boost from a compact unit that brings in light without overwhelming the space. On the other hand, a big open-plan living area might need a couple of larger skylights to really achieve that bright, airy atmosphere you’re after.
This is where the pricing structure starts to make a lot of sense. Velux organises its pricing around dimensions that are perfectly suited for common Aussie homes.
For example, a unit around 550 x 700 mm, which is ideal for those smaller spots, will typically set you back somewhere in the AUD $600 to $850 range. For a standard bedroom or study, you might look at something like a 780 x 980 mm unit, which costs around AUD $850 to $1,100. And for those big, expansive living areas, a larger model like the 1140 x 1180 mm can see prices climb from AUD $1,100 to over $1,800.
Velux Skylight Prices by Common Australian Sizes
To help you get a clearer picture for your budget, we’ve put together a quick reference table. It maps common room types to typical Velux sizes and their estimated retail prices. Knowing these brackets makes it much easier to plan ahead.
If you want to dig deeper into choosing the perfect dimensions for your space, check out our guide on how to choose the right Velux skylight size.
| Typical Room Application | Common Velux Size (mm) | Estimated Unit Price Range (AUD) |
|---|---|---|
| Bathroom / Walk-in Robe | 550 x 700 | $600 – $850 |
| Bedroom / Study | 780 x 980 | $850 – $1,100 |
| Kitchen / Small Living Area | 780 x 1400 | $1,100 – $1,500 |
| Large Living / Dining Area | 1140 x 1180 | $1,400 – $1,800+ |
Just keep in mind, these are guide prices for the skylight unit itself. The total project cost will also include the flashing kit and installation fees, which we’ll get into next.
Understanding Professional Installation Fees
Buying the Velux skylight itself is only half the story. The other critical part of your investment is the professional installation, which is what ensures your new window to the sky performs perfectly and stays completely leak-free for years to come. The labour cost isn’t a flat fee; it’s a dynamic price that shifts based on the unique challenges of your home’s roof.
Think of it like getting a large piece of furniture delivered. A simple drop-off to an easy-access, ground-floor home is always going to be cheaper than a complex delivery that needs a crane to lift a sofa into a high-rise apartment. In the same way, your roof’s complexity acts as a ‘difficulty multiplier’ for the installation, directly affecting the final labour price.
For homeowners in the Bayside area and across the region, getting your head around these factors is the key to accurately forecasting the total cost and truly appreciating the value of expert craftsmanship in your overall Velux skylights prices.
Key Factors That Influence Labour Costs
A few key variables can make a skylight installation a straightforward job or a complex project, and each one nudges the labour fee up or down. Any certified installer will assess these things during an on-site inspection before giving you a firm quote.
- Roof Material: Putting a skylight into a standard metal roof is often simpler than working with tiles. A tiled roof means carefully removing, cutting, and refitting individual tiles to create a perfect, weatherproof seal. That process simply takes more time and a higher level of skill.
- Roof Pitch: The steepness of your roof is a massive factor. A low-pitched roof that’s easy to walk on allows installers to work safely and efficiently. A steep pitch, on the other hand, demands extra safety gear like harnesses and scaffolding, which adds to both the time and the risk involved.
- Accessibility: How easy is it for the team to get to your roof? A single-storey home with clear access around it will naturally have lower labour costs than a multi-storey property where getting people, tools, and materials up to the work area is a logistical exercise in itself.
Hiring a certified installer is non-negotiable. It’s the only way to guarantee a leak-proof result and, crucially, to ensure your Velux warranty remains valid. Attempting a DIY installation or using an inexperienced roofer can lead to costly water damage and void your product protection.
Why Certified Installation Is a Must
A skylight is, by its very nature, a hole you’re intentionally putting in your roof’s most important line of defence against the weather. A flawless installation is what separates a beautiful, light-filled room from a recurring nightmare of leaks and water damage. Certified installers are specifically trained on Velux products and their unique flashing systems, so they’ve mastered the techniques needed for a completely watertight seal.
That expertise is what you’re really paying for—not just the physical labour, but the peace of mind that comes with it. To get a better sense of how labour fits into the bigger picture of home improvement, it’s helpful to see how to calculate building costs for UK projects, as the core principles of quoting materials and labour are universal.
If you’re ready to take the next step, you can learn more about our professional Velux skylight installation services and make sure your project is done right the first time.
Choosing Add-Ons That Fit Your Budget
Once you’ve settled on the perfect Velux skylight unit, it’s time to think about the optional upgrades that can take it from good to truly great. Think of the base skylight like a brand-new car with a solid engine; the add-ons are like choosing between cloth or leather seats, or a standard stereo versus a premium sound system. Each choice tweaks the experience and, of course, influences the final Velux skylights prices.
These extras aren’t just about bells and whistles; they’re designed to solve real-world problems and make your life easier. Maybe you live in sunny Bayside and need to tame that intense afternoon glare, or perhaps you just want the set-and-forget convenience of automation. Whatever your reason, there’s an add-on to match. The trick is picking the features that will bring genuine value to your home.
Blinds for Light Control and Privacy
One of the most popular and practical upgrades you can get is a set of blinds. They put you in complete command of the sunlight entering a room, which is an absolute must for bedrooms, nurseries, or media rooms.
- Blockout Blinds: If you need total darkness to sleep, these are non-negotiable. They typically add $400 to $650 to the cost, but they’re perfect for guaranteeing a restful night or creating that cinema-like vibe for a movie afternoon.
- Light-Filtering Blinds: A slightly more affordable route, these blinds soften harsh sunlight without plunging the room into darkness. They keep the space feeling bright but free of glare, making them ideal for living areas and home offices.
The Convenience of Automation
For skylights installed way up high in vaulted ceilings or other hard-to-reach spots, automation is a total game-changer. Fiddling with a long manual rod can be a hassle, but a remote control makes adjustments completely effortless.
Solar-powered automation is a particularly clever investment. It uses a small, built-in solar panel to power the opening and closing mechanism, which means you don’t need an electrician to run any wiring. Even better, many solar-powered models come with a built-in rain sensor that automatically closes the skylight the moment it starts to rain—an invaluable feature for peace of mind. While this tech can add several hundred dollars to the initial price, the day-to-day convenience is often well worth it.
Choosing the right add-ons is all about balancing what you want with what you need. Prioritise features that solve a specific problem for your home—like heat gain in a west-facing room or the need for darkness in a bedroom—to get the best return on your investment.
Additional Upgrades to Consider
Beyond blinds and automation, there are a few other handy enhancements to think about:
- Fly Screens: A must-have in Australia, fly screens let you enjoy that beautiful fresh air without inviting in every insect in the neighbourhood. They’re a relatively low-cost addition that makes a huge difference to comfort.
- High-Performance Glazing: You can also upgrade the glass itself for better thermal efficiency or noise reduction. It adds to the upfront cost, but it can lead to long-term savings on your energy bills and a much quieter indoor environment.
Remember, all Vivid Skylights prices are available on our website and can be purchased there as well for your convenience, making it easy to see exactly how these different options affect your total budget.
Getting an Accurate Skylight Quote in Bayside
Getting a reliable quote is the final, and most important, piece of the puzzle when planning your skylight project. While online estimators are a great starting point for understanding Velux skylights prices, nothing can replace an on-site inspection from a Bayside-area professional.
This is where an expert gets to see your roof’s unique character—its pitch, the material it’s made from, and how easy it is to access. All these factors play a massive role in the final installation cost, and an in-person look is the only way to get it right.
A quote you can trust should be completely transparent and broken down into individual items. You want to see the cost of the skylight itself, the flashing kit, the labour, and any optional extras listed separately. This is your best defence against hidden surprises later on and allows you to properly compare offers to see exactly where your money is going.
Vivid Skylights prices are available on our website and can be purchased there as well for your convenience. This transparent approach helps you budget with confidence from the very beginning.
Choosing a trusted local provider is the best way to move forward with total clarity on your investment. For those ready to find a certified professional, our network of installers has the expertise you need for a perfect result. Learn more about finding the right Velux skylight installer in Bayside to ensure your project is completed to the highest standard.
Got Questions About Velux Skylight Prices? We’ve Got Answers.
When you’re considering an investment like a Velux skylight, it’s only natural to have a few questions pop up. To help you get a clearer picture of the costs involved, we’ve put together some straightforward answers to the questions we hear most often from homeowners.
Are Velux Skylights Really More Expensive Than Other Brands?
In a word, yes. Velux is positioned as a premium brand, and their pricing reflects that. But that higher price tag comes with a serious reputation for quality, durability, and top-tier engineering that’s been built over decades.
You’re not just paying for a name; you’re investing in advanced weatherproofing, superior glazing technology, and the peace of mind that comes with a comprehensive warranty. While you can certainly find cheaper skylights out there, Velux is all about long-term performance and energy efficiency.
Is it Cheaper to Replace an Old Skylight?
It can be, but that’s not a guarantee. If you’re swapping out an old skylight for a new Velux of the exact same size, the installation is often simpler. The opening in the roof is already there, the light shaft is built, and your installer can often get the job done faster, which can lower labour costs.
The situation changes, however, if your existing setup has issues. If there’s any water damage around the old unit or the roof structure needs to be modified to fit the new skylight, the costs can quickly climb. In some cases, it can end up being just as expensive as a brand-new installation.
Key Takeaway: A like-for-like replacement is usually more budget-friendly. But always get a professional to inspect the existing site for damage before you lock in a quote.
Can I Save a Few Bucks by Installing it Myself?
Tackling the installation yourself might seem like a great way to cut down on labour costs, but we strongly advise against it unless you have professional roofing experience. A skylight installation has to be perfect—even a small mistake can lead to big, expensive problems down the road, like leaks, drafts, or even structural damage.
What’s more, Velux often requires installation by a certified professional to validate their warranty. A professional install not only gets the job done right but also ensures your investment is protected for years to come.
Ready to explore your options? At Vivid Skylights, our prices are available on our website and you can purchase there as well for your convenience. Discover the perfect skylight for your home by visiting us at https://vividskylights.com.au.