
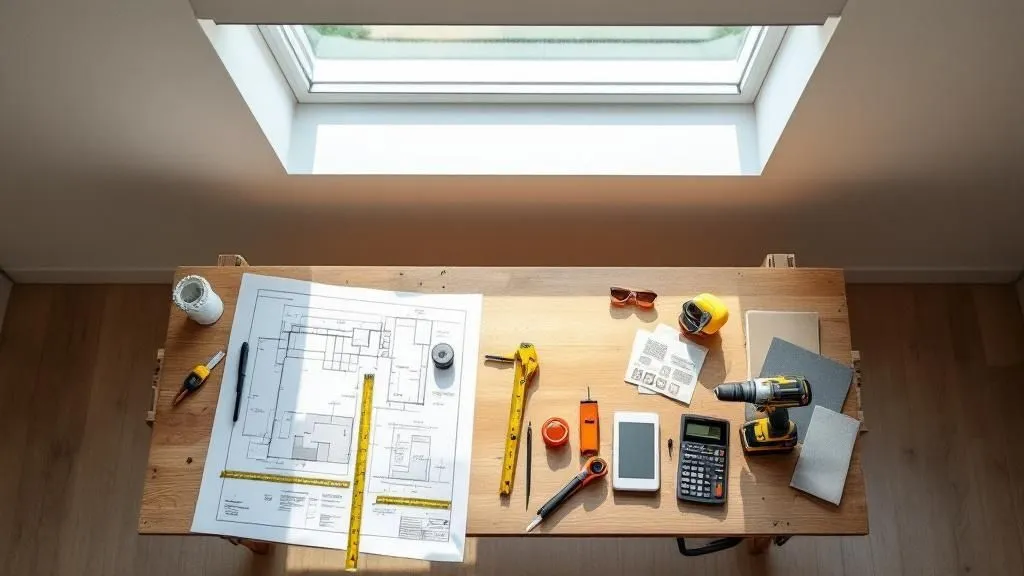
So, you’re thinking about flooding a room with natural light? It’s a fantastic idea. When it comes to professional skylight installation in Australia, you can expect to invest anywhere from $1,200 to over $7,000. That’s the all-in price, covering both the skylight unit itself and the expert labour to get it in place.
The final number really hinges on the type of skylight you fall in love with and how tricky the installation job is.
Your Quick Guide to Australian Skylight Costs
When you start asking, “how much for a skylight installation?”, you’ll quickly find the answer isn’t a single number. It’s more like a recipe with a few key ingredients: the materials, the skilled labour, and any extras needed to do the job right. The biggest decision you’ll make is the skylight unit itself.
A simple, fixed skylight that doesn’t open is always going to be your most budget-friendly option. But if you’re after something more sophisticated—like a model that opens for ventilation or has all the bells and whistles like rain sensors and built-in blinds—you’ll naturally be looking at the higher end of the spectrum.
To get you started, here’s a quick snapshot of what you might expect to pay for different types of skylights, fully installed.
Estimated Skylight Installation Costs at a Glance
This table gives you a ballpark idea of the all-inclusive costs for common skylight types in Australia. Think of it as a helpful starting point for your budget planning.
| Skylight Type | Average Installed Cost (Unit + Labour) |
|---|---|
| Tubular Skylight | $900 – $2,000 |
| Fixed Skylight | $3,000 – $5,000 |
| Manual Ventilated Skylight | $3,200 – $5,900 |
| Electric/Solar Ventilated Skylight | $4,250 – $7,300+ |
As you can see, the costs vary quite a bit. At the end of the day, every quote you receive will be built on two main pillars: the product and the installation.
- The Product: This is the skylight unit. The price tag is influenced by its size, the brand you choose, the type of glass (glazing), and any special features.
- The Labour: This covers the time and skill of the professionals who will be cutting into your roof and ceiling, framing the new opening, fitting the unit, and making sure everything is perfectly weatherproof.
Getting a handle on these two core elements is the first step. In this guide, we’ll break down every part of the cost, so you can see exactly where your money goes and feel confident in your decision.
Understanding Your Core Cost Components
When you get a quote for a new skylight, the final number really comes down to two key things: the product you’ve chosen and the skilled person who’s going to put it in your roof. Getting your head around these two core components—materials and labour—is the first step to understanding what you’re actually paying for.
It’s a bit like buying a new oven. There’s the price of the oven itself, but then there’s the cost for a qualified electrician to wire it in safely. You can’t really have one without the other, and both have their own set of factors that influence the price.
The Skylight Itself: Material Costs
First up, you’ve got the physical skylight unit. This isn’t just a simple pane of glass; it’s a high-performance window designed specifically for your roof, and the choices you make here will have the biggest impact on your budget.
Generally, skylights fall into three main categories:
- Fixed Skylights: These are the most straightforward and usually the most budget-friendly. Think of them as a picture window for your ceiling – they’re all about letting light in and don’t open.
- Ventilated Skylights: These are the ones that open up, either manually with a crank or automatically with a solar or electric motor. They give you both light and fresh air, but that extra function comes at a higher price.
- Tubular Skylights: These are fantastic little “light tunnels.” They use a collector on the roof to funnel sunlight down a highly reflective tube, bringing daylight into places where a normal skylight just wouldn’t work, like a small bathroom or a walk-in robe.
Of course, each of these types comes in different sizes and with various glazing options (like double-glazing or UV-blocking glass), which all play a role in the final material cost. If you want to dive deeper, this guide to construction cost breakdown is a great resource for seeing how materials fit into the bigger picture of any building project.
The Installation: Labour Costs
The other half of the equation is the labour—the cost of a professional’s time and expertise. Installing a skylight properly isn’t a quick weekend job for a handyman; it’s a serious bit of construction that often involves a roofer, a carpenter, and even a plasterer.
An installer isn’t just fitting a window; they are performing structural surgery on your home. This involves cutting through your roof and ceiling, framing the new opening, and ensuring a perfect, leak-proof seal against the elements.
The complexity of the job is what really drives the labour cost. A few things can make an installation trickier and, therefore, more expensive:
- Roof Pitch and Material: A really steep roof is harder and slower to work on, requiring extra safety gear. Likewise, cutting through a metal or slate roof is a far more delicate operation than working with standard tiles.
- Ceiling and Attic Space: Got a towering cathedral ceiling? The installer will need to build a much longer “light shaft” to connect the skylight to the room below. A cramped attic full of trusses can also add a lot of time to the job.
While some installers might charge by the hour, most will give you a fixed price for the whole project. That fee is their calculation of everything involved, from making that first cut in your roof to applying the final touch of paint on the plaster inside.
How Skylight Type And Size Shape Your Budget
When it comes to your final quote, the type of skylight you choose is easily the biggest line item. Think of it like buying a car: a basic model gets you from A to B, but adding luxury features, a bigger engine, or more space will naturally increase the price. It’s exactly the same with skylights, so understanding what you’re getting for your money is the first step.
A simple, non-opening fixed skylight is your go-to if the goal is purely to flood a room with natural light. It’s essentially a sealed window for your roof—beautifully simple and effective. Step up to a ventilated skylight, and you get the added bonus of fresh air. These can be opened manually or with a motor, making them perfect for kitchens and bathrooms where you need to let steam and odours escape.
Then you have tubular skylights. These are a brilliant solution for tricky spaces like hallways, pantries, or walk-in robes where a traditional skylight just won’t fit. They work by capturing sunlight on your roof and funnelling it down a highly reflective tube to brighten up the space below.
Comparing Fixed vs Ventilated Models
The most common fork in the road for homeowners is deciding between a fixed or a ventilated skylight. Fixed models are far simpler in their construction—no moving parts, no electronics. This simplicity means they are less expensive to buy and quicker to install.
On the other hand, ventilated models, especially the electric or solar-powered versions, come with motors, remote controls, and sometimes even rain sensors that automatically close the window when it starts to drizzle. All that clever tech adds to the upfront cost, but the payoff is huge. Imagine airing out a stuffy room with just the press of a button. For a deeper dive into the pros and cons, you can explore the different types of skylights and see which one feels right for your home.
This image gives you a great visual breakdown of where the money goes during a typical installation, splitting the costs between the skylight itself and the labour to get it in.
As you can see, the labour is a significant chunk of the total cost. It really drives home how important it is to have a skilled, professional installer doing the work.
The Influence of Size and Brand
Of course, it’s not just about the type. The physical size of the skylight and the brand you select will also have a major impact on the final price. A bigger skylight doesn’t just cost more for the unit itself; it also means more work for the installer—a larger hole to cut in the roof, more framing, and more materials to make it all weatherproof.
Brands like VELUX are well-known in Australia for their quality and wide range of features, and their pricing reflects that. To give you a ballpark idea, a standard fixed skylight installation might fall somewhere between $1,200 and $5,000. If you start looking at more complex models with ventilation and motorised blinds, you could be looking at a range of $5,000 to $8,000.
Tubular skylights, being smaller and simpler, are a much more budget-friendly option. You can typically get one fully installed for between $900 and $2,000.
Comparing Skylight Types and Installed Costs
To make sense of all these options, it helps to see them side-by-side. This table breaks down the most common skylight types, their typical installed price range, and what they’re best used for.
| Skylight Type | Typical Installed Price Range (AU) | Best For | Key Features |
|---|---|---|---|
| Tubular Skylight | $900 – $2,000 | Dark, small spaces like hallways, bathrooms, and walk-in robes where a traditional skylight won’t fit. | Compact design, highly reflective tube, minimal structural changes required, most affordable option. |
| Fixed Skylight | $1,200 – $5,000 | Living rooms, kitchens, or any area where the main goal is to maximise natural light without needing ventilation. | No moving parts, highly durable, excellent for architectural impact and bringing in daylight. |
| Manual Ventilated Skylight | $1,800 – $4,500 | Accessible areas like loft conversions or rooms with lower ceilings where you can easily reach the winder. | Provides both light and fresh air, operated with a manual crank or winder, good for improving airflow. |
| Electric/Solar Ventilated Skylight | $5,000 – $8,000 | Out-of-reach applications in rooms with high ceilings, kitchens, and bathrooms. | Remote-controlled operation, often includes rain sensors for automatic closing, premium convenience. |
Ultimately, choosing the right skylight comes down to balancing your home’s needs with your budget. Each type offers a unique set of benefits, so the best choice is the one that solves your specific problem, whether it’s a lack of light, poor airflow, or both.
The Impact of Labour and Regional Price Variations
While the skylight itself is a big part of the budget, you can’t overlook the cost of skilled labour—it’s the other half of the equation that really shapes the final price. Don’t think of an installer as just someone fitting a window. They’re a specialist performing careful surgery on the most critical part of your home: the roof.
This isn’t a simple DIY job. It demands absolute precision, from cutting through roofing and plasterboard to framing the new opening and sealing the unit so it’s completely watertight for years to come. The expertise needed to get this right is a huge factor in answering the question, “how much for skylight installation?”
Why Your Postcode Affects the Price
Just like house prices change from one city to the next, so do the hourly rates for skilled tradies. Where you live plays a massive role in the labour portion of your skylight quote, thanks to things like local demand, cost of living, and how many qualified installers are in the area.
In Australia, for instance, you can expect to pay anywhere from $65 to $90 an hour for a skylight installer. If you’re in Queensland, you might find rates around the $75 per hour mark. That same job in Victoria or Western Australia could creep up to between $80 and $85 per hour. At the top end, you’ll often find New South Wales, where labour can hit $90 per hour. As you can see, your location can really sway the total cost. You can get a better sense of these differences by exploring skylight installation costs across Australia.
What’s Actually Included in a Labour Quote?
When you get a quote from a professional, you’re not just paying for their time on the roof. The price covers a whole process designed to give you a safe, weatherproof, and beautifully finished result.
A standard installation fee typically bundles together all these steps:
- Prep and Safety: This involves setting up a safe work area and making sure your home’s interior is protected from dust and debris.
- Cutting and Framing: The installer will precisely cut the openings in your roof and ceiling, then build the structural frame for the skylight and the internal light shaft.
- Fitting and Sealing: Here, the skylight unit and the flashing kit are installed. Think of the flashing as a custom-fitted raincoat that expertly channels water away from the opening.
- Interior Finishing: The job isn’t done until the inside looks good, too. This includes lining the light shaft with plasterboard and often plastering and sanding it so it’s ready for you to paint.
Remember, a higher labour cost often reflects a more complex job. Tricky roofing materials like slate, a really steep pitch, or having to work around awkward attic trusses will all add time and demand more skill, which naturally bumps up the price.
Uncovering Potential Hidden Installation Costs
When you get a quote for a new skylight, it usually covers the main event: the skylight itself and the basic labour. But just like buying a car, it’s the on-road costs and dealer extras that can really inflate the final price. Knowing what to look for beyond that initial number is crucial for keeping your budget on track and avoiding any nasty surprises.
Think of the initial quote as your starting point. The real cost often includes a few extra items that are either essential for your specific roof or are worthwhile upgrades. By understanding these potential add-ons, you can ask your installer the right questions from day one.
Essential Add-Ons and Modifications
Some extra costs are unavoidable. They might be required to make the skylight weathertight on your particular roof, or because your home’s structure needs a bit of extra work to accommodate the new opening. These are the things a professional can only confirm after a proper inspection.
Here are a few of the most common “extras” you’ll likely encounter:
- Flashing Kits: This isn’t really an ‘extra’—it’s an absolute necessity. A flashing kit is the custom-fitted weather seal that fits around your skylight, channelling rainwater away from the opening. It’s essentially a bespoke raincoat for your installation, and the right one must be chosen for your specific roofing material, be it tile, metal, or something else.
- Structural Work: Your roof is held up by a series of rafters. If your chosen spot for the skylight happens to land right on top of one, you can’t just cut it out. A builder will need to frame a new opening and reinforce the surrounding structure to maintain your roof’s integrity. This, of course, adds to the labour and material bill.
- Interior Finishing: The installer’s job is typically done once the skylight is in, secure, and waterproof. That often leaves you with an unfinished plasterboard light shaft inside. This will still need to be properly plastered, sanded, and painted to seamlessly blend in with your ceiling. This finishing work is almost always a separate job, so you’ll need to factor in hiring another tradie or tackling it yourself.
An all-inclusive quote should clearly itemise every single step, from cutting the hole in the roof to the final coat of paint inside. If finishing work isn’t mentioned, make sure you ask who is responsible for it and what it will cost.
Upgrades and Optional Extras
Once the essentials are covered, you can start thinking about features that add convenience, comfort, and a bit of wow-factor. These aren’t necessary for the skylight to function, but they can make a world of difference to how you use the space.
Some popular optional upgrades include:
- Motorised or Solar-Powered Blinds: A game-changer for controlling light and heat, especially for skylights in hard-to-reach places or those copping the full force of the afternoon sun.
- Rain Sensors: This is a brilliant feature for any opening skylight. The sensor detects the first drops of rain and automatically closes the unit, so you never have to worry about a sudden downpour.
- Fly Screens: If you’re installing a ventilating skylight to let in fresh air, a fly screen is a non-negotiable for keeping the bugs out.
Getting a clear picture of these potential expenses early on helps you have a much more informed chat with your installer. For a deeper dive, you can learn more about what goes into the final skylight installation cost in our complete guide.
Planning Your Budget and Getting Accurate Quotes
Alright, you’ve got a great handle on the costs involved. Now for the most important part: turning those numbers into a real-world plan by getting accurate, detailed quotes from the pros. A good quote isn’t just a price tag; it’s a project roadmap that protects you from any nasty surprises later on.
To get a quote you can actually rely on, you need to give your potential installer the right info upfront. A little prep work on your end helps them see the full picture, which means you get a much more solid price.
Preparing for Your Quote
Before you even think about making a call, take five minutes to pull together a few key details about your home. This gives any installer a clear snapshot of the job, letting them give you a far more accurate initial estimate.
Try to have this info on hand:
- Your Roof Type: What are we working with? Tiles? Metal? The roofing material is a massive factor in how complex the installation will be.
- Roof Pitch: You don’t need to be a roofer, but a rough idea of how steep your roof is helps them understand the difficulty and safety gear required.
- Ceiling Height: Knowing the floor-to-ceiling measurement helps figure out how long the light shaft needs to be.
- Desired Skylight Location: Know exactly where you want that natural light to pour in. Is it in an open area or right next to existing light fittings or beams?
What to Look for in a Comprehensive Quote
A proper, professional quote should be totally transparent and broken down into individual items. You need to see exactly what you’re paying for. If you just get a single, vague number, that’s a bit of a red flag. You want a detailed document with no room for guesswork.
A solid quote will always clearly outline:
- The specific skylight model, including its size and brand.
- The cost of all materials needed, like the all-important flashing kit.
- A proper breakdown of the labour charges.
- Any extra costs for things like structural work or plastering.
- All the warranty details for both the skylight itself and the installation work.
Here’s a pro tip: choosing a supplier who also handles the installation is often the best way to go. It creates a single point of accountability. When the product expert is the same person fitting it, you get real peace of mind knowing the workmanship is perfectly matched to the skylight, from start to finish.
For those planning bigger renovations, especially in a commercial setting, this guide to commercial tenant finish projects has some excellent insights into budgeting and planning that you might find useful.
Getting a Seamless Installation in Melbourne
It’s always a smart move to find an installer who specialises in the brand of skylight you want. They’ll know the product inside and out, which is your best guarantee of a perfect, leak-free installation. For anyone based in Victoria, this can make the whole project a breeze.
Vivid Skylights can install our range of skylights all over Melbourne suburbs at a competitive rate. Because we handle both the supply and the installation, we make sure our high-performance roof windows are fitted exactly to manufacturer standards. This all-in-one approach takes the hassle out of the process and gives us total quality control from our warehouse right through to your roof. You can even see the technical side of things in our guide on how to install a skylight.
By having your details ready and knowing what a good quote looks like, you can set your budget with confidence and get ready to bring that beautiful, natural light into your home.
Your Top Skylight Cost Questions Answered
When you start planning a skylight project, it’s natural for a bunch of questions to pop up. You’re probably wondering about the timeframe, what makes a job tricky, and how your home’s unique features might impact the final bill.
Let’s break down some of the most common queries homeowners have when trying to nail down their skylight installation budget.
How Long Does It Take to Install a Skylight?
For a straightforward job, you’re usually looking at about half a day to a full day of work. This is for a standard installation on an easy-to-access roof, like a common tile or metal one, where no unexpected structural issues pop up.
However, the timeline can easily stretch out. If your project is more involved—say, it requires cutting and reinforcing the roof rafters—it’s going to take longer. A really steep roof also adds time, as installers need to take extra safety precautions. In these cases, expect the job to take two days or more to get that perfect, watertight seal.
Does My Roof Type Change the Installation Price?
Absolutely. Your roof type is one of the biggest variables affecting the cost. A standard corrugated metal or tile roof is generally the most budget-friendly option, as most experienced installers have the process down to a fine art.
Costs start to climb when you have specialty materials. Slate roofs, for instance, require a completely different skill set and tools to work with, which means higher labour charges. Likewise, a steep roof pitch makes everything slower and more complex, pushing up the final price due to the extra safety gear and time required.
Is It More Expensive to Install a Premium Skylight?
Not usually, at least not for the labour itself. The actual physical work of installing a premium skylight—cutting the opening, framing it out, and weatherproofing—is pretty much the same as for any other skylight of a similar size.
The real difference in cost comes from the price of the unit itself. Premium skylights are packed with high-end features like advanced glazing for better insulation, solar-powered openers, smart blinds, and even rain sensors that close them automatically. All that technology is what increases the material portion of your quote.
Ready to bring beautiful, natural light into your Melbourne home? At Vivid Skylights, we offer expert installation of our high-quality roof windows at a competitive rate across all Melbourne suburbs. Get a seamless experience from product selection to a perfect, leak-free finish. Find out more and get a personalised quote at Vivid Skylights.