

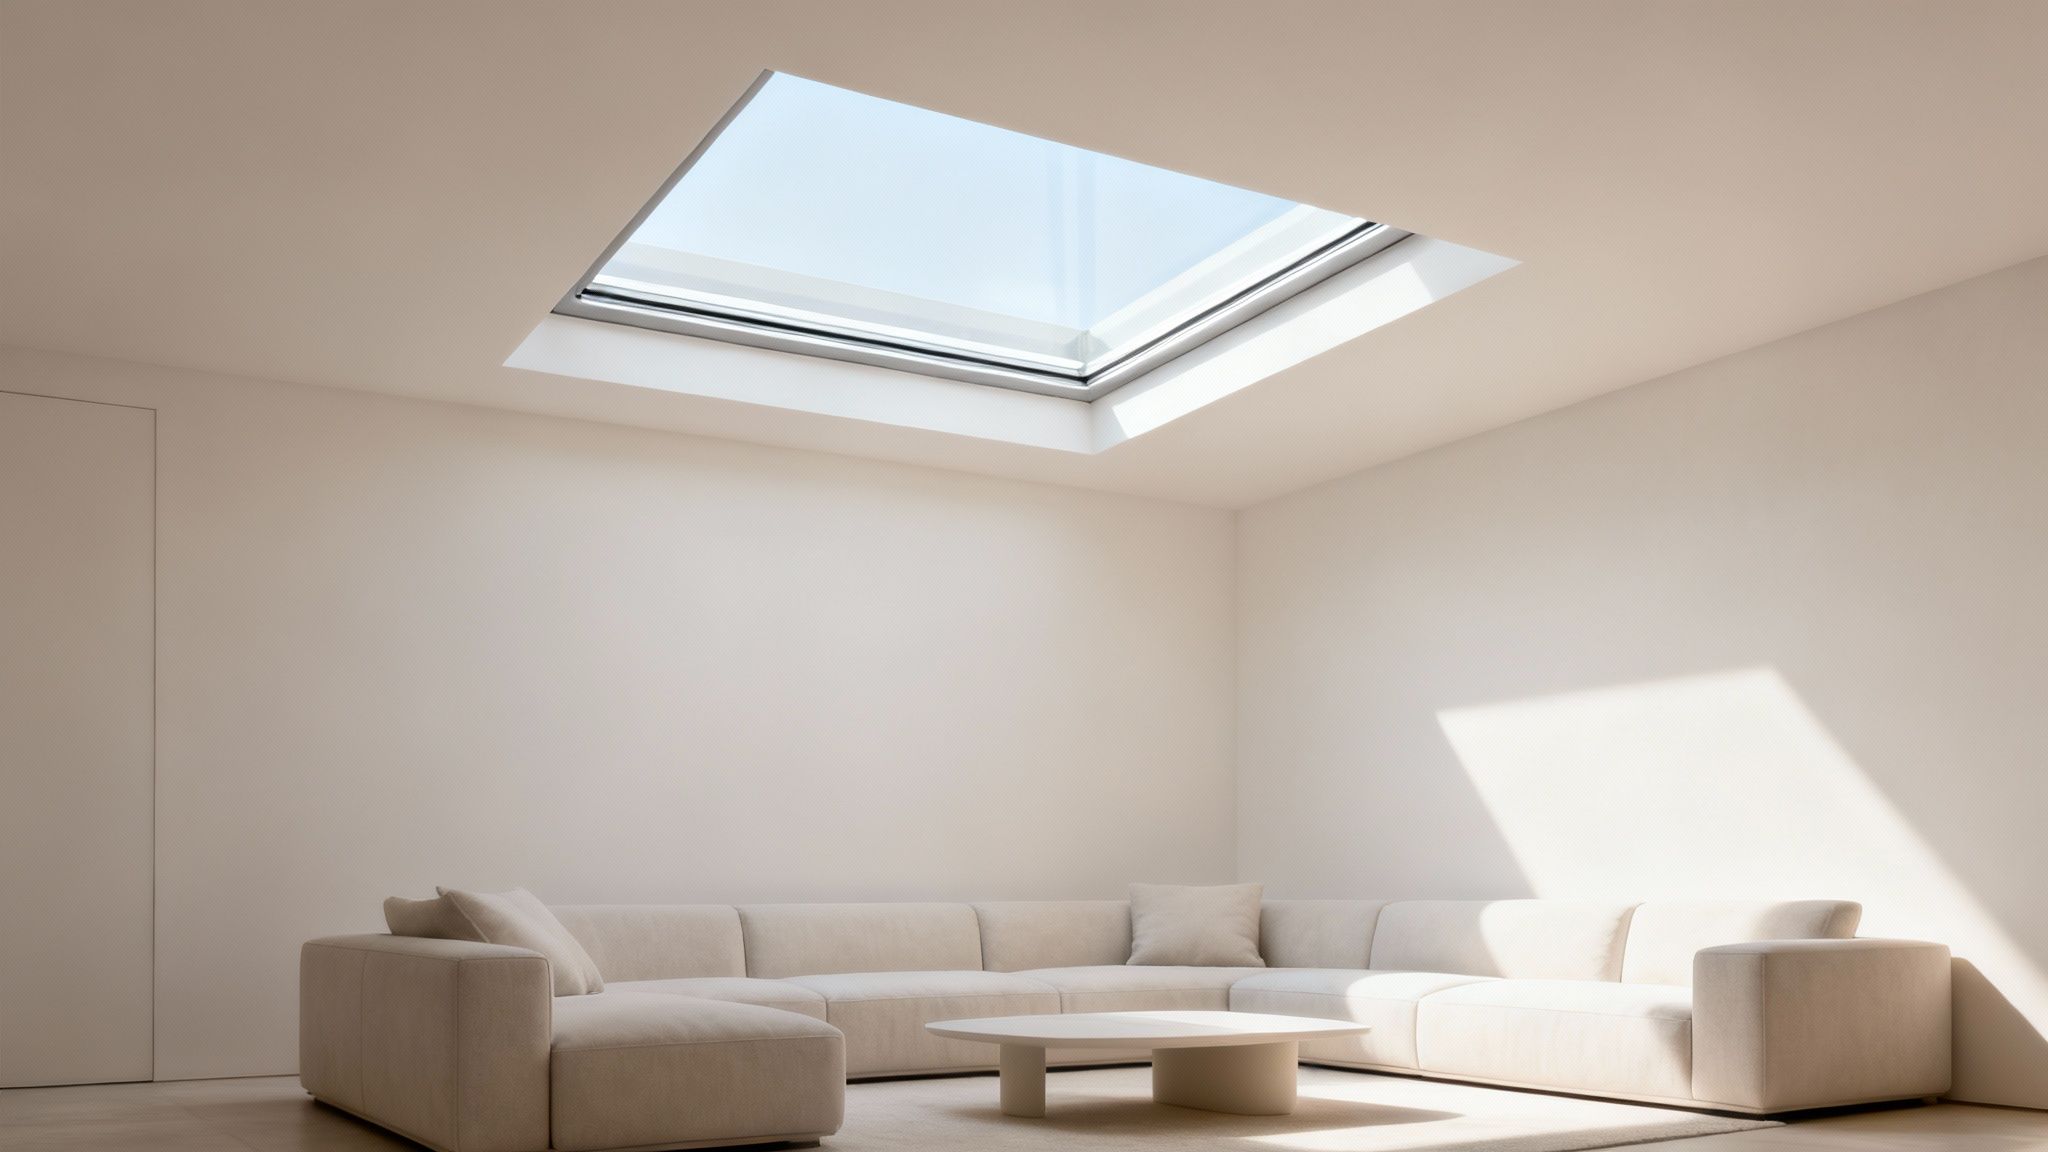
Installing a skylight is more than just cutting a hole in your roof; it’s about fundamentally changing the feel of a room. A successful project can turn a dark, forgotten corner into the most inviting space in your house. This guide goes beyond the basic steps, digging into the real value of bringing natural light into your home with Vivid Skylights. We’re a leading supplier of premium double glazed fixed and operable skylights, and we’re passionate about making this incredible home improvement accessible to everyone with nationwide delivery across Australia.
Transform Your Home with Natural Light
Putting in a skylight is a smart move. It’s an investment that pays you back in property value, lower energy bills, and a better atmosphere every single day. This guide will walk you through the process, focusing on our Vivid Skylights double-glazed fixed and operable models—including both electric and solar powered options—all engineered specifically for tough Australian conditions. As a leading nationwide supplier, we get our high-performance skylights delivered right across Australia, so any homeowner can access a quality daylight solution.
Whether you’re a seasoned DIYer looking for a weekend project or you’re planning to bring in a professional, we’ve got you covered. We’ll take you through everything from the initial site check to the final commissioning, giving you the confidence to get a flawless, leak-free result.
The Vivid Skylights Advantage
Here at Vivid Skylights, we specialise in products built for performance and longevity. As a leading supplier of double glazed fixed and operable skylights, our products don’t just let light in; they’re designed to improve your home’s thermal comfort and energy efficiency.
What sets our range apart?
Double Glazed Glass: This is non-negotiable for us. It provides brilliant insulation, helping to keep your home cooler in summer and warmer in winter.
Fixed and Operable Models: You can choose from our simple, elegant fixed skylights or opt for fresh air with our electric and solar-powered operable versions.
Robust Aluminium Frames: Our sturdy, black powder-coated frames are built to handle whatever the weather throws at them and are designed to prevent water pooling.
Nationwide Delivery: It doesn’t matter where you are in Australia. We can deliver our premium fixed, electric, or solar powered skylights straight to your door.
The push for natural home enhancements is definitely on the rise. In Victoria, where Vivid Skylights is proud to serve homeowners across bayside, east, and south-east Melbourne, the rooftop solar boom has also sparked more interest in skylights. By the end of the first half of 2025, Victoria had hit 5.4GW of installed rooftop solar capacity. This surge goes hand-in-hand with homeowners looking for natural light solutions to offset rising energy costs.
A well-planned skylight installation does more than brighten a room; it enhances your quality of life. The psychological and aesthetic benefits of natural light are huge, making this a project that rewards you every single day. You can explore the many benefits of skylights in our detailed article.
If installing a skylight is just one piece of a bigger puzzle, looking into whole home renovations can give you a complete picture of how to transform your living space.
To give you a head start, the table below offers a quick snapshot of what to expect from your installation project.
Skylight Installation Project At a Glance
This table breaks down the key phases of installing a Vivid Skylight, giving you a realistic idea of the time and skills involved at each step.
| Installation Phase | Typical Duration | Required Skill Level |
|---|---|---|
| Site Assessment & Planning | 1-2 hours | Beginner |
| Cutting & Framing Opening | 3-5 hours | Intermediate |
| Fitting Skylight & Flashing | 2-4 hours | Intermediate |
| Waterproofing & Sealing | 1-2 hours | Intermediate |
| Finishing & Testing | 1-3 hours | Beginner |
This project is certainly achievable for a confident DIYer, but it’s crucial to be honest about your skill level, especially when it comes to working at heights and ensuring a perfect seal.
Planning Your Project for Success
A successful skylight installation begins long before you ever set foot on the roof. Honestly, this initial planning stage is probably the most important part of the whole job. It lays the groundwork for a smooth, safe, and—most importantly—leak-free project. I’ve seen it time and time again: rushing this step almost always leads to costly mistakes and serious headaches down the line.
Proper prep is more than just grabbing your tools. It’s about getting to know your home’s unique structure, understanding how the sun moves across your property, and being clear on the specific requirements of the skylight you’ve chosen. At Vivid Skylights, a leading supplier in Australia, we simplify this by supplying high-quality, double-glazed units designed for Aussie conditions. With nationwide delivery, you can get a premium fixed, electric, or solar powered skylight anywhere in Australia, ready to go.

Choosing the Perfect Location
Where you decide to put your skylight will completely change a room’s atmosphere and can even affect your home’s energy efficiency. It’s a real balancing act between what you want aesthetically and what your roof will actually allow.
First up, think about the sun’s path. Here in Australia, a north-facing skylight is the gold standard for consistent, soft light all day long, without cooking the room below. On the flip side, a south-facing one might bring in too much heat during summer, though it can be a nice bonus in winter. East and west-facing placements will give you an intense blast of light in the morning or afternoon.
Next, you need to get into your roof cavity and play detective. Grab a torch and see what’s lurking above the ceiling.
Roof Trusses and Rafters: Standard timber framing is usually spaced 600mm or 900mm apart. The goal is to fit your skylight neatly between these supports to avoid cutting into major structural beams.
Electrical Wiring: Keep an eye out for any cables running through your chosen spot. If you find any, you’ll need a licensed electrician to reroute them safely.
Plumbing and Ducting: Vents, pipes, or HVAC ducts can also throw a spanner in the works. Moving these is often a much bigger, more expensive job.
Planning isn’t just about dodging problems; it’s about unlocking potential. A carefully chosen location ensures your new skylight delivers the best possible light and enhances the room’s feel without compromising your home’s structural integrity.
Assembling Your Tools and Materials
There’s nothing worse than having to stop mid-job to run to the hardware store. Having everything you need on hand from the get-go makes the entire process safer and more efficient. A well-prepped toolkit is the sign of a well-planned project. While every installation has its quirks, here’s a solid checklist of what you’ll generally need.
Essential Gear Checklist:
Safety Equipment: A sturdy ladder, safety harness, non-slip boots, safety glasses, and gloves. These are non-negotiable.
Measuring & Marking: A tape measure, chalk line, spirit level, and a trusty pencil are essential for getting it right.
Cutting Tools: You’ll likely need a reciprocating saw or circular saw for the roof opening, and a plasterboard saw for the ceiling inside.
Fastening Tools: A drill with a good set of bits, and either a nail gun or a hammer.
Waterproofing: High-quality, neutral-cure silicone sealant and a caulking gun are your best friends for a watertight finish.
To make things easier, Vivid Skylights includes a purpose-built flashing kit with every skylight, designed specifically for tiled roofs. This integrated system is engineered to create a perfect seal, taking a lot of the guesswork out of the waterproofing process. If you have a different roof type, you may need a custom flashing solution. You can get a better idea of what’s involved by checking out our guide on the overall https://vividskylights.com.au/skylight-installation-cost/.
Navigating Permits and Regulations
Finally, here’s a step that’s too often forgotten: checking with your local council about permits. While many basic skylight installations might not need a permit, any job that involves structural changes—like cutting a rafter—almost certainly will. It’s always better to make the call and find out for sure.
Building codes vary from council to council, but the core principles of structural integrity and safety are universal. Before you start, it’s worth understanding the types of rules that govern these projects. Check with your local council as they will highlight the importance of sticking to our local Australian standards.
A quick call to your council is all it takes to avoid potential fines and compliance headaches down the track.
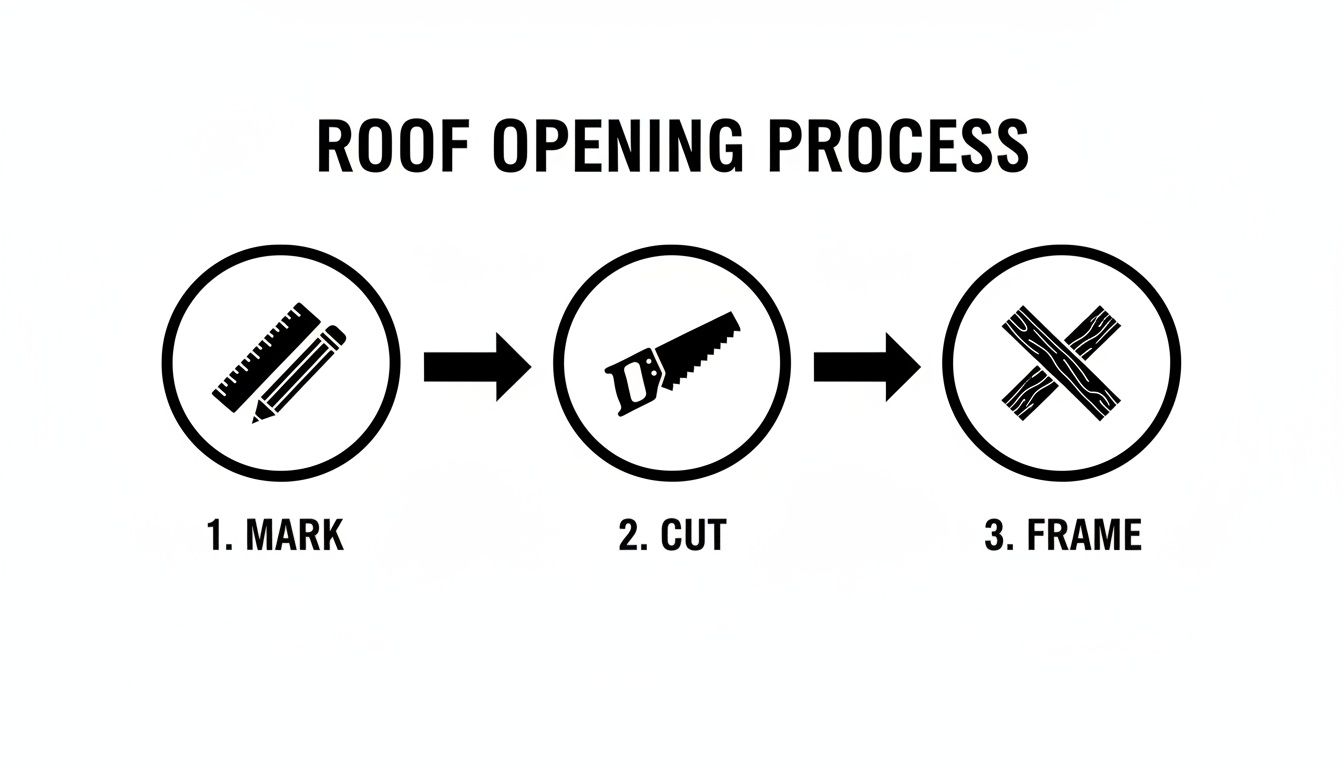
Cutting and Framing Your Roof Opening
This is where the real work begins—and the transformation truly starts. With all the planning done, it’s time to get hands-on and create the space for your new Vivid Skylight. The whole process hinges on precision, patience, and a healthy respect for your home’s structure. Your goal is a clean, perfectly sized opening that will seat your skylight securely for a professional, weathertight finish.
Don’t rush this part. The accuracy of your cuts sets the stage for everything that follows, from fitting the frame to waterproofing the flashing. A well-measured and cleanly cut opening makes the rest of the job a whole lot smoother. This is the moment your vision starts taking physical shape.
Marking Your Cutting Lines with Precision
Before a single cut is made, you need to mark out your opening perfectly. It’s a two-part job that starts inside the house, right under where you want the skylight to be.
First, drive four long screws or nails up through the ceiling plasterboard at each corner of your planned interior opening. These will act as your guideposts when you get up on the roof. Once you’re outside, you’ll see the four points poking through.
Now, grab a chalk line and snap straight, crisp lines between those points to form a perfect rectangle. This is your cutting guide for the roof itself.
Pro tip: Always double-check your measurements against the skylight’s rough opening specs. This is critical. Too small, and the skylight simply won’t fit. Too large, and you’re creating a world of pain for yourself with structural and waterproofing headaches.
Adapting Your Technique for Different Roof Materials
The way you cut the opening is dictated entirely by your roofing material. A tile roof is a different beast to a metal one, and each requires its own technique to avoid damaging the surrounding area.
For Tiled Roofs: Your first job is to carefully remove the tiles inside your marked area, plus a few rows around it. This gives you clear access to the battens or rafters underneath and stops you from accidentally cracking nearby tiles. Stack them somewhere safe; you’ll need them later.
For Metal Roofs (e.g., Colorbond): An tin snips or a nibbler is your best friend here. Go slowly and follow your chalk lines with a steady hand. Make sure you’re kitted out with proper safety gear—this job leaves dangerously sharp edges.
Once the outer roofing is off, you can use a reciprocating saw or circular saw to cut through the roof sarking and decking. With that done, you’ll have a clear view of the rafters below.
Constructing the Light Shaft and Reinforcing Rafters
With a hole in your roof, you can now see exactly how the opening lines up with the ceiling below. The next step is to build the “light shaft” (or “light well”)—the tunnel that connects the two and funnels all that glorious sunlight down into your room.
You’ve got a couple of choices for the design:
Straight Shaft: The walls are built perpendicular to the ceiling. This creates a direct, focused column of light.
Splayed Shaft: The walls are angled outwards from the skylight down to the ceiling. This spreads the light over a larger area and can make the room feel much bigger and more open.
Whichever style you choose, the shaft is framed with timber, essentially creating a box that connects the roof rafters to the ceiling joists. If you’re lucky, your skylight fits neatly between two existing rafters. More often than not, though, you’ll need to cut a rafter to make way for the skylight’s width.
If you have to cut a rafter, reinforcing the structure is non-negotiable. You do this by installing “headers” and “trimmers”—these are horizontal timber beams that run between the adjacent, uncut rafters. They effectively transfer the load the cut rafter was carrying, which is crucial for maintaining your roof’s structural integrity. Skipping this step is asking for trouble and can lead to serious issues like roof sag down the track. For a more detailed walkthrough on this, check out our guide on how to fit a roof window.
This reinforcement ensures your new Vivid Skylight is a secure, safe, and lasting addition to your home. For renovators in Melbourne specifying energy-efficient options, Vivid’s robust black powder-coated frames and motorised openers align perfectly with the national trend toward smarter homes. Installing skylights can significantly cut daytime electricity needs by enhancing illumination, a benefit for the up to 40% of Australian homes that lack sufficient natural light. Driven by net-zero pushes, skylight permits in Australia rose 18% from 2019-2024, with Victoria alone issuing over 12,000 units in that period. This commitment to efficiency is why so many architects and builders across Australia choose Vivid Skylights, knowing we deliver nationwide.
Mastering Skylight Fitting and Waterproofing
Alright, you’ve got the opening framed out perfectly. Now comes the part where precision really counts. Fitting the skylight unit and getting the flashing right is, without a doubt, the most critical stage of the whole job.
This is where your patience pays off. A perfect fit means a completely watertight seal, turning your new skylight into a feature you’ll love, not a leak you’ll constantly worry about. Get this right, and you’re not just protecting your home from the elements—you’re also validating your warranty.
The goal is straightforward: create a seal that water simply can’t penetrate. This isn’t about just blobbing on sealant; it’s a methodical process of integrating your Vivid Skylight into the roof. Let’s walk through how to seat the tough aluminium frame and install the supplied flashing kit—a system designed from the ground up to handle harsh Australian weather for years to come.
Seating the Skylight Frame Securely
First up, let’s get the skylight itself in place. Carefully lower the unit into the opening you prepared. The frame should sit flush and level on your roof deck or curb. Before you grab any fasteners, take a moment. Check that it’s perfectly square and that there are no gaps between the frame and the roof surface.
Once you’re happy with the fit, use the fasteners provided to secure the skylight to the roof structure. Drive the screws through the pre-drilled holes in the frame, making sure they get a solid bite into the timber rafters and headers below. This physical connection is what will hold your skylight firm against wind and weather, so don’t rush it.
One of the most common mistakes I see is over-tightening the fasteners. Cranking them down too hard can actually warp the aluminium frame and compromise the seal. You’re aiming for snug and secure, not crushed. A firm, even pressure is all you need.
With the skylight firmly seated, it’s time to shift your focus to the most important part of the job: waterproofing. This is a multi-layered approach designed to ensure that even the most determined, wind-driven rain can’t find a way in. The whole process is built on the foundation of a well-prepared opening.
As you can see, methodical work is key. Accurate marking, clean cutting, and solid framing are the non-negotiables that lead to a successful fit.
Installing the Supplied Flashing Kit
Vivid Skylights provides a purpose-built flashing kit designed specifically for tiled roofs. This takes all the guesswork out of achieving a professional, leak-free finish. Flashing works by creating channels that direct water down and around the skylight opening, using gravity and overlapping layers to form a durable shield.
The installation has to be done in a specific sequence, always starting from the bottom and working your way up.
Front Apron (Sill Flashing): This is the first piece to go on, sitting at the bottom edge of the skylight. It needs to be carefully moulded to the profile of your roof tiles and tucked underneath the first course of tiles below the unit.
Side Channels: Next are the side flashings. These channels run vertically up the sides of the skylight frame, sliding underneath the tiles on either side. Each piece interlocks or overlaps, creating a continuous barrier against water ingress.
Back Saddle (Head Flashing): The final piece is the saddle flashing, which goes at the top of the skylight. This is a larger piece designed to catch any water flowing down the roof from above and guide it safely out and around the side channels.
After all the flashing components are in place, you can start reinstalling the roof tiles you removed earlier. They will need to be cut to fit snugly around the flashing, ensuring you have complete coverage and a seamless, professional look. For a really deep dive into this, our dedicated roof flashing installation guide is an invaluable resource.
Ensuring a Leak-Free Result
Following these flashing installation steps correctly is exactly how you validate Vivid Skylights’ 10-year leak-free warranty. The entire system is engineered to perform flawlessly when it’s installed as directed. As a leading supplier of double glazed fixed and operable skylights, we’ve put a lot of work into engineering our products for durability and your peace of mind.
Whether you’ve chosen an electric or a solar-powered operable skylight, the fundamental waterproofing principles are exactly the same.
And because we can deliver our skylights to every corner of Australia, homeowners from Melbourne to Perth can benefit from a high-quality, weather-tight daylight solution. Taking the time to master this fitting and waterproofing stage is what ensures your investment is protected and will perform beautifully for decades.
Wiring Your Electric or Solar Skylight
With your skylight snugly fitted and fully waterproofed, it’s time for the final piece of the puzzle: connecting the power. If you’ve opted for one of Vivid Skylights’ smart electric or solar-powered models, this is the exciting part where its best features come to life, giving you fingertip control over your home’s light and ventilation.
Vivid Skylights is a leading supplier of double-glazed fixed and operable skylights, and our motorised units are some of the most sophisticated on the market. We deliver nationwide, so no matter where you are in Australia, you can bring this level of convenience into your home.
The wiring process really comes down to which model you choose—electric or solar. Each is engineered for a different scenario, but both deliver incredible ease of use.
Connecting Your Electric Operable Skylight
An electric skylight needs to be wired directly into your home’s mains power, and this is a job that absolutely must be done by a licensed electrician. I can’t stress this enough; it’s a non-negotiable for safety and legal compliance.
Your sparky will run the necessary wiring from your switchboard, up into the roof cavity, and connect it straight to the skylight’s motor. This hardwired connection guarantees a steady, reliable power supply, making it a perfect fit for new builds or major renovations where running new cables is already part of the plan.
Setting Up Your Solar Powered Skylight
For anyone retrofitting a skylight into an existing home, the solar-powered operable skylight is a game-changer. It’s a brilliant, self-sufficient unit that needs no internal wiring at all, which radically simplifies the installation.
The skylight has a small, integrated solar panel that trickle-charges an internal battery. That battery is what powers the motor, meaning the whole unit operates completely off-grid. All you have to do is make sure the solar panel has a clear, unobstructed view of the sky. No electrician needed, no fuss.
It’s a seriously clever bit of engineering. This design makes adding motorised ventilation to any room incredibly straightforward, sidestepping the cost and hassle of running new wires through an established home.
Syncing Smart Features and Controls
Once the power is sorted, the last step is commissioning the smart features. This is where you’ll sync the remote control and, crucially, activate the built-in rain sensor—a standard feature on all of Vivid Skylights’ operable models.
That little sensor is your peace of mind. The moment it detects rain, it automatically closes the skylight, so you never have to worry about being caught out by a sudden downpour. The syncing process is simple, usually just a sequence of button presses on the remote and the unit itself, all clearly laid out in the instructions.
This is also when you’ll pair any optional extras you’ve added, like motorised block-out blinds or fly screens. Getting these synced to the remote gives you the ultimate command centre for managing light, airflow, and comfort.
This kind of integrated home tech is becoming more and more common. We’re seeing a huge boom in home batteries across Australia, with an expected 85,000 units to be installed in 2025 alone—that’s a 191% jump. Smart features like our electric and solar skylights tie in perfectly with this trend towards intelligent energy management. In fact, after the 2022 floods in Melbourne, installations of opening skylights shot up 22% as people looked for better airflow and more resilient homes.
Finishing Your Project and When to Call a Pro
The final details are what separate a good skylight installation from a great one. With the skylight secure and weatherproofed, your focus can finally shift inside. This is where you’ll finish the light well and make your new feature look like it was always part of the home.
This last stage is all about seamless integration. It involves plastering the light shaft walls, carefully taping and sanding the joins, and then applying a fresh coat of paint to match your ceiling. Take your time here. A bit of patience ensures the result is a clean, architectural feature, not just a box cut into the ceiling.
The Final Commissioning Checklist
Before you pack away your tools, it’s crucial to run a few final checks. This simple quality control step confirms everything is working exactly as it should and gives you total peace of mind for the years to come.
Perform a Water Test: This one is non-negotiable. Grab a garden hose and give the area around the skylight a thorough soaking for several minutes. Afterwards, head inside and check for any hint of moisture around the frame or in the light well. It’s far better to find a tiny issue now than during the first major downpour.
Test Operable Functions: If you’ve installed one of Vivid Skylights’ advanced electric or solar-powered operable skylights, run it through its paces. Open and close it a few times with the remote to make sure the motor is operating smoothly and quietly.
Verify Sensor Activity: For the operable models, you’ll want to test the rain sensor. Just a few drops of water on the sensor should trigger the skylight to close automatically. This little test confirms its most critical safety feature is ready to go.
Knowing When to Hire a Professional
While this guide is here to empower confident DIYers, it’s just as important to recognise when a project is better left to the pros. Being honest about your skill level and the complexity of the job is the smartest decision you can make.
There’s no shame in calling in a professional. A successful project is one that’s completed safely and to a high standard, no matter who does the work. Your home is your biggest asset, and protecting its structural integrity is paramount.
Consider hiring a pro if you find yourself in any of these situations:
Complex Roof Structures: If your roof has an unusual pitch, multiple layers, or needs significant structural modifications like cutting through several rafters, a professional is essential.
Unfamiliar Roofing Materials: Not comfortable working with slate, tricky metal profiles, or membrane roofing? An experienced roofer will have the specialised tools and knowledge needed to get it right.
Discomfort with Heights: Safety is the number one priority. If you aren’t completely confident working on a ladder or up on the roof, it is simply not worth the risk.
Lack of Time: A proper skylight installation takes time. If your schedule is tight, rushing the job can lead to critical mistakes—especially during the waterproofing stage.
As a leading supplier of double glazed fixed and operable skylights, we at Vivid Skylights can deliver our premium products nationwide across Australia. We’re here to give you the best starting point for a flawless installation, whether you do it yourself or bring in an expert.
Your Top Skylight Installation Questions Answered
When you’re thinking about bringing more natural light into your home, a few questions always pop up. It’s completely normal. Drawing from our experience as a leading supplier of skylights nationwide, we’ve put together some straightforward answers to the questions we hear most often.
How Long Does a Typical Installation Take?
For a standard installation on a tiled roof, you should plan for a full day. That’s usually enough time for an experienced installer to handle everything properly—from cutting the opening and framing it out, to fitting the skylight and flashing kit, and then making sure it’s all completely waterproof.
Of course, if the job is a bit more complex, like if it involves structural changes or you’re installing multiple skylights, it could easily stretch into a second day. It’s always better to allow for a little extra time than to rush it.
Can I Install a Skylight on a Low-Pitch Roof?
Absolutely. Our skylights are designed to work on almost any roof, including those with a low pitch or even flat roofs.
The key to a successful low-pitch installation is building a custom curb on-site. This small, raised frame creates the slope needed for water to drain away effectively, preventing any pooling. While our flashing kits are made for standard pitched tile roofs, any good roofer can fabricate custom flashing to ensure a perfect, watertight seal for your specific roof.
It all comes down to versatility. Whether your roof is steep or nearly flat, a Vivid Skylight can be adapted for a perfect, leak-free fit when handled by a skilled professional.
What Is the Difference Between Electric and Solar Operable Skylights?
The main difference is simply where they get their power. As a leading supplier, we offer both double glazed electric and solar powered options.
Electric Skylights: These are hardwired directly into your home’s electrical system. Because of this, the work must be done by a licensed electrician to meet safety standards.
Solar Operable Skylights: This option is completely self-sufficient. A small, built-in solar panel charges an internal battery, which then powers the motor to open and close the skylight. This is a game-changer for retrofits because it means no internal wiring is needed, making the installation process much simpler and quicker.
At Vivid Skylights, we are a leading supplier of double glazed fixed, electric, and solar-powered operable skylights, and we deliver our high-quality products nationwide across Australia. Explore our full range and find the perfect daylight solution for your home at https://vividskylights.com.au.