
For plenty of Aussies, the path to a brighter home often starts with a Saturday morning trip to the local hardware store. Kicking off a search for skylights Bunnings offers is a common first step, and for good reason. They stock a range of accessible, off-the-shelf options that are a solid fit for standard home projects, making them a go-to for DIYers and those sourcing products for their tradie.
Your Essential Bunnings Skylight Buying Guide
Walking into the lighting aisle can feel a bit overwhelming, but the choice you need to make is simpler than it looks. The whole journey really boils down to one question: are you going to tackle this yourself, or are you hiring a professional? That one decision shapes everything else, from your budget to your timeline.
Bunnings has you covered either way, with skylight kits designed for the competent handyperson sitting right next to products a carpenter or roofer would happily install. The trick is to be really honest with yourself about your skills, the tools you have, and how comfortable you are working up on a roof before you commit.
Key Factors to Consider Early On
Before you dive into the nitty-gritty of product specs, nail down these three fundamentals first. They’ll guide your entire purchase.
- Installation Approach: Are you genuinely prepared to cut a hole in your own roof? If the answer is no, then your job is to focus on picking the right product and finding a qualified installer to handle the tricky part.
- Budget Reality: The price on the box is just the beginning. You have to factor in the cost of labour if you’re hiring someone, plus extra materials like timber for framing and any tools you might need to buy or rent.
- Skylight Type: Let your home’s needs dictate the product. A dim hallway might only need a simple, affordable tubular skylight, while a big, open-plan living area could be transformed by a much larger fixed unit.
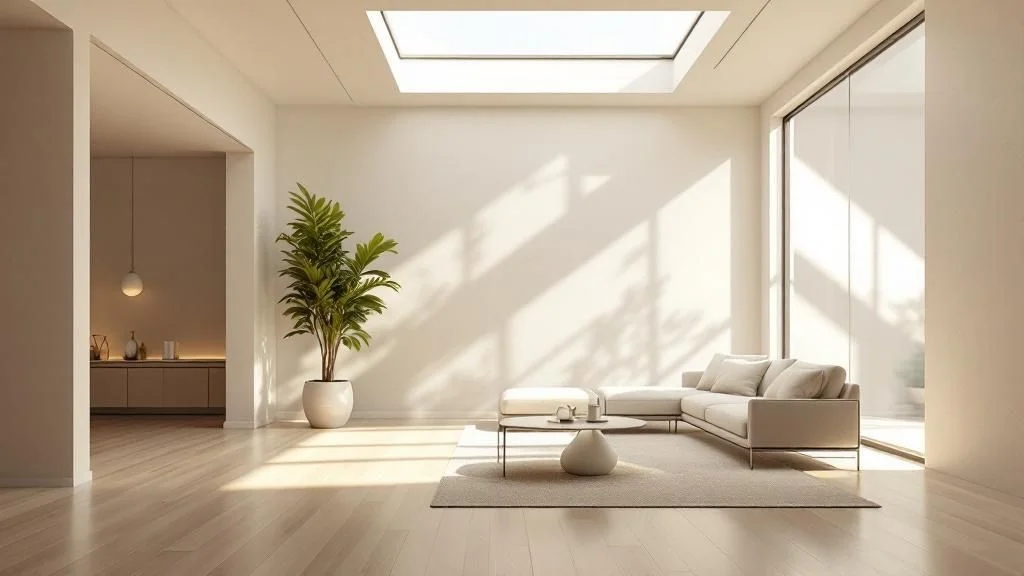
Bringing more natural light into your home is a fantastic way to improve the feel of a space and even boost energy efficiency. Prices for the units themselves start from a few hundred dollars, depending on the size and features you’re after. A typical installation can take anywhere from one to two days, really depending on your roof’s structure. If you want to dig deeper into the benefits, The Eco Experts has some great insights on daylighting.
Think of it this way: a Bunnings skylight is like a flat-pack kitchen. You can buy all the components off the shelf, but the final quality and success of the project depend entirely on how well it’s put together and installed.
To give you a head start, here’s a quick overview of the main types of skylights Bunnings typically has in stock.
Bunnings Skylight Options At a Glance
This table breaks down the common options you’ll find on the shelves, giving you a ballpark idea of cost, difficulty, and where they work best.
| Skylight Type | Typical Price Range | DIY Difficulty | Best For |
|---|---|---|---|
| Tubular Skylight | $250 – $600 | Moderate | Hallways, bathrooms, walk-in robes |
| Fixed Skylight | $400 – $900+ | High | Living rooms, kitchens, open-plan areas |
| Ventilating/Manual | $900 – $2,200+ | High | Bathrooms, laundries needing fresh air |
Think of this as your starting point. It helps you quickly narrow down what to look for based on the room you want to brighten and whether you’re planning a DIY weekend or calling in the pros.
Choosing the Right Type of Skylight
Walking into the lighting aisle at Bunnings can feel a bit like you’re about to sit a pop quiz on building terminology. With all the different boxes showing off various designs and features, it’s easy to get overwhelmed. But it all gets simpler once you realise each type of skylight is just a tool designed to solve a specific problem in your home.
Think of it this way: you wouldn’t use a garden hose to put out a house fire, and you definitely wouldn’t use a fire hose to water your petunias. Every tool has its purpose. It’s the same deal with skylights—the trick is to match the right one to the right room and what you need it to do.
The range of skylights Bunnings has on offer generally falls into three main buckets. Each one brings natural light indoors in a completely different way, catering to different spaces, budgets, and needs. Let’s break them down so you can figure out the perfect fit for your project.
Tubular Skylights: The Light Funnel
Imagine you need to get sunlight into a dark, windowless nook in your house, like a walk-in wardrobe or a downstairs toilet. A regular window is out of the question. This is where tubular skylights really shine—literally. They work like a periscope for sunlight.
A small, clear dome on your roof captures daylight and funnels it down a highly reflective, flexible tube. This tube snakes its way through your roof cavity, bending around trusses and pipes, before ending at a discreet diffuser panel on your ceiling.
- Best For: Small, enclosed spaces like hallways, laundries, ensuites, and walk-in robes.
- Key Advantage: Their flexibility is a lifesaver for tricky installations where there’s no straight shot from the roof to the ceiling. They’re also one of the most budget-friendly options.
- Consideration: They give you a diffuse, soft light, not a direct view of the sky.
This design is incredibly clever at channelling light into areas that would otherwise be completely dependent on electricity during the day.
Fixed Skylights: The Classic Roof Window
When you picture a classic skylight, you’re probably thinking of a fixed model. These are basically windows for your roof—flat, sealed units designed to let in the absolute maximum amount of daylight and give you a clear view of the sky above.
These are the real workhorses of the skylight world, perfect for transforming the big, central areas of your home. A well-placed fixed skylight in a living room or kitchen can make the whole space feel bigger, brighter, and more connected.
Think of a fixed skylight as adding a fourth dimension to a room. It doesn’t just add light; it adds a sense of height, openness, and connection to the outside world that vertical windows can’t always achieve.
Because they’re completely sealed, they offer excellent thermal performance, especially when you opt for quality glazing. Their simplicity is their strength—no moving parts means fewer things that could potentially go wrong down the track.
Ventilating Skylights: The Multitasker
Now, think about rooms that are always battling moisture and stuffy air, like kitchens and bathrooms. Just adding light isn’t enough; you need ventilation to deal with steam and cooking smells. This is exactly what a ventilating (or opening) skylight is for.
These units give you all the benefits of a fixed skylight but add the functionality of a window, letting you open them up to get fresh air circulating. Most of the models you’ll find at Bunnings are manually operated with a winder, making them a practical way to seriously improve airflow.
Why Choose a Ventilating Skylight?
- Moisture Control: They are brilliant for letting out steam from the bathroom after a hot shower or clearing cooking fumes from the kitchen.
- Passive Cooling: On a mild day, cracking open a skylight can create a natural chimney effect, drawing warm air up and out of your home.
- Fresh Air: They’re a fantastic way to air out a room without having to worry about privacy or security at ground level.
While they’re usually the most expensive off-the-shelf option, that dual function often justifies the cost in rooms that need both light and air. For a deeper dive into the various models and features out there, you can explore this overview of the different types of skylights available in Australia. Understanding the full spectrum of options, from basic to premium, helps you make a truly informed decision for your home.
How to Assess Your Home for a Skylight
Before you even think about heading to Bunnings or browsing online, the most important thing you can do is spend a few minutes assessing your own home. This isn’t about becoming a professional roofer overnight; it’s about being an informed buyer. A quick check now will help you understand what you actually need, sidestep common headaches, and walk out with a product that will genuinely work for your space.
Think of it like measuring a room before you buy a new sofa. You wouldn’t just guess and hope it fits. A skylight is a permanent addition, so a bit of upfront homework ensures you get it right the first time.
What Is Your Roof Made Of?
First up, you need to know what your roof is made of. This is crucial because it dictates the type of flashing kit you’ll need. Flashing is the custom-shaped metal barrier that creates a waterproof seal between your skylight and your roof—get this wrong, and you’re asking for trouble.
- Tiled Roof: If you have concrete or terracotta tiles, you’ll need a specific flashing kit designed to integrate with the overlapping pattern of the tiles. It’s shaped to tuck under and over the tiles to channel water away safely.
- Metal Roof: For roofs made of corrugated iron or a profiled sheet like Colorbond, you’ll need a flashing kit that matches that exact profile. It needs to fit snugly against the ribs and pans of the metal sheeting to prevent any water from getting in.
Bunnings sells flashing kits for both of these common roof types. Grabbing the wrong one is a guaranteed recipe for leaks down the track, so be absolutely certain what’s up there before you buy.
The diagram below can help you start thinking about where a skylight might best fit in your home.
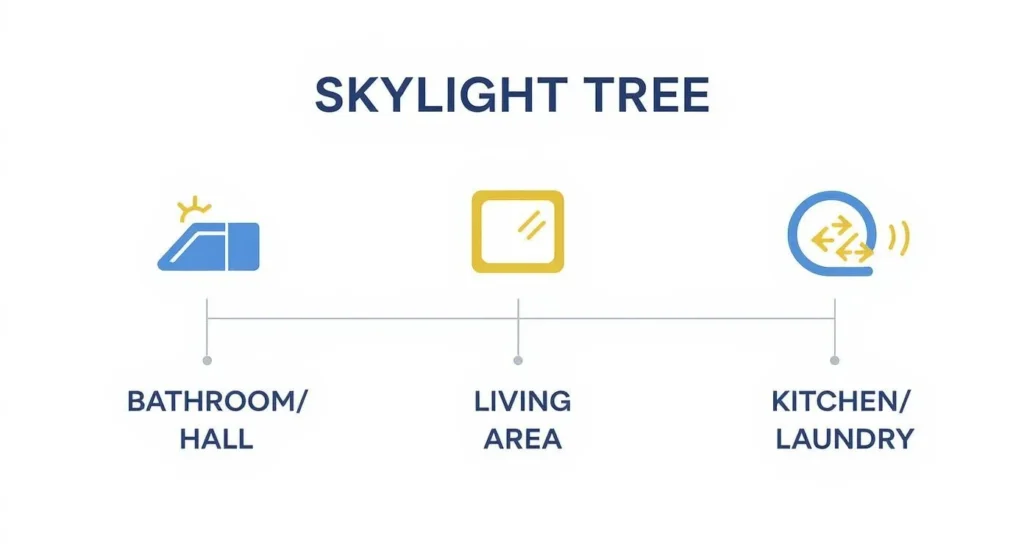
This kind of decision tree is a great starting point, linking common room types to the most suitable skylight to make sure the light works for the space.
Peeking Inside Your Roof Cavity
Next, it’s time to see what’s lurking between your ceiling and your roof. Grab a torch, pop your head up through the manhole, and have a good look around for any potential roadblocks. You’re searching for anything that could get in the way of the skylight itself or the light shaft that connects it to your ceiling.
Keep an eye out for these common obstacles:
- Roof Trusses: These are the big timber or steel supports holding up your roof. Cutting a truss is a massive structural no-no and absolutely not a DIY job—it requires an engineer.
- Plumbing Pipes: It’s common for vent pipes from bathrooms or kitchens to run through the roof space.
- Electrical Wiring: You’ll likely see power cables running across the joists.
- Ducting: Air conditioning or heating ducts can often take up a lot of space.
If your dream spot for the skylight is blocked, you’ll either have to pick a new location or get quotes from tradies to safely move the obstruction.
A quick 10-minute look inside your roof space can save you 10 hours of frustration during installation. What you can’t see is often what complicates the job the most.
A proper home assessment also means thinking about how to protect your roof system in the long term, especially with Australia’s wild weather. A healthy roof is the best foundation for a successful, leak-free skylight that will last for years.
Understanding Roof Pitch and Orientation
Finally, think about the angle of your roof and which way it faces. The roof pitch, which is just a term for its steepness, can affect which skylight models will work. Most products you’ll find at skylights Bunnings are designed for a standard pitch range, but if your roof is very flat or super steep, you might need a specialised solution.
The orientation of your roof has a massive impact on the quality and amount of light you’ll get inside.
- North-Facing: In Australia, this is the jackpot. It delivers beautiful, consistent, and soft indirect light all day long without the harsh glare or heat.
- East-Facing: Perfect for morning light. This is great for kitchens and bedrooms to help you wake up with the sun.
- West-Facing: Gives you strong, direct sun in the afternoon, which can really heat a room up in summer. Something to be mindful of.
- South-Facing: Offers the least amount of direct light. This can be ideal for home offices or art studios where you want to avoid glare on screens or artwork.
Once you’ve got this info—your roof type, a clear path in the roof cavity, and an idea of your roof’s orientation—you can walk into Bunnings and choose a skylight with real confidence.
DIY Installation vs Hiring a Professional
You’ve got the perfect skylight from Bunnings sitting in your trolley, and now you’re at a crossroads. Do you roll up your sleeves and tackle the installation yourself, or do you dial up a professional? This isn’t just about saving a few dollars; it’s a serious decision that pits your skills, time, and nerve against the cost of getting an expert in.
Going the DIY route can be incredibly satisfying. There’s a real sense of pride that comes from cutting a hole in your own roof and successfully flooding a room with natural light. The biggest driver for most people is saving on labour costs, which can easily match or even top the price of the skylight itself.
But let’s be clear: installing a skylight is a world away from putting together flat-pack furniture. You’re performing structural surgery on the most important protective layer of your home—the roof. The job demands precise cutting, proper framing, and, most critically, flawless waterproofing. A tiny mistake with the flashing can lead to a nagging leak, causing thousands in damage to your ceiling, insulation, and timber frame.
Evaluating Your DIY Readiness
Before you even think about climbing that ladder, it’s time for an honest chat with yourself. A successful DIY skylight installation requires more than just a can-do attitude. You need a specific skillset and a healthy respect for working at heights.
Are you genuinely comfortable on a pitched roof? You’ll need proper safety gear, like a harness and decent non-slip boots. You also need to know your way around basic carpentry to build a support frame (known as a “curb”) and be confident you can follow technical instructions to get the flashing perfect.
Think of it like this: A professional roofer has installed hundreds of flashings. They’ve seen how water behaves in every kind of storm and learned from experience. A DIYer is trying to get it 100% right on their first go, with their own home on the line.
For those keen to see what’s really involved, digging into a detailed guide to DIY skylight installation can give you a sobering preview of the tools, techniques, and potential headaches you’ll face. It’s the best way to make an informed call on whether to tackle it yourself or leave it to an expert.
The Professional Advantage
Hiring a professional roofer or carpenter to fit your skylight brings one massive benefit: peace of mind. An experienced installer has seen it all. They can spot potential issues a mile off, deal with unexpected surprises like hidden wiring, and guarantee the whole thing is structurally sound and completely watertight.
Professionals are also much faster, often knocking over a job in a single day that might take a DIYer a full weekend. Most importantly, they’re insured. If something goes wrong during the installation, their public liability insurance has your property covered. Plus, any reputable tradie will guarantee their workmanship, so if a leak does appear down the track, they’ll be back to fix it.
Whether you go it alone or hire a pro, it pays to be aware of the pitfalls. Learning about common renovation mistakes to avoid can help your project run smoothly from start to finish.
To make the choice clearer, let’s break down the two approaches side-by-side.
DIY vs Professional Skylight Installation Comparison
| Factor | DIY Installation | Professional Installation |
|---|---|---|
| Total Cost | Lower (cost of unit + tools) | Higher (cost of unit + labour) |
| Risk Level | High (leaks, structural error) | Low (insured & guaranteed work) |
| Time Commitment | High (1-3 days for a novice) | Low (often completed in one day) |
| Required Skill | Advanced (roofing, carpentry) | None (you just need to hire right) |
| Tools Needed | Extensive (power saws, drills, safety gear) | None (installer provides everything) |
| Warranty | Product warranty only | Product & workmanship warranty |
A popular middle-ground approach is to purchase one of the skylights Bunnings offers yourself and then hire a trusted local carpenter or roofer for the install. This lets you control the product choice while shopping around for a competitive labour quote, giving you a nice balance of control and security.
Ultimately, the right decision comes down to your confidence, your budget, and how much you value a guaranteed, leak-free result.
When to Look Beyond Bunnings for Skylights
Bunnings is an Aussie institution, no doubt about it. For countless home projects, their convenience and solid range of products are a lifesaver. When it comes to skylights Bunnings offers some great, accessible, off-the-shelf solutions that are a perfect fit for many straightforward jobs. But it’s important to know when your project’s needs might outgrow those generalist options.
Think of it like buying a suit. An off-the-rack suit from a department store works well for most people and most occasions. But for a truly perfect fit, superior fabric, and details tailored just for you, you head to a tailor. A specialist skylight supplier is the tailor in this story, crafting a customised fit for your home.
Bunnings’ success comes from providing these accessible solutions exceptionally well. Between 2015 and 2024, their total sales rocketed up by an impressive 98.9%, while their retail floor space only grew by 26.8%. As their investor briefings show, this incredible growth highlights their mastery of optimising core product ranges for the mass market. This strategy makes them a powerhouse for general DIY, but it also clearly defines the point where a specialist becomes the better choice.
Performance in Extreme Climates
Australia’s climate doesn’t pull any punches. From the scorching summer heat in Perth to frosty winter mornings down south, your home’s exterior is constantly under attack. This is where the gap between a standard skylight and a specialist one really shows.
Many off-the-shelf skylights use single-pane acrylic or basic glass. They do a fine job of letting in light, but they offer very little in the way of thermal insulation. That can lead to serious heat gain in summer, turning your living room into a greenhouse, and significant heat loss in winter, sending your energy bills through the roof.
A specialist supplier like Vivid Skylights, on the other hand, typically offers high-performance double glazing as standard.
Double glazing acts like a thermal barrier. The gap between the two panes of glass, often filled with an inert gas like argon, dramatically slows the transfer of heat. This keeps your home cooler in summer and warmer in winter, leading to real savings on your energy bills.
If you live in an area with extreme temperatures, investing in a double-glazed unit isn’t a luxury—it’s a long-term strategy for comfort and energy efficiency. The upfront cost is higher, but the year-round benefits often deliver a solid return on that investment.
Architectural and Sizing Needs
Standard homes with standard roof structures are well-catered for by the range of skylights Bunnings keeps in stock. But what if your home is a little different? Perhaps you have an architecturally designed home with a unique roof pitch, or you need a very specific size to slot in perfectly between exposed beams.
This is another area where specialist suppliers shine. They usually offer a much wider array of standard sizes and often provide custom manufacturing if you need something truly unique.
Consider a Specialist If:
- You need a non-standard skylight size to fit a specific architectural feature.
- Your project involves a low-pitch or flat roof, which needs a specialised design to ensure water runs off properly.
- You’re chasing a particular aesthetic, like a completely frameless look on the roofline, which is usually a feature of premium models.
Advanced Features and Integration
Skylight technology has come a long way, and so have the available features. While you can find basic ventilating models at Bunnings, specialists offer a whole suite of advanced integrations that can turn a simple roof window into a smart home feature.
These premium options often include:
- Motorised Openers: Open and close your skylight with the touch of a button.
- Rain Sensors: A real lifesaver for ventilating models, these sensors automatically close the skylight the moment it starts to rain.
- Integrated Blinds: Get total light control with block-out or light-filtering blinds built right into the skylight frame for a clean, seamless look.
- Superior Glazing Options: Access to things like Low-E (low-emissivity) coatings that block UV rays and boost thermal performance even further.
Choosing between a retailer and a specialist isn’t about one being “better.” It’s about matching the right product to your project. For a simple job in a mild climate, a Bunnings skylight is often the perfect, most cost-effective solution. But for homes with unique challenges, or for homeowners who prioritise peak performance and features, looking beyond the big-box store is a very smart move.
Common Questions About Bunnings Skylights
As you get closer to making a decision, a few final questions always seem to pop up. It’s completely natural. When you’re looking at a significant home improvement like the skylights Bunnings offers, you want to be sure you’ve covered all your bases. Let’s tackle some of the most common queries we hear from homeowners, with clear, straightforward answers to help you lock in your plans with confidence.
How Much Does It Cost to Get a Bunnings Skylight Installed?
This is the big one, and the answer really comes in two parts. First, you have the cost of the skylight itself, which you’ll pick up from Bunnings. This could be anything from around $200 for a simple tubular model to well over $800 for a larger fixed or opening skylight.
The second, and often larger, part is the installation bill. This is a separate cost. If you hire a professional roofer or carpenter to fit it, you can expect the labour to be anywhere from $500 to $1,500. That’s a big range, I know. It all depends on your location, how tricky your roof is (a steep tile roof is a lot more work than a low-pitch metal one), and if any structural framing is needed. It’s always a good move to get at least three itemised quotes from insured professionals.
Are Bunnings Skylights Good Quality?
Bunnings stocks reputable brands that are made to meet Australian building standards. When they’re installed correctly, they are reliable, durable, and won’t leak. It’s a common myth that the skylight unit is to blame for leaks; in reality, problems nearly always come back to a poor installation job, especially around the flashing.
For most typical Aussie homes and conditions, the quality is perfectly fine. But your specific situation really matters. If you live in a high-wind zone, a coastal area with salt spray, or you have very specific energy efficiency goals, a specialist product might be a smarter long-term investment. Things like standard double glazing and beefier frames can make a real difference in performance and durability.
A skylight’s final quality is a partnership between the product and the installer. A great unit fitted poorly will fail, while a standard unit fitted perfectly by a professional will perform reliably for many years.
Do I Need Council Approval to Install a Skylight?
For most straightforward, like-for-like skylight installations, you generally don’t need council approval. It’s often considered an ‘exempt development’—a minor renovation that doesn’t require a long-winded approval process.
However—and this is important—you should always check with your local council before you start any work. There are some key exceptions where approval is absolutely necessary. These usually include:
- Heritage-Listed Homes: Any change to a heritage property will need to go through a strict approval process.
- Bushfire-Prone Areas: If you’re in a designated bushfire zone, you’ll likely need to use specific fire-rated materials.
- Major Structural Changes: If the installation means cutting or altering roof trusses, you’ll need an engineer’s report and council approval.
A quick call to your local council’s planning department is the easiest way to get a definite answer and avoid any headaches or fines down the track.
Can a Skylight Make My Room Hotter in Summer?
Yes, it absolutely can. Any opening in your roof has the potential to increase heat gain, and that’s a massive consideration in the Australian climate. A standard, clear acrylic or single-pane glass skylight will let in both beautiful light and a whole lot of solar heat.
To minimise this unwanted greenhouse effect, placement is everything. Try to avoid putting it on a north or west-facing roof that gets blasted by the direct afternoon sun. For rooms where heat is a big concern, it’s also smart to look at skylights that come with integrated blinds. If you’re struggling to find a good off-the-shelf fit, our guide to finding a skylight blind Bunnings might give you some helpful alternatives.
For maximum thermal comfort, though, investing in a specialist double-glazed unit with a Low-E coating is the most effective way to block the heat while still letting all that lovely natural light pour in.
Ready to upgrade your home with beautiful, natural light without compromise? Vivid Skylights offers a premium range of double-glazed fixed and electric opening skylights designed for Australian conditions, complete with a 10-year leak-free warranty. Explore our high-performance solutions today at https://vividskylights.com.au.