

 A successful skylight installation doesn’t start with a saw on the roof. It starts with a good plan. This groundwork is your best defence against the classic pitfalls, making sure you end up with brilliant natural light, not persistent leaks and long-term headaches.
Planning Your Skylight Installation Project
Bringing a skylight into your home is an exciting project, one that promises to turn a gloomy room into a bright, welcoming space. But the success of the whole job really comes down to the planning. Simply jumping up on the roof and cutting a hole is a recipe for disaster. A solid plan covers everything from structural integrity and local council rules to picking the right type of skylight for your home.
Not sure on how or have the time to install a Vivid Skylight? We have a team of experienced installers in Melbourne who can conveniently install our range of skylights for you very promptly.
Pinpointing the Perfect Location
Your first big decision is where this thing is going to go. Finding the ideal spot is a balancing act between getting the most sunlight and dodging structural hassles. You want the light to fall where it’ll make the biggest difference—maybe that’s over a kitchen island, down a dark hallway, or as the centrepiece of your living room.
Think about which way your house faces. In Melbourne, a north-facing roof will give you consistent, soft light all day long. An east-facing one will catch that intense morning sun. You need to consider the sun’s path across the sky throughout the year to avoid unwanted glare or turning your living room into a sauna in summer.
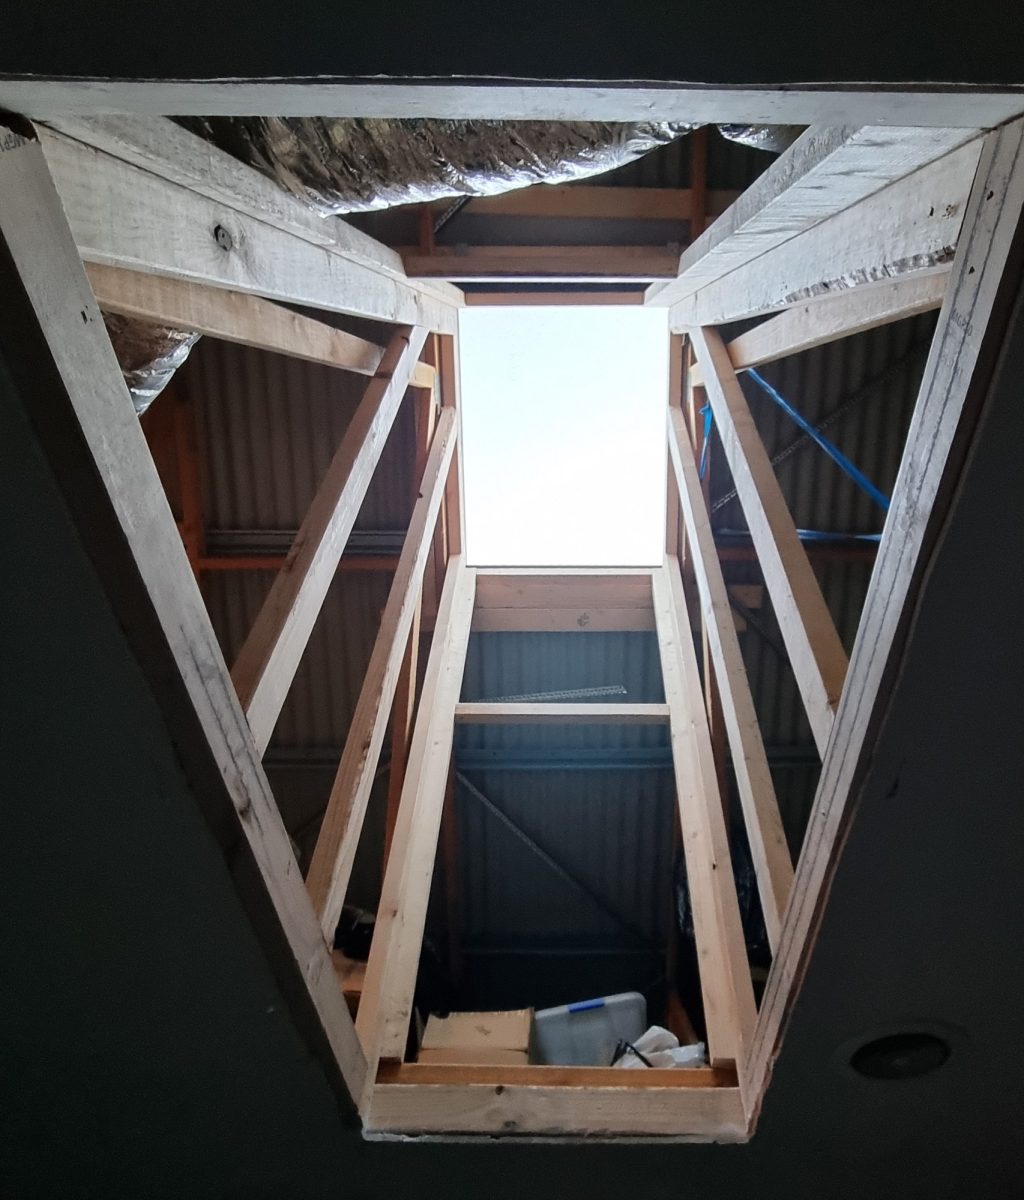
Even more critical is figuring out what’s hiding under your roofing. Your roof is held up by a framework of rafters or trusses—these are its bones. Cutting through them without the right reinforcement can seriously compromise your roof’s structure. The goal is to fit the skylight neatly between these beams. Use a stud finder on the ceiling inside to get a rough idea of where they are and how far apart they’re spaced before you even think about climbing onto the roof.
Navigating Local Building Codes in Melbourne
Before you start any work, you have to get your head around the local regulations. In Melbourne, as in most places, any significant structural change usually needs a building permit. A skylight installation, especially if you have to cut into a rafter, almost certainly falls into this category.
It’s a common mistake to think a skylight is just a minor tweak. If you skip the permits, you could be facing fines, an order to remove the skylight, and major hassles when it comes time to sell your house. Always check with your local council first.
These rules are there to keep you safe. They ensure that any changes maintain the structural soundness of your home and meet the necessary standards for weatherproofing and energy efficiency. A quick call to your local council or a qualified building surveyor will clear up exactly what’s required for your project.
Choosing the Right Skylight for Your Home
The type of skylight you pick will have a massive impact on both the look and the function of the room. There are three main types, and each has its own strengths.
- Fixed Skylights: These are sealed units that don’t open. They’re perfect for spots where you just want more light and don’t need extra ventilation. Their simple, sealed design makes them a really reliable, low-maintenance choice.
- Vented (Opening) Skylights: A game-changer for kitchens and bathrooms. These skylights open up, either manually or with a remote, to let out steam and hot air. This simple function does wonders for air quality and helps keep the temperature down.
- Tubular Skylights: What if a traditional skylight just won’t work because of attic obstructions? A tubular skylight is the clever solution. It uses a highly reflective tube to pipe sunlight from the roof down into tight spaces like wardrobes, laundries, or small bathrooms.
For anyone living in Melbourne, choosing a skylight with high-performance, double-glazed glass is a no-brainer. This feature is crucial for insulating your home against our chilly winters and hot summers, which ultimately boosts your home’s energy efficiency. It’s also worth looking at options like self-cleaning glass to cut down on maintenance—a bonus for any homeowner.
To help you decide, here’s a quick rundown of how different skylights suit typical Melbourne homes and our famously unpredictable weather.
Skylight Type Suitability for Melbourne Homes
| Skylight Type | Best Use Case | Key Benefit | Consideration |
|---|---|---|---|
| Fixed Double-Glazed | Living rooms, hallways, studies | Excellent thermal insulation for Melbourne’s varied climate, reducing energy bills. | No ventilation provided. Best for areas where airflow isn’t a priority. |
| Manual Vented | Bathrooms, kitchens, converted attics | Provides both light and fresh air, helping to manage moisture and heat buildup. | Requires easy physical access to open and close. Not ideal for very high ceilings. |
| Electric/Solar Vented | High-ceiling areas, master bedrooms | Remote-controlled convenience for ventilation. Often includes rain sensors for automatic closing. | Higher initial cost and requires a power source (solar or hardwired). |
| Tubular Skylight | Small, dark spaces (closets, pantries, small bathrooms) | Brings natural light into areas where a traditional skylight isn’t feasible. | Provides diffused, not direct, sunlight and no view of the sky. |
Ultimately, the best choice depends on the specific room and your goals. If energy efficiency is your top priority for a large living area, a fixed double-glazed unit is fantastic. But for a steamy bathroom, the ventilation from an opening skylight is essential.
Getting Your Tools and Safety Gear in Order
Confidence on a roof doesn’t come from being fearless; it comes from being prepared. A successful skylight installation really boils down to having the right gear, and that means more than just a hammer and some nails. Having the right tools makes the job go smoothly, while the right safety equipment is absolutely non-negotiable.
While the DIY route is rewarding, it’s not for everyone. If gathering specialised tools and climbing onto your roof sounds a bit daunting, remember there’s no shame in calling in the pros. Not sure on how or have the time to install a Vivid Skylight? We have a team of experienced installers in Melbourne who can conveniently install our range of skylights for you very promptly.
Your Essential Toolkit for the Job
To tackle a skylight installation correctly, you’ll need more than what’s in your basic toolbox. Some tools are designed specifically to make clean cuts, create secure seals, and give you that professional finish. Missing a key item can lead to frustration and a job you’re not happy with.
Here are the must-have tools for the project:
- Reciprocating Saw: This is your workhorse for making that initial opening in the roof. Its power and versatility are essential for cutting cleanly through roofing materials, sheathing, and even rafters if needed.
- Circular Saw: For framing the light shaft and getting those perfectly straight, precise cuts in your timber, a circular saw is invaluable.
- Caulking Gun and Quality Sealant: Don’t skimp here. A high-quality, weatherproof silicone sealant is your primary defence against leaks. For Melbourne’s climate, choose a product rated for UV resistance and extreme temperature changes.
- Drill with Various Bits: You’ll need it for everything from pilot holes and driving screws for the framing to securing the skylight unit itself.
- Measuring Tape, Level, and Chalk Line: Accuracy is everything. These tools ensure your opening is square, your skylight is level, and your interior light shaft is perfectly aligned.
Non-Negotiable Safety Gear
Working at height introduces risks that must be managed with the right equipment. Safety isn’t an area to cut corners; it’s the most important part of the entire installation.
From seasoned installers, the one piece of advice that always stands is this: your safety harness is your best friend on the roof. It should be properly fitted and securely anchored before you even think about picking up a tool.
Your essential safety checklist includes:
- Safety Harness and Lanyard: This is your lifeline. Make sure it’s correctly sized and attached to a secure anchor point on the roof.
- High-Grip Footwear: Roof surfaces can be slippery, especially with morning dew. Wear sturdy boots with excellent traction to prevent falls.
- Gloves and Safety Glasses: Protect your hands from sharp materials and your eyes from debris when you’re cutting and drilling.
Managing your tools effectively while you’re up there is also a huge part of staying safe. Use a tool belt to keep essential items secure and within easy reach, which helps prevent the dangerous possibility of dropping tools. Setting up a secure work zone on the ground below also ensures the safety of anyone else around your home during the skylight installation. By prioritising this prep work, you set the stage for a successful and, most importantly, safe project.
How to Cut and Frame the Roof Opening
This is it—the moment of truth in any skylight installation. Getting this part right is absolutely critical, because the quality of your cuts and framing determines not just how securely the skylight fits, but how well it keeps the weather out. It’s a two-part process: transferring your interior markings to the roof with precision, then doing some basic carpentry to keep your roof structurally sound.

While cutting a hole in your roof is incredibly satisfying, it’s also where a small mistake can turn into a big headache. If you’re based in Melbourne and feeling even slightly hesitant about taking a saw to your roof, remember that professional help is just a call away. Our team of experienced installers can take care of the whole job, guaranteeing a perfect, leak-free fit without you having to worry.
Transferring Your Markings to the Roof
First things first, you need to get the location you marked on your ceiling accurately onto the roof’s surface. You’ve already figured out the perfect spot between the rafters inside; now it’s time to project that rectangle straight up.
A great way to do this is by drilling small pilot holes up from the inside at each of the four corners you’ve marked out. Before you punch through the roof sheathing, pop your head into the attic or crawl space to make sure you’re clear of any wiring, pipes, or other hidden surprises. Once you’re on the roof, these four tiny holes are your new best friends.
Grab a chalk line and snap straight, clean lines between these points. You should have a perfect rectangle right there on your roofing material. Now, before you even think about starting the saw, get your tape measure out and double—no, triple—check your measurements against the manufacturer’s specs for the rough opening. They’re often very specific, and being off by a few millimetres can cause real problems later.
Making the Cut
With your cutting lines marked and checked, it’s time to open up the roof. The tool for the job really depends on what your roof is made of. A reciprocating saw is a fantastic all-rounder, but if you’re dealing with a metal roof, you might need an angle grinder or a pair of specialised shears.
Start by carefully removing the roofing material—be it tiles, shingles, or metal sheets—from an area just a little bigger than your marked opening. This gives you a clean workspace and stops you from accidentally damaging the surrounding roof while you’re cutting.
Next, fire up your saw and cut through the roof sheathing, following your chalk lines as closely as you possibly can. Let the saw do the work and take your time to avoid jagged edges. A clean, square opening is the foundation for a seamless sky light installation.
Here’s a pro tip: one of the most vital checks at this point is making sure the opening is perfectly square. Use a builder’s square on the corners, or if you don’t have one, use the classic 3-4-5 triangle method. A skewed opening can make seating and sealing the skylight correctly almost impossible.
Building a Sturdy Support Frame
With the opening cut, the next job is to reinforce the structure. Your roof’s rafters carry a lot of weight, and the hole you just made needs to be framed out properly. This framing redistributes the load and gives you a solid surface to mount the skylight.
You’ll build this frame using timber that’s the same dimension as your existing rafters. It’s made of two main parts:
- Headers: These are the horizontal beams running between the two main rafters on either side of the hole. They create the top and bottom of your skylight frame.
- Trimmers: If you had to cut a rafter to make space for the skylight, trimmers are installed between the headers to support the cut ends, transferring the load to the neighbouring full-length rafters.
Measure twice and cut your header pieces to fit snugly between the rafters. Use galvanised framing nails or structural screws to secure them, making sure they’re perfectly level and flush with the existing structure. This new frame doesn’t just restore the roof’s strength; it creates the robust box that your skylight will call home.
For those after more detailed diagrams and techniques on this crucial step, you can learn more about how to install a skylight in our comprehensive guide.
Mastering a Watertight Seal with Proper Flashing
Alright, you’ve cut and framed the opening. Now comes the moment of truth: getting a proper, watertight seal. This is easily the most critical part of the whole job, and it’s about a lot more than just squeezing on some sealant and calling it a day. Flashing is an engineered system, designed to use gravity to its advantage, expertly channelling water down and away from the skylight.
Getting this right is what separates a beautiful, light-filled room from a ceiling ruined by water stains. I can’t stress this enough: rushing this step or thinking roofing cement is the main solution is one of the biggest mistakes you can make. It often leads to those slow, hidden leaks that cause an incredible amount of damage before you even notice them.
While a DIY installation is a massively rewarding project, the flashing stage demands precision. If you’re looking at your roof here in Melbourne and feeling a bit out of your depth, just remember we have a team of experienced installers who can get our skylights fitted for you, guaranteeing a perfect, weatherproof seal right from the start.
The Logic of Layering Flashing
The entire principle behind effective flashing is layering, just like the tiles on a roof. You install each piece from the bottom up, making sure every piece above overlaps the one below it. This creates a foolproof path for rainwater to flow harmlessly down your roof, never getting a chance to sneak under the skylight’s edges.
This is exactly why relying on sealant alone is a recipe for disaster. Sealants inevitably break down over time, thanks to UV exposure and the constant expansion and contraction from Melbourne’s wild temperature swings. Flashing, on the other hand, is a permanent mechanical barrier against water getting in.
To get a better sense of how this crucial stage fits into the bigger picture, have a look at this infographic. It outlines the foundational planning process that comes first.
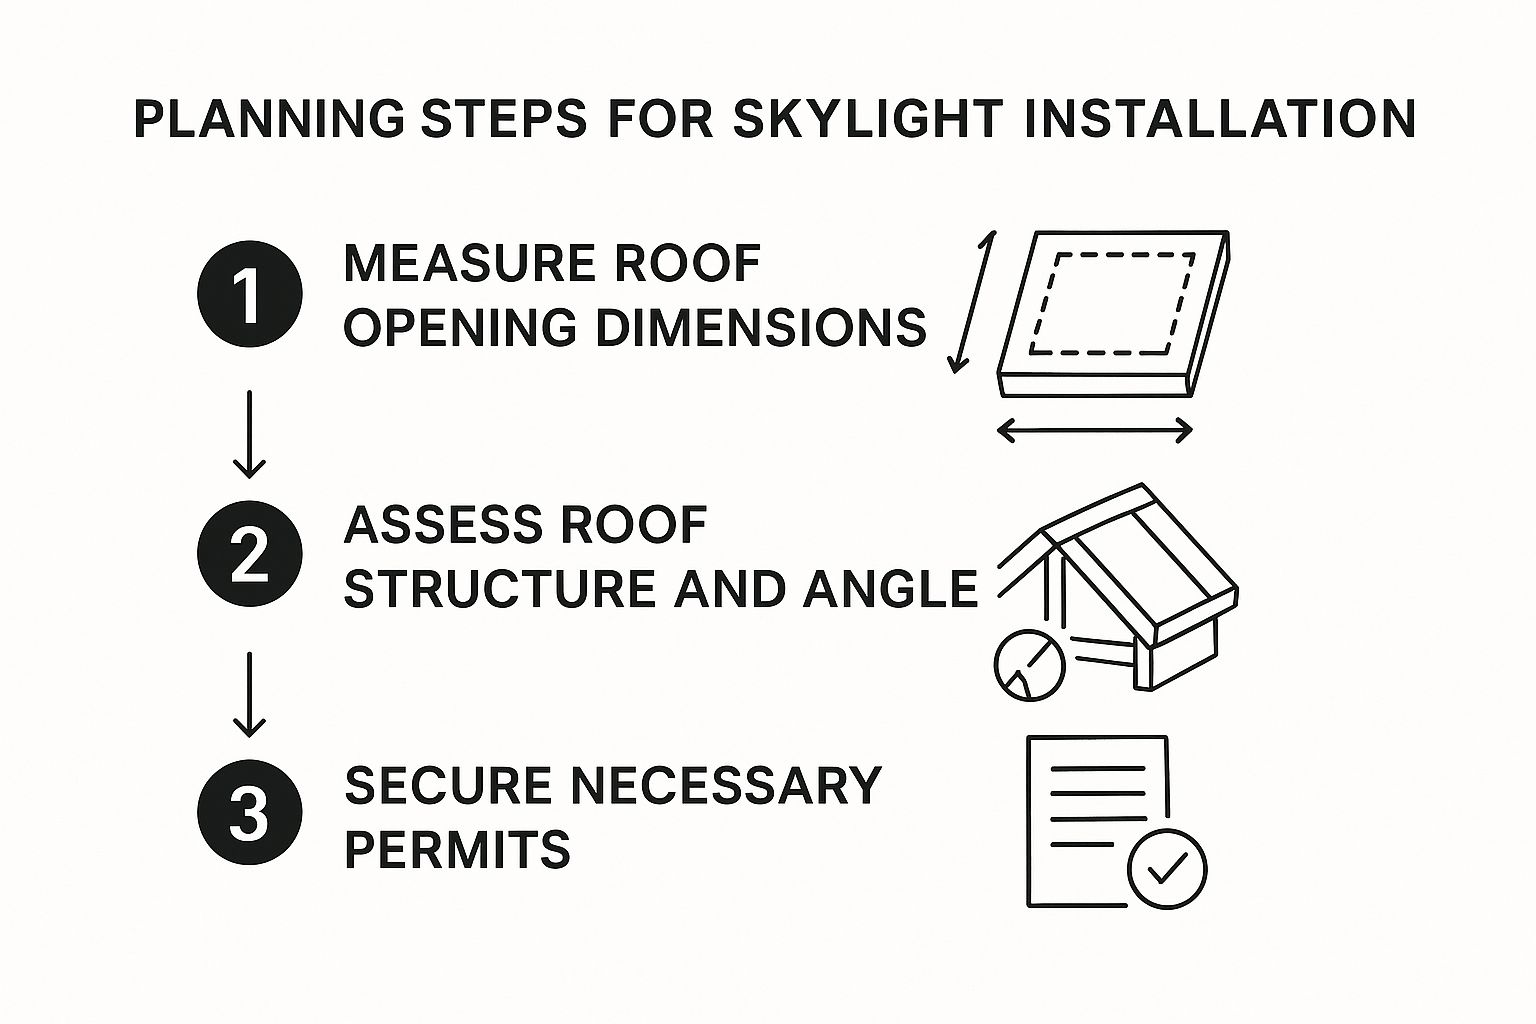
As you can see, a successful outcome depends on careful prep work long before you even touch the flashing itself.
Installing the Key Flashing Components
A standard flashing kit will have three main parts, and each one has a specific job protecting a different side of the skylight. Your skylight’s instructions will give you the exact details, but the general order of installation is always the same.
- Sill Flashing: This is your starting piece. It fits along the bottom edge (the sill) of the opening and gets tucked under the roofing material below it. This ensures any water running down the roof flows right over the top of the flashing, not underneath.
- Step Flashing: These are the individual, L-shaped metal pieces you’ll layer with each course of your tiles or shingles along the sides of the skylight. Each piece overlaps the one below it, creating that distinctive “step” pattern that kicks water away from the vertical sides of the unit.
- Saddle Flashing: The final piece of the puzzle is the saddle flashing, which goes over the top edge of the skylight. It’s designed to sit over the side step flashing and tuck underneath the roofing material above it. This is a critical piece that stops water from getting in at the top—the area that takes the most direct hit from the rain.
Here’s a massive takeaway for anyone doing this job: resist the temptation to nail through the flat part of the flashing. Fasteners should only ever go through the vertical flange that attaches to the skylight curb, or exactly as the manufacturer specifies. Puncturing the flashing creates an instant weak spot for a leak.
Adapting to Melbourne Roof Types
The exact flashing technique will change depending on what your roof is made of. On a classic Melbourne tile roof, you’ll need to carefully remove tiles, install the flashing, and then cut the tiles to fit snugly around the skylight curb. The real key is making sure the flashing integrates perfectly with both the underlayment and the tile pattern.
For modern metal sheeting, the process is different but the principles are the same. You’ll use a specialized flashing kit made for corrugated or standing seam profiles. These kits often come with foam inserts or rubber gaskets to create a tight seal against the metal’s specific profile, stopping wind-driven rain from being forced underneath. Having the right gear is non-negotiable, and you can explore options with a purpose-built skylight flashing kit designed for your specific roof.
The Strategic Use of Roofing Cement
While flashing does all the heavy lifting, roofing cement or a high-quality sealant does play an important supporting role. It should be used sparingly—think sealing joints and fastener heads, not as your main water barrier.
Think of it as the final touch for that extra bit of security. A small bead of sealant where flashing pieces overlap or where the flashing meets the skylight frame gives you another layer of defence against water, especially in spots where heavy rain or debris might build up. This strategic, minimal approach ensures a durable, professional, and leak-proof sky light installation that will serve you well for years to come.
Installing the Skylight and Finishing the Interior
With all the flashing layered in, your roof is now properly sealed and ready for the main event: getting the skylight itself into place. This is a satisfying moment. The focus shifts from tough exterior work to creating the beautiful interior finish that will finally bring all that sunlight down into your home.
This final stage is where the whole project really comes to life, but precision is everything. If you’re based in Melbourne and would rather have the peace of mind that comes with a professional touch, our experienced team can handle the entire sky light installation for you. We’ll make sure you get a perfect finish, both inside and out.
Securing the Skylight Unit
First up, carefully lower the skylight unit into the framed opening. It should sit squarely on the curb you built, resting evenly without any rocking or wobbling. Grab your level and check it from all sides—a unit that isn’t perfectly level can compromise the waterproof seal and will look obviously crooked from inside.
Once you’re happy with its position, it’s time to fasten it down according to the manufacturer’s instructions. The key here is to drive the screws until they are just snug. Do not overtighten them. Cranking down too hard can easily warp the frame or even crack the housing, creating a weak spot that’s just asking for a leak down the track.
Framing and Insulating the Light Shaft
With the skylight secure on the roof, you can head back inside to build the tunnel that connects it to your ceiling. This is the light shaft, and it’s what directs all that lovely sunlight into the room. You’ll construct a simple timber frame that runs from the roof opening down to the ceiling opening you cut earlier.
This structure defines the shape of the shaft. You can build it straight down, or you can have it splayed—meaning it’s wider at the bottom. A splayed shaft is a great trick for spreading the light more broadly across the room.
Before you even think about putting up plasterboard, proper insulation is non-negotiable. An uninsulated light shaft acts like a thermal chimney, letting precious heat escape in winter and pouring hot air in during summer. It completely undermines your home’s energy efficiency.
Fit high-quality insulation batts snugly between the timber studs of your shaft frame. It’s a simple step, but it’s absolutely vital for maintaining a comfortable temperature indoors and keeping your energy bills from creeping up.
Hanging and Finishing the Plasterboard
Next, measure and cut your plasterboard to line the inside of the light shaft. The angles can make this a bit tricky, so take your time and follow the old rule: measure twice, cut once. Secure the plasterboard panels to the timber frame with screws, making sure the heads are slightly recessed below the surface.
Once the plasterboard is up, the real finishing work begins. Apply jointing tape over all the seams where the panels meet. Then, cover it with several thin layers of joint compound, sanding lightly between each coat. The goal is to create a perfectly smooth, seamless surface that blends flawlessly with your existing ceiling.
The Final Touches for a Professional Look
With the plastering complete and sanded smooth, you’re on the home stretch. Prime the entire light shaft and ceiling area, then apply a couple of coats of your chosen paint colour. A crisp white is usually the best choice, as it does a brilliant job of maximising light reflection, making the whole space feel even brighter.
These finishing touches are what transform a simple hole in the roof into a stunning architectural feature. The end result is a room flooded with natural light that not only looks fantastic but also offers real benefits. The Australian skylight market is growing for a reason—people want energy savings. A well-installed skylight, like a flat roof model, can lead to average energy savings of around 15% and extend daily natural light by about two hours. You can learn about the benefits of energy-efficient glazing to see how modern skylights contribute to a more efficient home.
Need a Professional Installer in Melbourne?
While tackling a DIY skylight installation can be a seriously rewarding project, let’s be honest—it’s a big job. It demands the right skills, a specific set of tools, and being completely comfortable working at heights. It’s definitely not a weekend project for everyone.
Not sure on how or have the time to install a Vivid Skylight? We have a team of experienced installers in Melbourne who can conveniently install our range of skylights for you very promptly.
Going with one of our pros means you can skip the hassle and potential risks altogether. You get total peace of mind knowing your new skylight is installed flawlessly for a weatherproof finish that will brighten your home for many years to come. Wondering what the investment looks like? You can get a clear idea by checking out our detailed guide on skylight installation cost.
Our professional installers guarantee a flawless fit, ensuring your skylight is not just a source of light but also a durable, leak-free addition to your home’s structure.
This professional approach is what countless homeowners and building contractors rely on for a job done right the first time. For those interested in the trade side of things, it can be fascinating to learn about the various strategies for construction contractors to find clients and build their businesses.
Your Skylight Questions, Answered
Thinking about installing a skylight? It’s a great move, but it’s natural to have a few questions before you start cutting a hole in your roof. Here are some of the most common queries we get from homeowners, with straightforward answers to help you plan your project like a pro.
How Long Does a Typical Skylight Installation Take?
For a professional installer, a standard skylight job is usually a one-day affair. But if you’re tackling this as a DIY project, do yourself a favour and block out a full weekend. You really don’t want to be rushing critical steps like getting the flashing just right.
Of course, the timeline can stretch. A complex roof, unpredictable weather, or the need to cut and re-brace rafters will add time. My best advice? Always, always check the weather forecast before you start. An open roof during a surprise downpour is a nightmare you don’t need.
Can I Install a Skylight on Any Type of Roof?
Pretty much, yes. Skylights are designed for most common Aussie roofs—tile, metal, and shingle—as long as the pitch is somewhere between 15 and 60 degrees. The key, though, is using the right flashing kit for your specific roofing material. This isn’t a place to mix and match; the kit is what creates the watertight seal.
If you have a flat or very low-slope roof, you’ll need a special curb-mounted skylight. This basically builds a raised frame for the skylight to sit on, creating enough of a pitch to let water run off instead of pooling. Water pooling is the number one enemy of a skylight.
A common mistake is assuming one flashing kit fits all. Trust me on this one: using the wrong flashing for your roof type is the fastest way to guarantee a leak. Double-check that the kit matches your roofing material before you buy.
What Is the Best Time of Year for Installation in Melbourne?
In Melbourne, your best windows for installation are spring or autumn. The weather is generally milder and, more importantly, drier. These seasons give you a much better shot at having a predictable, rain-free day or two to get the job done.
Working with an open, vulnerable roof is the main reason for this. Trying to beat winter’s rain or sweating it out in the peak of summer heat just makes the whole process more stressful and less safe. A calm, dry day makes for a much smoother—and more enjoyable—installation.
Thinking about a new skylight but not so sure about the DIY path? The team at Vivid Skylights is here to help. We have experienced installers right across Melbourne who can fit our range of skylights for you, professionally and without the fuss. Get in touch to bring beautiful, natural light into your home with total peace of mind.