
Adding a pitched roof with skylights is one of the best ways to bring natural light deep into your home, turning once-gloomy spaces into bright, welcoming areas and even improving energy efficiency. It’s an upgrade that doesn’t just look good architecturally; it genuinely lifts the feel of your home and adds to its value.
Laying the Groundwork for Your Skylight Project
Before you even think about touching a roof tile, a great skylight installation starts with solid planning. This isn’t just about picking a window and a spot on the roof. It’s about getting to know your home’s unique structure and climate to make sure the end result is as practical as it is beautiful. A bit of careful thought upfront prevents a world of headaches and ensures your new skylight will be a joy for years to come.
This thoughtful approach is catching on with Australian homeowners. We’ve seen a real surge in demand for pitched roof skylights as people look for smarter, more sustainable ways to improve their homes. It’s part of a bigger picture, too, with the global market expected to grow by 6% to 7% each year.
Evaluating Your Roof Structure
First things first, you need to understand what’s holding your roof up. Pop your head into the attic and figure out if you’re dealing with rafters or trusses—it makes a huge difference.
- Rafters: These are the big, solid timber beams running from the peak of your roof down to the edges. They usually offer a lot more flexibility for placing skylights, as you can frame out an opening between them without too much structural drama.
- Trusses: These are the pre-made, web-like triangular structures. You absolutely cannot cut into a truss without risking your roof’s structural integrity, so you’ll need an engineer’s sign-off for that. Most standard skylights are cleverly designed to slot right in between typical truss spacing.
Knowing which one you have is non-negotiable. With a truss system, the structure tells you where the skylight can go. With rafters, you get more creative freedom, but you still need to plan the framing properly.
Pinpointing the Perfect Placement
Where you put your skylight will completely change the kind of light you get. This is more than just about what looks good from the outside; it’s about smart, climate-aware design, which is essential here in Australia.
For a home in Melbourne, a north-facing skylight is brilliant for soaking up that lovely, passive warmth from the low winter sun. But put that same skylight in a Darwin home, and you’ve just created a heat trap during the wet season. For warmer climates, you’re often better off with south-facing skylights for softer, indirect light that keeps the heat gain down.
The angle of your roof, or its pitch, is another critical piece of the puzzle. Getting this angle right is fundamental for proper water drainage and making sure you choose the correct flashing kit for a watertight seal.
As you start laying out your plans, it’s also a good time to think about the bigger financial picture. When any roof work is involved, it pays to do your homework on the potential costs by obtaining a comprehensive roofing estimate.
Matching Skylight to Purpose
Finally, have a good think about what you want the light to do. Are you trying to brighten an entire living room with soft, ambient light? Or do you need a focused beam of light right over a kitchen bench or a desk? A big skylight can make a living room feel expansive, while a smaller one can be just the ticket for a hallway or a bathroom that needs a lift.
Don’t forget the light shaft—the tunnel connecting the skylight to your ceiling. The height of your ceiling and the pitch of your roof will dictate its size and shape. You can use our handy roof pitch calculator to help with these early measurements. A flared shaft spreads the light out for a wider glow, while a straight shaft will give you a more direct, concentrated pool of light below. Getting these details right is key to creating the exact atmosphere you’re dreaming of.
How to Choose the Right Skylight for Your Home
Once you’ve pinpointed the perfect spot, it’s time to choose the skylight itself. This decision is about more than just getting the dimensions right. It’s about matching the skylight’s function and features to your lifestyle, your local climate, and what the room actually needs. A pitched roof with skylights is a fantastic upgrade, so picking the right type is absolutely crucial.
The world of skylights really boils down to a few main categories, each with its own set of pros and cons. Your choice will shape everything from airflow and daily convenience to your home’s energy efficiency and safety. Let’s walk through the key options so you can make a decision you feel great about.
Fixed vs Opening Skylights
The first and most fundamental choice is whether you want a skylight that’s fixed in place or one that opens up to let in fresh air. The answer usually comes down to the room’s purpose.
A fixed skylight is the simplest and most popular option out there. Its one job is to let in light, making it a brilliant, budget-friendly choice for hallways, living rooms, or any space where extra ventilation isn’t the main goal. With no moving parts, they have a clean, minimalist look and are incredibly reliable.
On the other hand, opening skylights (often called venting or operable skylights) pull double duty, bringing in both glorious light and ventilation. This makes them perfect for rooms that tend to trap heat and moisture, like kitchens and bathrooms. They are key to creating natural airflow, allowing warm, stale air to escape through the roof while drawing cooler, fresh air in from windows below—a handy process known as the stack effect.
Opening models come in two main flavours:
- Manual Opening: These are generally operated with a long winder pole, which makes them a practical choice for skylights that are still within easy reach. They’re also a more affordable option than their electric cousins.
- Electric Opening: For those high, vaulted ceilings or just for the sheer convenience, electric models are a total game-changer. They’re operated by a remote or wall switch, and many modern versions even come with rain sensors that automatically close the window at the first hint of a downpour.
Think about your daily routine. An electric skylight in a master bedroom can be programmed to open for a few minutes each morning, flushing out stuffy air while you get ready for the day. It’s a small luxury that makes a big difference.
Comparison of Skylight Types for Pitched Roofs
To make the decision clearer, here’s a quick comparison of the main options available for pitched roofs. Looking at them side-by-side can really highlight which features will best suit your home and lifestyle.
| Feature | Fixed Skylight | Manual Opening Skylight | Electric Opening Skylight |
|---|---|---|---|
| Primary Function | Light only | Light and ventilation | Light, ventilation, and convenience |
| Operation | None (sealed unit) | Hand crank or winder pole | Remote control, wall switch, or automated (e.g., rain sensors) |
| Best For | Hallways, living rooms, areas needing only light | Kitchens, bathrooms, easily accessible locations | High ceilings, bedrooms, smart homes, ultimate ease of use |
| Cost | Most affordable | Mid-range | Highest initial cost |
| Maintenance | Minimal (cleaning only) | Low (occasional check of mechanical parts) | Low (check electronics and mechanisms periodically) |
| Energy Efficiency | High (fewer seals to fail) | Good (provides natural cooling) | Good (provides natural cooling, some models have timers) |
Ultimately, the best choice balances your budget with the functional needs of the room. A fixed skylight offers brilliant simplicity, while an opening model adds a dynamic layer of comfort and air quality control to your home.
Glazing and Glass Options
The type of glass in your skylight has a massive impact on its performance, safety, and your home’s overall comfort. Standard windows in Australia are double-glazed for a good reason, and skylights are no different. This involves two panes of glass separated by a sealed gap filled with air or gas, which provides excellent insulation against both heat and cold.
But modern glazing technology offers so much more than basic insulation.
- Laminated Glass: This is a non-negotiable safety feature. It’s made of two layers of glass bonded with a clear interlayer. If the glass ever breaks, the fragments stick to the interlayer instead of falling into the room below. It’s actually mandatory in Australia for any skylight installed more than three metres above floor level.
- Low-E Coatings: A Low-Emissivity (Low-E) coating is a microscopically thin, transparent layer that reflects thermal energy. In winter, it helps keep warmth inside your home. In summer, it does the opposite by reflecting the sun’s heat, keeping your rooms cooler and cutting down your reliance on air conditioning.
- Self-Cleaning Glass: Some skylights come with a special coating that uses the sun’s UV rays to break down organic dirt. When it rains, the water sheets off evenly instead of beading, washing all the loosened dirt away and dramatically reducing how often you need to get up there and clean.
You can learn more about the different models and their features by exploring the various types of skylights available. Getting to know these options will help you choose a product that performs beautifully for years to come.
Integrated Blinds and Accessories
Finally, don’t forget to think about how you’ll control all that beautiful light. While brightening your home is the goal, there will definitely be times when you want to soften the glare or achieve complete darkness. This is where integrated blinds are the perfect solution.
Block-out blinds are fantastic for bedrooms or media rooms, offering near-total darkness on demand. For living areas, light-filtering or Venetian blinds are often a better fit, allowing you to diffuse that harsh midday sun while still enjoying a soft, natural glow. Many electric skylights offer motorised blinds that can be operated with the same remote, adding a final touch of luxury and effortless convenience.
Getting to Grips with Australian Building Codes
Putting a skylight in your roof isn’t just a simple renovation. It’s a structural alteration, and in Australia, that means it needs to meet some pretty strict safety and performance standards. You’ll need to get familiar with the National Construction Code (NCC) and a few key Australian Standards. It might sound a bit daunting, but knowing the rules is the best way to make sure your new pitched roof with skylights is safe, watertight, and fully compliant.
Think of the building codes as a non-negotiable safety net. They’re there to protect your home and your family, making sure every skylight is tough enough to handle everything from a summer downpour to the harsh Aussie sun. Trying to sidestep them can lead to some serious headaches, like hefty fines, failed council inspections, or even a dangerously faulty installation.
Key Standards to Look For
When you’re choosing a skylight, a couple of key standards and certifications will be your best guide. They act as a clear benchmark for quality, taking the guesswork out of finding a product that’s built to last.
Here are the big ones you need to have on your radar:
- AS 4285: This is the essential standard for skylights in Australia. It lays out the minimum requirements for things like water penetration, wind load resistance, and overall strength. If a skylight meets AS 4285, you know it’s been properly tested for local conditions.
These standards aren’t just bureaucratic box-ticking. They’re based on years of industry experience and are specifically written to deal with Australia’s unique and often punishing climate zones.
Making Sense of the National Construction Code
The National Construction Code (NCC) is the rulebook for all building work across the country, and it has some specific, non-negotiable requirements for installing skylights. These rules cover everything from structural integrity to fire safety.
One of the most important rules is about glazing safety. If your skylight is installed three metres or more above the floor level, the NCC says you must use laminated glass. This is a critical safety measure. In the rare event of an impact, the glass will hold together instead of shattering and falling into the room below.
The NCC also dictates how close your skylight can be to your property’s boundary line. For most residential homes (classified as Class 1 and 10 buildings), a skylight needs to be at least 900mm away from the boundary wall. This is a fire safety measure designed to help prevent flames from spreading between neighbouring properties. Getting across these details early in your planning can save you from major design dramas and help your project sail through council approval. For a more detailed look, check out our guide on building permit requirements.
Why Local Compliance is Everything
Australia’s climate is incredibly diverse, so a “one-size-fits-all” approach to building just won’t cut it. The codes and standards are written to be adaptable, ensuring a skylight installed in cyclone-prone Far North Queensland is just as robust as one in a Victorian bushfire zone. This is where a professional installer’s local knowledge is invaluable.
Australian building standards have really shaped the skylight industry for the better, pushing manufacturers to create products that can handle our extreme weather. You’ll find products tested for cyclonic ratings, with some able to withstand wind pressures of –2.16kPa, making them suitable for the toughest environments. This rigorous testing is a cornerstone of consumer protection here.
These location-specific requirements are crucial. A skylight near the coast needs corrosion-resistant flashing and components to deal with the salty air. In a bushfire-prone area, it will need materials with a specific Bushfire Attack Level (BAL) rating. Getting this right means your skylight won’t just flood your home with beautiful light—it will genuinely add to the safety and resilience of your property.
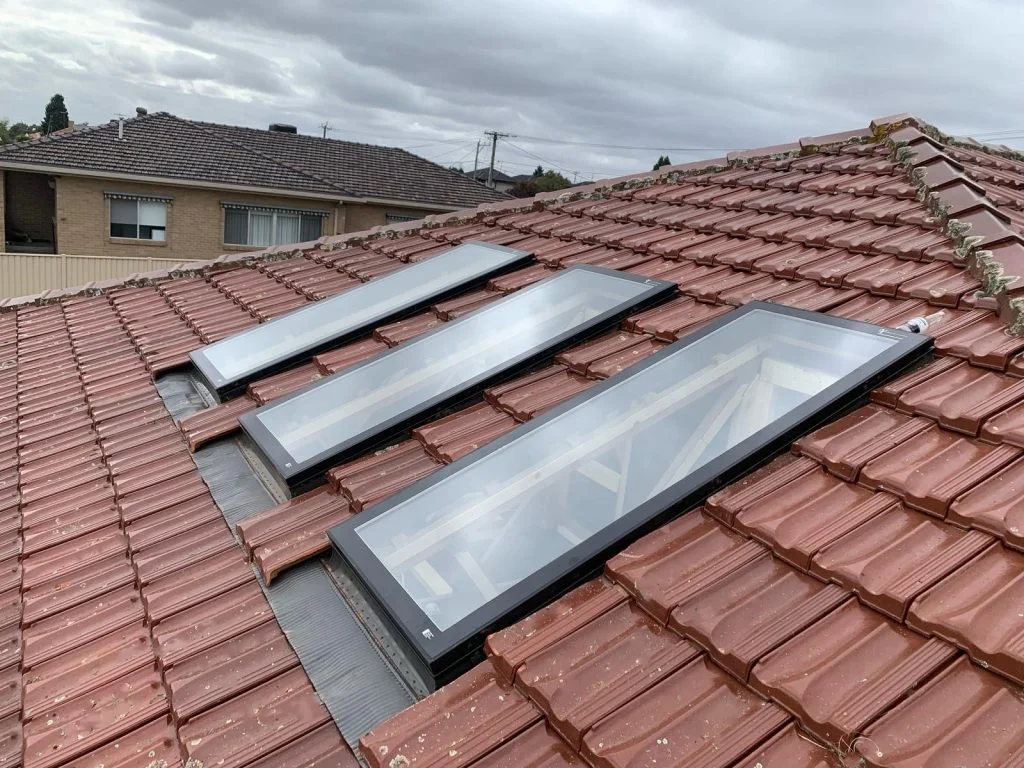
A Look Inside the Installation Process
This is where all that careful planning and selection comes to life. A professional skylight installation on a pitched roof is a methodical job, a real blend of precision roofing and carpentry. When it’s done right, it completely transforms a room with natural light.
The journey from a solid roof to a beautiful, light-filled feature isn’t a quick one. It involves several key phases, with each step building on the last to ensure the final result is not only stunning but also completely weatherproof and structurally solid for decades to come.
Preparing the Roof and Making the Cut
First things first, an installer has to pinpoint the exact location on the roof. They’ll measure from inside your attic to find the centre point between the rafters, then transfer those measurements to the outside of your roof. This guarantees the opening lines up perfectly with your ceiling below.
Once it’s all marked out, the surrounding roof tiles or metal sheeting are carefully lifted and set aside. This clears the deck, creating a clean workspace and making sure your existing roofing materials don’t get damaged.
Then comes the point of no return—cutting the opening. Using a circular saw, the installer makes a precise cut through the roof decking and underlayment. This moment is critical. The opening has to be perfectly square and sized exactly to the manufacturer’s specs for a snug, secure fit.
Framing for Strength and Support
You can’t just cut a hole in your roof and call it a day; you’ve just interrupted its structure. That’s why framing the opening is a non-negotiable step for maintaining the roof’s long-term strength and stability.
For a standard rafter roof, this usually means installing timber headers between the rafters at the top and bottom of the opening. It effectively creates a sturdy box frame that transfers the roof load around the new skylight. Think of it like building a small window frame right into the roof structure itself.
This process ensures that the pitched roof with skylights remains just as strong as it was before anyone picked up a saw. It’s a vital step that prevents sagging and protects the integrity of your entire home.
The Art of Flashing and Waterproofing
Without a doubt, the most crucial part of any skylight installation is the waterproofing. This is where a high-quality flashing kit really earns its keep, forming an impenetrable barrier against wind and rain. A leak isn’t just an annoyance; it can lead to serious, expensive structural damage over time.
Professional installers layer the flashing components in a specific sequence, integrating them with the roofing material like carefully placed puzzle pieces.
- Sill Flashing: The bottom piece goes on first, sitting under the lowest course of tiles.
- Step Flashing: Individual pieces are then woven into the roofing material up each side, overlapping like scales on a fish to direct water down and away.
- Saddle and Head Flashing: Finally, the top pieces are fitted, with the head flashing tucked securely underneath the roofing material above the skylight.
This overlapping technique creates multiple layers of protection. It’s a tried-and-true method that ensures even in a driving Aussie downpour, water is safely channelled down the roof and well away from the opening.
Mounting and Finishing Touches
With the flashing in place, the skylight unit is carefully lifted into the opening and secured to the frame. The installer will check it’s perfectly level and flush before fastening it down. If you’ve opted for an electric opening model, a qualified electrician will run the wiring through the roof cavity now, connecting it to a power source.
A common mistake is underestimating the complexity of the interior finishing. The light shaft connecting the skylight to your ceiling needs to be properly framed, insulated, and plastered for a seamless, professional look that prevents heat loss and condensation.
Once the skylight is secure, the roof tiles or metal sheets are put back, trimmed precisely to fit snugly against the new flashing. The final stage moves inside to build the light shaft. This “tunnel” is framed with timber, lined with plasterboard, and fully insulated. A skilled plasterer then finishes the joins and corners, creating a smooth surface that’s ready for painting—blending the new feature perfectly into your ceiling.
The infographic below illustrates the key pillars of a compliant and safe installation.
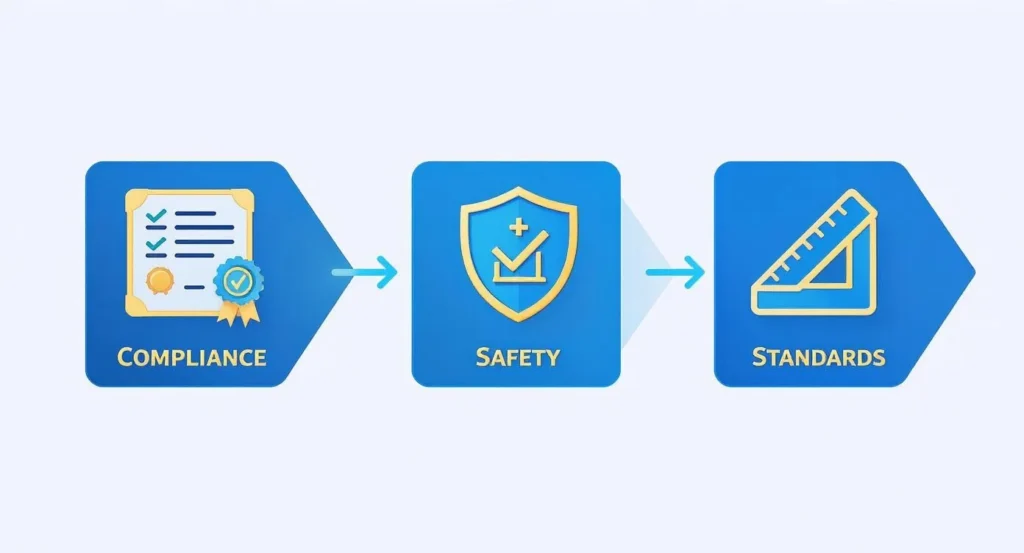
It really highlights how sticking to certified compliance, safety protocols, and industry standards is essential for a successful job that lasts.
Finally, any accessories like blinds or shades are fitted. For the unique angles involved with pitched roofs, an Installation Guide for Shades on Angled Windows can offer some really practical advice. This last touch gives you complete control over the light, completing the transformation of your space.
Boosting Energy Efficiency and Performance
A well-designed skylight should be an asset to your home’s comfort and energy bills, not a liability. When you add a pitched roof with skylights, the real goal is to get that beautiful, natural light without creating uncomfortable hot spots in summer or letting precious warmth escape in winter.
Getting the performance details right is what separates a good installation from a great one. Understanding a few key metrics will empower you to make a smart choice that’s genuinely suited to Australia’s varied climates. Think of these ratings as the language of energy efficiency for windows and skylights; they tell you exactly how a product will perform once it’s on your roof.
Decoding Key Performance Ratings
When you start comparing skylights, you’ll come across two critical numbers that measure thermal performance: the U-Value and the Solar Heat Gain Coefficient (SHGC).
- U-Value: This number tells you how well the skylight prevents heat from escaping. The rule is simple: the lower the U-value, the better its insulating properties. A low U-value is absolutely crucial for homes in cooler climates like Melbourne or Hobart, where keeping warmth inside during winter is the main game.
- Solar Heat Gain Coefficient (SHGC): This measures how much of the sun’s heat makes it through the glass. A lower SHGC means less solar heat gets into your home, which is vital for managing comfort (and air conditioning bills) in hot climates like Brisbane or Perth.
Finding the right balance is everything. In a cooler region, you might actually want a slightly higher SHGC to benefit from passive solar warming in winter. But in a hot, sunny region, the lowest possible SHGC is your best friend.
The Power of High-Performance Glazing
Modern glazing technology is what makes today’s skylights so incredibly efficient. Features that used to be luxury add-ons, like special coatings and gas fills, are now pretty much standard for any high-quality unit.
A Low-E (low-emissivity) coating is a microscopically thin, transparent layer applied to the glass that works wonders. It reflects infrared energy, essentially keeping heat on the same side of the glass it came from. In winter, it reflects your home’s internal heat back into the room. In summer, it reflects the sun’s scorching heat away from your home.
Many double-glazed units are also filled with argon gas between the panes. Because argon is denser than air and a poor thermal conductor, it dramatically slows down heat transfer, which improves the U-value even further.
Getting the glazing right is one of the most effective long-term investments you can make in your home’s comfort. It means less reliance on heating and cooling systems, which translates directly into lower energy bills and a more pleasant living environment year-round.
The growing focus on sustainable building has made energy-efficient skylights more popular than ever with Australian homeowners. It’s clear that well-designed skylights can lead to significant energy savings, and the trend highlights a real shift towards more energy-conscious home design across the country. You can explore more about the benefits of modern skylights on Vivid Skylights.
Don’t Forget Insulation Around the Frame
The performance of your skylight doesn’t stop at the glass. The light shaft—that tunnel connecting the roof to your ceiling—has to be properly insulated. An uninsulated shaft can become a major source of heat exchange and, even worse, condensation.
During installation, make sure high-quality insulation is fitted snugly around all four sides of the light shaft. This thermal barrier is critical for preventing “thermal bridging,” where heat finds a way to bypass the insulated glass by travelling through the frame. A well-insulated shaft ensures the whole system performs as intended, keeping your home comfortable and your ceiling free from moisture problems.
Common Questions About Pitched Roof Skylights
When you’re thinking about adding a pitched roof with skylights, it’s only natural for a few questions to come to mind. It’s a big project, after all, and you want to be sure you’re making the right call. Let’s tackle some of the most common queries we hear from homeowners, from the big worry about leaks to the practicalities of cost and upkeep.
Getting these answers upfront is the key to planning with confidence and avoiding any surprises down the road.
Will My Skylight Leak?
This is, without a doubt, the number one concern for anyone thinking about cutting a hole in their roof. Let’s put this one to rest: modern, high-quality skylights are engineered to be completely watertight when installed correctly. The old myth of the leaky skylight almost always comes from shoddy installation jobs or cheap, outdated products from decades ago.
Today’s skylights come with incredibly sophisticated, purpose-built flashing kits. These kits are designed to create a perfect seal with your specific roofing material, whether it’s classic tiles or metal sheeting. When a skilled installer layers these flashing components properly, they create a multi-layered, weatherproof barrier that directs every drop of water safely away from the opening.
A leak is almost always a sign of an installation problem, not a product failure. This is why choosing an experienced installer who understands the nuances of waterproofing is just as important as selecting a quality skylight.
What Is the Realistic Cost of Installation?
The cost of installing a skylight can vary quite a bit, so there’s no simple “one-size-fits-all” answer. The final price tag really comes down to a few key factors.
Here’s a breakdown of what influences the overall cost:
- The Skylight Itself: A basic fixed skylight is naturally going to be more budget-friendly than a top-of-the-line electric model with all the bells and whistles like rain sensors and built-in blinds.
- Your Roof’s Complexity: A really steep pitch, tricky access, or an unusual roof structure can add to the labour costs.
- Interior Finishing: A big part of the job is building, insulating, and plastering the light shaft inside your home. The size and finish of this will affect the budget.
- Structural Work: If rafters need to be cut and reinforced to fit the skylight, this requires more labour and materials than a simple installation that fits between existing rafters.
As a general guide in Australia, you can expect a professional installation for a standard fixed skylight to range from around $1,900 to $7,000. This figure usually covers the skylight unit, the flashing kit, and all the labour for both the roofing work and the interior finishing.
What Kind of Maintenance Is Required?
Honestly, modern skylights are designed to be surprisingly low-maintenance. They free you up to simply enjoy the beautiful light they bring into your home. The exterior glass on many quality units now features a special self-cleaning coating. This clever bit of tech uses the sun’s UV rays to break down organic dirt, and when it rains, the water sheets off the glass, washing the grime away.
This means you’ll rarely, if ever, need to get up on the roof for a clean. For the inside pane, a quick wipe with a standard glass cleaner every now and then is all it takes to keep it sparkling.
If you opt for an opening skylight, it’s a good idea to check once in a while that the hinges and opening mechanisms are clear of any leaves or debris. Other than that, the tough, powder-coated aluminium frames are built to handle the Aussie elements without needing any special attention. With a quality product, you can look forward to years of performance with minimal fuss.
Ready to transform your home with beautiful, natural light? Vivid Skylights offers a premium range of fixed and electric opening skylights designed for Australian homes. Explore our products and get a free estimate today!