
Putting in roof ventilation is all about creating a balanced system, with vents for air to get in and vents for it to get out. In practice, this means cutting an opening in your roof, fitting the vent and its flashing securely, and making sure you get a watert-tight seal with roofing-grade silicone to stop any leaks.
Why Roof Ventilation Is a Non-Negotiable for Your Home
Before you even think about climbing that ladder, let’s talk about what’s really happening up in your roof cavity. An unventilated roof space during an Australian summer is like a giant radiator, trapping super-heated air that relentlessly pushes heat down into your living areas.
This forces your air conditioner to work overtime, often for hours on end, just to keep things comfortable. The result? Skyrocketing energy bills and a home that never quite feels cool.
This is where a properly designed ventilation system makes all the difference. The goal isn’t just to punch a hole in the roof; it’s to create a continuous, gentle airflow that cycles out stale, hot, and moist air. A balanced system gets this done by pairing:
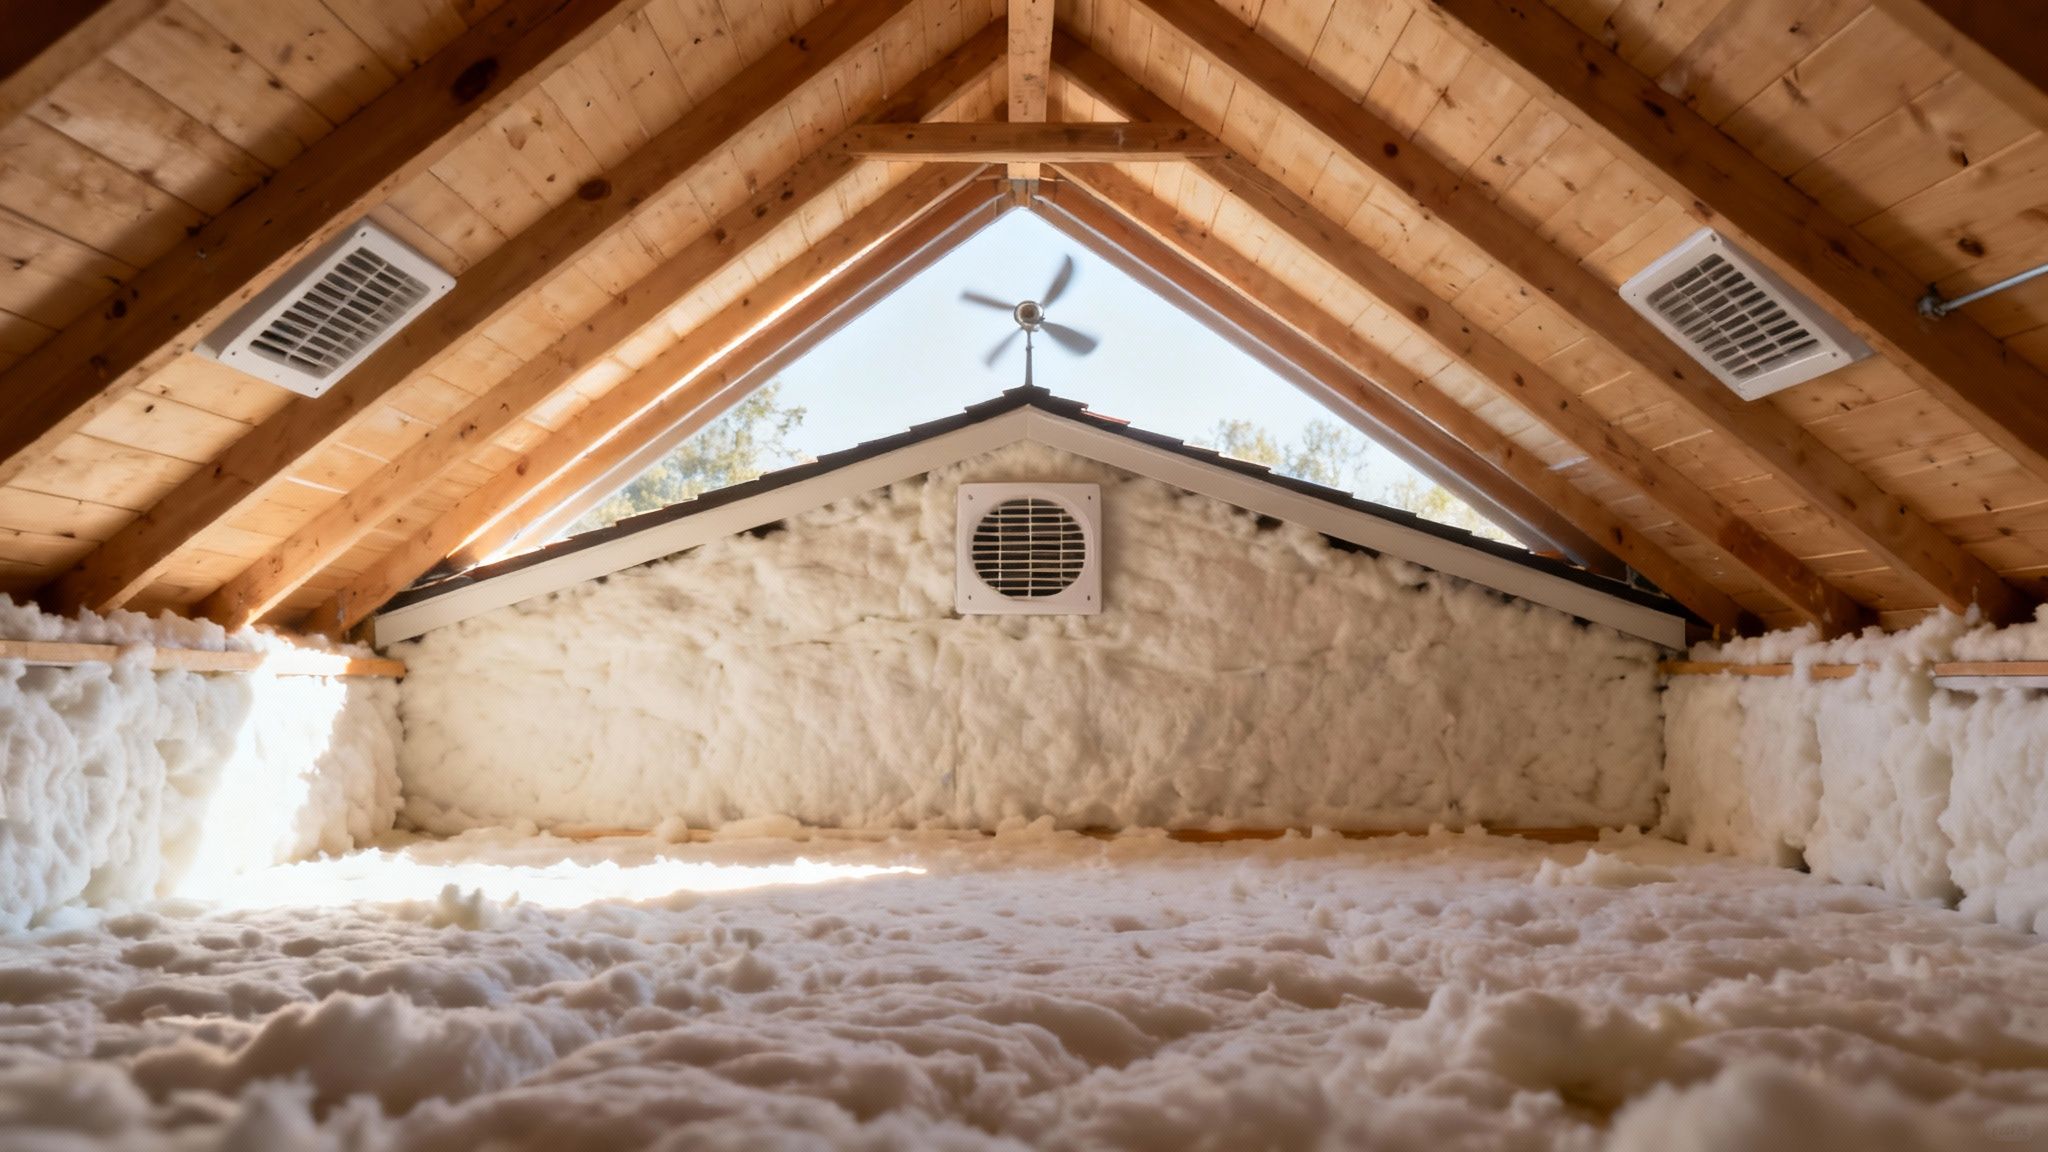
- Intake Vents: Usually tucked away under the eaves (soffit vents), these let cooler, fresh air into the roof cavity.
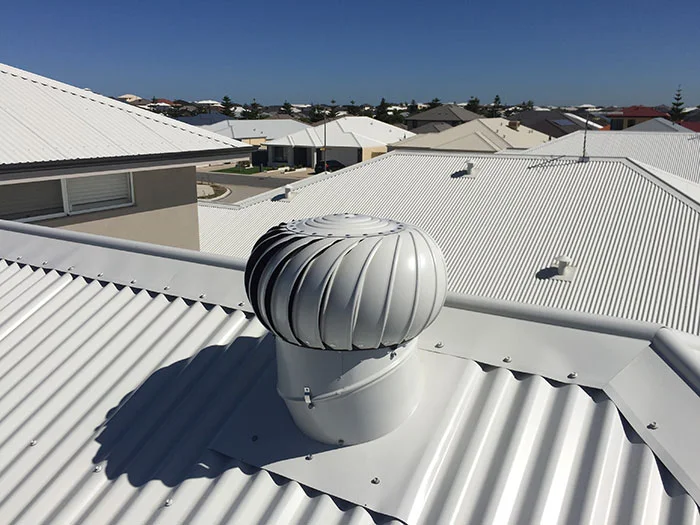
- Exhaust Vents: Placed near the highest point of the roof (like whirlybirds or ridge vents), these give the hot, humid air a way to escape.
This constant air exchange is your home’s first line of defence against some pretty serious structural problems.
Preventing Moisture and Mould Damage
Heat isn’t the only enemy lurking in your attic. Everyday activities like cooking, showering, and even breathing create a surprising amount of water vapour. In a sealed-off roof space, this moisture has nowhere to go.
It ends up condensing on the cooler underside of your roof sheeting and timbers, creating the perfect breeding ground for mould, mildew, and wood rot. Over time, that can lead to expensive structural repairs and seriously compromise your home’s integrity.
Beyond installing roof ventilation, discovering effective indoor air quality improvement tips can further enhance your home environment and address broader air quality concerns.
A well-ventilated roof is a dry roof. By actively removing damp air before it can condense, you are protecting your timber trusses, insulation, and ceiling from the destructive effects of long-term moisture exposure.
Aligning with Modern Building Standards
The importance of good ventilation is now formally recognised in building regulations. As Aussie homes become more energy-efficient and tightly sealed, the risk of trapped moisture has actually gone up.
In response, the Australian National Construction Code (NCC) has been updated to stress ventilation’s critical role in managing condensation. The guidelines now push for comprehensive strategies, like pairing vents with vapour-permeable membranes, to make sure moisture can escape effectively. You can learn more about the science behind these changes in this detailed video on roof condensation management.
Understanding the specific roof ventilation requirements in Australia is a great starting point for any project. You can find a solid overview of what’s needed here: https://vividskylights.com.au/roof-ventilation-requirements-australia/
Choosing the Right Roof Vent for Your Home
Not all vents are created equal, and finding the right one can feel a bit overwhelming at first. The best choice really depends on your local climate, the design of your roof, and your budget. Here’s a quick rundown of the most common options to help you decide.
| Vent Type | Power Source | Best For | Key Considerations |
|---|---|---|---|
| Whirlybirds (Turbines) | Wind-powered (Passive) | Most residential homes in areas with consistent breezes. Great all-rounders. | Cost-effective and silent. Performance depends on wind speed. |
| Ridge Vents | Passive | Homes with a long, straight ridge line. Provides very even ventilation. | Aesthetically subtle. Requires careful installation to prevent leaks. |
| Soffit/Eave Vents | Intake (Passive) | Essential for creating a balanced system. Used in conjunction with exhaust vents. | Must be kept clear of insulation and debris to function properly. |
| Solar-Powered Vents | Solar (Active) | Hot climates or on still, windless days when passive vents struggle. | More powerful than passive vents. Higher upfront cost but no running costs. |
| Electric-Powered Vents | Mains (Active) | Situations requiring maximum airflow control, regardless of weather. | Most powerful option. Requires professional electrical work and has running costs. |
For most DIY projects, a well-placed set of whirlybirds provides an excellent balance of performance and simplicity, making them an ideal starting point for improving your home’s health and comfort. They’re cost-effective, silent, require no electricity, and are generally more than enough for the average Aussie home.
Here is the rewritten section, crafted to sound completely human-written and natural, following all the provided instructions and examples.
Mapping Out Your Ventilation Project for Success
A successful DIY project is 90% preparation. Trust me, rushing into a job like this without a clear plan is a surefire recipe for multiple trips to the hardware store and potential mistakes up on the roof. Think of this as your pre-flight checklist, ensuring you have everything sorted before a single cut is made.
Proper planning starts with understanding exactly what your roof needs. The first step isn’t just grabbing a vent; it’s figuring out how many you’ll need to do the job properly. A single whirlybird on a large roof simply won’t create enough airflow to make any real difference.
Calculating Your Vent Requirements
For most Aussie homes, a simple rule of thumb works beautifully. As a guideline, you’ll want one passive vent (like a whirlybird) for every 50 square metres of roof space. This ratio helps achieve that even, consistent airflow across the entire roof cavity, preventing hot spots and pockets of trapped moisture from forming.
For instance, an average Australian home with a roof area around 245m² would typically need about four to five vents to be properly ventilated. If you’ve got a complex roof with isolated sections, you might even need an extra one to ensure no area is left stagnant. You can dive deeper into these calculations and see why multiple vents are more effective than one big one by reading this detailed guide on roof vent requirements.
Once you have your number, it’s time for placement. Walk around your property and eyeball the roof from the ground. Look for the highest points of the roofline—the ridge—as this is where hot air naturally wants to go.
Your goal is to pinpoint locations that are:
- Unobstructed: Well away from chimneys, solar panels, or skylights.
- Evenly Spaced: To give you balanced ventilation across the whole roof.
- Aesthetically Pleasing: Lined up symmetrically for a clean, professional finish.
Assembling Your Tools and Materials
There’s nothing more frustrating than being halfway through a job on the roof only to realise you’re missing a crucial tool. A well-organised toolkit isn’t just a nice-to-have; it’s a non-negotiable part of the process.
Pro Tip: Before you buy a thing, lay out all the tools you already own. Check your drill bit sizes and the condition of your ladder. A few minutes of prep now can save you an hour-long trip to the store later.
Here’s a practical shopping list to get you started:
- Your Roof Vents: The right number of whirlybirds or other vents with the correct flashing for your roof type (metal or tile). If you’re considering a more powerful solution, it’s worth exploring the benefits of solar roof ventilation fans.
- High-Quality Sealant: A tube of UV-resistant, neutral-cure roofing silicone for each vent. Don’t cheap out on this; a good seal is absolutely critical.
- Caulking Gun: A sturdy, reliable gun to apply the sealant smoothly.
- Drill and Bits: A cordless drill with a bit for the pilot hole and a driver bit for the screws.
- Measuring and Marking Tools: A tape measure, a marker pen, and a string to draw a perfect circle.
- Cutting Tools: This depends on your roof. You’ll need an angle grinder with a metal cutting disc for a metal roof, or tile-cutting tools if you have a tiled roof.
Prioritising Your Safety on the Roof
Working at heights carries obvious risks, and your safety has to be the number one priority. Never attempt this job without the proper protective gear and a healthy respect for the environment you’re in.
Your essential safety kit must include:
| Safety Item | Why It’s Essential |
|---|---|
| Safety Harness | This is your lifeline. A properly secured harness connected to an anchor point is the single most important bit of gear. |
| Non-Slip Footwear | Shoes with excellent grip are crucial for keeping your footing, especially on a pitched or dusty roof surface. |
| Gloves & Goggles | Protect your hands from sharp metal edges and your eyes from flying debris when you’re cutting. |
| Sturdy Ladder | Make sure your ladder is in good nick and placed on stable, level ground before you even think about climbing it. |
Taking the time to map out your vent locations, gather every tool, and sort out your safety gear sets the stage for a smooth, successful, and leak-free installation. It’s the difference between a frustrating weekend and a job you can be proud of.
Cutting the Opening and Fitting Your Roof Vent
Right, with all the groundwork done, it’s time to get to the main event. This is where the planning stops and the doing begins—making the actual cuts and changes that will boost your home’s comfort. We’ll go through everything, from checking your spot inside the roof space to getting that vent base fitted securely.
Your first move isn’t actually on the roof, but inside it. Get up into your attic with a good torch and double-check that the locations you picked from the ground are genuinely workable. The main thing you’re looking for is a clear space, squarely between two roof rafters. You cannot, under any circumstances, cut into this structural timber.
Once you’ve found a good bay, find the centre point. This gives you plenty of wiggle room and makes sure the roof sheathing properly supports the vent. When you’ve locked in your spot, grab your drill with a small bit (around 3-5mm is perfect) and send a single pilot hole straight up through the roof. This little hole is now your anchor point for everything you do on the outside.
Marking and Cutting the Roof Opening
Okay, back outside and up onto the roof. Find that pilot hole you just drilled—it’ll be the dead centre of where your vent is going to live. Most whirlybird kits come with a handy template, but if yours didn’t, don’t stress. Just measure the diameter of the vent’s throat, then use a bit of string and a marker to draw a perfect circle around your pilot hole.
How you make the cut really depends on what your roof is made of. Each material needs a slightly different touch to get a clean opening without causing any damage.
- For Metal Roofs (like Colorbond): Your best mate here is an angle grinder fitted with a thin metal-cutting disc. Start the cut gently and follow your marked line with a steady hand. It’s absolutely crucial to have your safety goggles and gloves on, as the tiny metal filings that come off are seriously sharp.
- For Tiled Roofs (Terracotta or Concrete): You won’t be cutting a circle directly. Instead, you’ll need to carefully remove the tiles that sit inside your marked area. You might find you need to use a tile grinder to trim the edges of the surrounding tiles to get a nice, snug fit around the flashing later on.
This visual breaks down the simple but vital steps of measuring, checking your work area, and getting your tools ready for a successful cut and fit.

As you can see, spending that extra time on prep is what makes the actual installation smooth and effective.
Critical Tip: When you’re cutting a metal roof, be meticulous about the cleanup. The tiny, hot metal filings from the grinder (we call it ‘swarf’) can dig into the roof’s coating and create rust spots down the track. A quick once-over with a brush and dustpan, followed by a wipe with a damp cloth, will stop this from happening.
Seating and Securing the Vent Flashing
With the hole cut, it’s time to fit the flashing. The flashing is the wide metal base of the vent, and it’s smartly designed to slide under the roofing material above the hole and sit over the material below it. This is what channels rainwater down your roof and away from the opening.
Gently work the top edge of the flashing underneath the roof sheet or tiles above your hole. The bottom edge of the flashing should then lie flat on top of the roofing material below. Pause for a moment here. Make sure it’s sitting flush and is perfectly aligned with the roof’s slope. You don’t want to see any big gaps or buckling—it needs to hug the contour of your roof.
Once you’re happy with how it’s sitting, you can lock it in place. Use the self-tapping roofing screws that came with the kit to fix the flashing down to the roof.
- Put the first couple of screws in the top corners to hold it steady.
- Then, work your way down each side, putting a screw in every 15-20 centimetres.
- Finish by securing the bottom edge.
The aim is to create a really solid connection to the roof, one that can handle strong winds and whatever else the weather throws at it. Don’t go crazy overtightening the screws, as you can dimple a metal roof or even crack a tile. Just make them snug enough that there’s zero movement.
This solid base is what the entire roof ventilation installation depends on for stability and performance. Now you can attach the turbine head with complete confidence.
Achieving a Watertight Seal on Your New Vent
You’ve cut the hole and screwed down the base, but honestly, the most critical part of the job is still ahead of you. Get the seal wrong, and that fantastic new vent quickly becomes a frustrating, damaging leak. This is where you need to slow down and focus on waterproofing—taking your time here is the single best investment you’ll make to protect your home.
The whole point is to create a durable, weather-tight barrier around the entire perimeter of the vent flashing. This isn’t just about squirting a line of silicone around the edges. It’s about understanding how water travels and stopping it dead in its tracks. A rushed job can leave tiny, hidden channels for water to seep in, often going unnoticed until a stain appears on your ceiling.
Applying the Roofing Sealant Correctly
Your choice of sealant is absolutely vital. You need a high-quality, neutral-cure roofing silicone specifically designed to be UV-resistant and flexible. Forget about standard bathroom silicone; the harsh Australian sun will break it down in a year or two, leaving it brittle and useless.
To make sure your new vent is completely waterproof, you really need a specialised product. A reliable roof and gutter sealant like Everbuild Roof Gutter Sealant is formulated to create a tough, watertight barrier that can handle extreme weather.
Here’s the right way to apply it for a seal that won’t fail:
- Lift and Apply: Gently lift the edges of the vent flashing where it meets the roof. Squeeze a generous, continuous bead of sealant directly onto the roof surface, about 2-3 centimetres in from where the edge of the flashing will sit.
- Press and Seal: Firmly press the flashing down into the wet sealant. This creates your primary, hidden seal underneath the flashing—it’s your main line of defence.
- Seal the Edges: Now, apply another bead of sealant around the entire visible perimeter of the flashing, making sure you cover the seam where the metal meets the roof. Pay close attention to the top edge and the corners.
- Cover the Fasteners: Finally, put a generous dab of sealant right over the head of every screw you used to secure the flashing. This stops water from ever finding its way down the screw threads.
Expert Tip: Use a wet finger or a smoothing tool on that outer bead of sealant. It doesn’t just look tidier; it properly forces the sealant into the seam and gets rid of any air bubbles or tiny gaps where water could sit.
Common Sealing Mistakes to Avoid
So many DIY jobs fail right at this stage because of a few simple, avoidable mistakes. Rushing the sealing on your roof ventilation installation is a decision you’ll regret down the track. Watch out for these common pitfalls:
- Using Too Little Sealant: This is the number one error. Skimping on silicone leaves a weak, thin barrier that can easily fail. Be generous—it’s far better to use a bit too much than not enough.
- Applying Unevenly: A bead of sealant that goes from thick to thin has weak points. Keep steady pressure on your caulking gun to get a consistent, unbroken line.
- Sealing on a Dirty Surface: The sealant needs a clean, dry surface to bond to. Any dust, moisture, or grime on your roof will stop it from adhering properly, and the seal is guaranteed to fail.
Knowing why you’re doing something is just as important as the task itself. For a deeper dive into best practices, checking out a comprehensive roof flashing installation guide can give you some invaluable insights that apply directly to this job.
Final Touches for a Professional Finish
Once the sealant is on, the last thing to do is make sure any surrounding roof materials are put back perfectly. A clean finish isn’t just for looks; it helps the entire roof shed water effectively.
If you have a tiled roof, this means carefully trimming and refitting the tiles so they sit snugly against the flashing. You shouldn’t have any large, awkward gaps. On a metal roof, just double-check that the sheeting is sitting flush and hasn’t been bent or warped while you were working.
Taking these extra few minutes to get the seal and finish just right is what separates a professional job from an amateur one. It ensures your hard work will last for decades, keeping your home and roof cavity dry and healthy.
Alright, the vent’s in, it’s sealed, and it’s looking pretty good from the ground. But hold on, don’t start packing up the tools just yet. The last ten minutes of the job are what separate a good install from a great one that’ll last for years without a single issue. This final once-over is your chance to spot any little hiccups before they turn into a real headache down the track.
First things first, get back up on the roof for a close-up look. You want to eyeball that entire bead of sealant you laid down. Are there any spots that look a bit thin? Any tiny gaps you might’ve missed? Make sure every single screw head is completely covered. It’s the small details that count.
Now, head inside and pop your head up into the roof space. Grab a good torch and shine it all around the base of the new vent from the inside. What you’re looking for is any sliver of daylight peeking through. If you see light, water will find its way in. It’s a whole lot easier to pop back on the roof and add another dob of silicone now than it is to deal with a leak stain on your ceiling after the next big downpour.
Don’t Skip the Cleanup
This is one of the biggest mistakes I see people make, especially on a metal roof. All those tiny metal filings from cutting – we call it swarf – might seem harmless, but they’re a nightmare. If you leave them sitting on the roof, they’ll dig into the protective coating and start little rust spots all over your new roof sheet.
Same goes for any offcuts, old sealant tubes, or stray screws. Don’t just leave them on the roof or, even worse, in the gutters. A handful of debris is all it takes to block a gutter and cause an overflow right back into your eaves. A quick sweep of the area and a glance into the nearby gutters is a non-negotiable final step.
What to Do If Your New Vent Acts Up
Even with a flawless installation, you might run into a couple of quirks. The good news is, they’re usually simple fixes. Turbine vents, or ‘whirlybirds’ as everyone calls them, are hands-down one of the most common ventilation choices for Aussie homes because they just work, no power needed. They’re super reliable, but it pays to know what to look for. If you’re curious, you can find a great breakdown of the pros and cons of these popular turbine vents and why they’re on so many roofs.
Here are a couple of common things you might notice and what to do about them:
- The vent isn’t spinning. A new whirlybird should move with the slightest puff of wind. If it’s stiff or dead still on a breezy day, the bearings might be a bit tight from the factory. More often than not, a quick spray of a lubricant like WD-40 right into the bearing housing is all it needs to get going.
- You can hear a scraping or squeaking. This is an easy one. It almost always means the spinning turbine head isn’t sitting perfectly level, so the fins are rubbing against the fixed base. Just gently push or pull the head until it’s sitting straight and the noise stops.
- You’ve spotted a drip after the first rain. Okay, don’t panic. This happens. The culprit is almost certainly a tiny, sneaky gap in your sealant. Wait for a dry day, get back up there, and have a very close look at the seal. Then, apply a fresh, generous bead of roofing silicone right over the top of the suspected area.
A post-install leak is usually caused by a “pinhole” gap in the silicone that’s too small to spot easily. The best fix is to simply clean the area and lay a new, wider bead of sealant directly over the old one. This ensures you cover whatever tiny opening was letting the water in.
By running through these final checks and knowing how to tackle these simple issues, you can be confident in the job you’ve done. You haven’t just learned how to install roof ventilation; you’ve learned how to do it right, ensuring your home stays cool and dry for years to come.
Got Questions About Your Roof Ventilation?
Even with a step-by-step guide in hand, it’s completely normal to have a few questions buzzing around before you get up on that ladder. Knowing how to install a roof vent is one thing, but figuring out the specifics for your own home is another challenge entirely.
Let’s run through some of the most common queries we get from Aussie homeowners who are taking this project on for the first time. Getting your head around the ‘why’ behind each step will give you the confidence to get it done right.
How Do I Know if My Roof Needs More Ventilation?
Often, the signs of poor ventilation are subtle… until they suddenly become big, expensive problems. The most obvious clue in summer is a top floor that feels like an oven compared to the rest of the house. That’s trapped heat radiating down from your roof space.
Winter throws up another massive red flag. If you can get a safe look inside your roof cavity, check for any condensation or even frost building up on the underside of your roof sheeting. Damp patches or mildew on your insulation or timber trusses are a dead giveaway that moisture is trapped and can’t escape.
A classic sign is an air conditioner that seems to be fighting a losing battle. If it’s running non-stop just to keep things comfortable, poor roof ventilation is a very likely culprit. A well-ventilated roof makes your whole cooling system work smarter, not harder.
Can I Put a Roof Vent on Any Type of Roof?
Pretty much, yes. Modern vents are designed to work with virtually all common Australian roofing materials, whether you’ve got Colorbond, classic terracotta tiles, or concrete tiles. The secret isn’t the roof material itself, but in getting the right installation kit for the job.
Every vent kit is paired with a specific type of flashing—that’s the metal or polymer baseplate that keeps everything watertight.
- For Tiled Roofs: The flashing is shaped to slide neatly underneath the tiles above it and sit snugly over the ones below.
- For Metal Roofs: These come with a flexible base that can be moulded and sealed perfectly against the specific profile of your metal sheeting.
Using the correct flashing kit is non-negotiable. It’s what guarantees a leak-proof seal that will stand up to the weather for years to come.
When Should I Call a Pro Instead of Doing It Myself?
Look, while popping in a simple whirlybird is a great DIY project for many, safety has to be your number one priority. There are definitely a few situations where picking up the phone and calling a professional is the smartest, safest move.
You should hire a pro if:
- You have a seriously steep roof: Anything over a 25-degree pitch dramatically increases the risk of a slip or fall.
- It’s a two-storey (or higher) home: Working at that height requires proper safety harnesses, scaffolding, and training. It’s not the place to learn on the job.
- You’re just not comfortable with heights: There is absolutely no shame in this. If you feel dizzy or nervous up there, your focus is compromised, and that’s when accidents happen.
- You’re nervous about cutting a hole in your roof: A professional roofer will guarantee their work against leaks. That peace of mind alone can be worth every cent.
What’s the Difference Between Passive and Powered Vents?
It’s actually quite straightforward.
Passive vents, like your classic whirlybirds or ridge vents, are powered by nature. They use the wind to spin their turbines and leverage convection—the simple fact that hot air rises—to draw stale, hot air out of your roof space. Their biggest perk? They cost absolutely nothing to run.
Powered vents, on the other hand, use a small motor run by either a solar panel or your home’s mains electricity. This motor drives a fan that actively sucks huge volumes of air out of the roof cavity. They’re far more powerful and keep working even on dead-still, scorching hot days. They cost more upfront, but their performance is superior, especially in really hot climates.
At Vivid Skylights, we specialize in brightening Australian homes with premium roof windows and skylights that improve both light and air quality.
Discover how our fixed and electric opening skylights can transform your space by visiting us at https://vividskylights.com.au.