
Flat roofs are a huge part of modern Australian architecture, but they come with a unique puzzle: how do you let the light in? A flat roof with skylight isn’t just a window pointing at the sky; it’s a clever upgrade that completely changes how your home feels, makes it more energy-efficient, and connects you to the outdoors. The trick is to use the right products and installation methods to get a stunning, leak-free result.
Bringing Natural Light Into Modern Aussie Homes
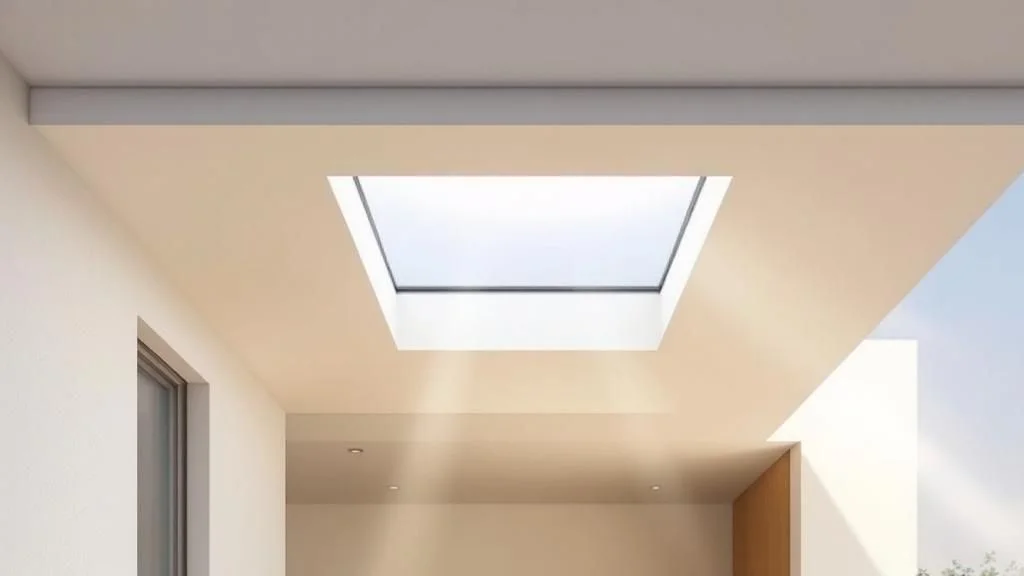
Flat and low-pitch roofs give homes that clean, minimalist look so many of us love. But their near-horizontal design doesn’t shed water as easily as a traditional sloped roof, which creates a few challenges for any rooftop installation. This is where a well-designed skylight changes everything, turning what could be a dark, closed-off space into a bright, airy room flooded with natural sunlight.
The benefits go way beyond just lighting up a room. Letting daylight into your home is proven to lift your mood and boost productivity, all while cutting down your reliance on artificial lights during the day. Think of this guide as your roadmap to getting a skylight on your flat roof right the first time, covering everything from picking the right model to the all-important waterproofing process.
Understanding the Growing Demand
The move towards energy-efficient, sustainable living is making skylights more popular than ever across the country. The Australian roofing market is booming, recently valued at around USD 2,814 million and forecast to hit USD 3,936.4 million by 2033. A big part of this growth comes from the push for greener building solutions in our cities, where modern designs often feature flat roofs. You can read more about these skylight trends for flat roofs to see what’s driving the demand.
A well-chosen skylight isn’t just an add-on; it’s a core architectural feature that can define a space. It can make a small room feel huge, draw attention to beautiful design elements, and completely change how a home feels to live in.
This guide will give you the confidence you need to make any room the brightest, most welcoming space in your house. We’ll walk you through:
- Why flat roofs need their own special kind of skylight.
- How to choose the perfect type for your home.
- The critical steps for a professional, watertight installation.
- Smart placement ideas to get the most out of the sun.
Why Flat Roofs Require Specialized Skylights
Think of a standard pitched roof like a steep slide at the park. Rain hits it and immediately shoots right off. A flat roof, on the other hand, is more like a shallow tray. Even with a slight pitch designed for drainage, it just doesn’t shed water with the same speed or efficiency. This one simple difference is exactly why you can’t just slap a regular skylight onto a flat roof and call it a day.
The biggest enemy here is ponding water. After a good downpour, water can sit on the roof’s surface for a while before it finally drains away. If you had a standard, flush-mounted skylight, it would be sitting right in the middle of that puddle, putting a huge amount of constant pressure on its seals. It’s only a matter of time before that standing water finds a way through, leading to some serious and costly leaks.
This is why a specialised design isn’t just a recommendation—it’s an absolute must for any flat roof with skylight installation.
The Role Of The Upstand
So, how do we solve the ponding water problem? The answer lies in a raised frame called a curb, or more commonly, an upstand.
Picture the upstand as a small, purpose-built dam around the opening in your roof. It physically lifts the entire skylight unit, raising it well above the roof surface and any water that might pool there. This simple but brilliant elevation is the secret to a leak-free skylight on a flat roof. Water can gather around the base of the upstand all it wants, but the skylight’s critical seals stay high and dry, completely separated from the moisture.
An upstand does more than just stop leaks. It creates a solid, weatherproof foundation for the whole skylight, giving it the structural integrity it needs to stand up to the harsh Australian elements for years to come.
Integrating With Waterproofing
The upstand is also a critical player in the overall waterproofing strategy. Your roof’s waterproof membrane—whether it’s bitumen, PVC, or another material—is laid up and over the sides of the curb. This creates a seamless, continuous barrier with no exposed edges or joints at roof level where water could sneak in.
The final piece of the puzzle is the metal flashing, which is installed over the membrane and around the skylight’s frame. This multi-layered defence system works together to actively channel water away from the opening. You can see exactly how a purpose-built skylight flashing kit brings all these components together for total protection.
Without these two specialised elements—the upstand and the integrated flashing—a skylight on a flat roof is practically guaranteed to fail.
Choosing The Right Skylight For Your Flat Roof
Once you’ve got your head around why flat roofs need a special kind of skylight, the next fun part begins: picking the perfect one for your home. This is where you get to balance the look, the function, and the budget. Each type brings something different to the table, so let’s break down the main options to find your perfect match.
The two big categories you’ll come across are fixed and ventilating skylights. The easiest way to think about it is like the difference between a picture window and one you can actually open. A fixed skylight is a sealed unit, purely designed to let in as much glorious daylight as possible. It’s a brilliant, low-maintenance choice for places like hallways, living rooms, or any spot where you’re just chasing the sun, not a breeze.
On the other hand, a ventilating skylight does exactly what the name suggests—it opens up. You can operate them manually with a long pole, or go for the convenience of an electronic remote or wall switch. This makes them an absolute lifesaver in rooms that tend to get a bit steamy or stuffy, like kitchens and bathrooms. The simple act of letting out steam and inviting in some fresh air can completely change the comfort and air quality of a room.
Glazing and Frame Materials Matter
The glass, or what we call glazing, is really the heart of your skylight. Here in Australia, with our wild and varied climate, double-glazing isn’t just a nice-to-have; it’s pretty much the standard, and for good reason. It works just like a thermos, trapping a layer of air or gas between two panes of glass. This creates fantastic thermal insulation, helping to keep your home cooler in the summer sun and holding onto warmth during those chilly winter months.
Safety is also a massive deal. Top-quality skylights use laminated glass, which is designed to hold together if it ever shatters—much like a car windscreen. This is a non-negotiable safety feature, but it also has the bonus of blocking over 90% of harmful UV rays, which stops your furniture, rugs, and floors from fading over time. Leading manufacturers design products specifically for the tough Australian environment. For instance, some skylights feature high-performance double glazing with excellent thermal insulation and can even achieve a BAL40 bushfire resistance rating, making them a solid choice for our challenging local climates.
The frame material plays a big part in durability, too. Powder-coated aluminium is a very popular choice because it’s tough, won’t corrode, and has a sleek, modern look that fits perfectly with contemporary homes.
Flat Roof Skylight Comparison Guide
Sometimes, seeing your options laid out side-by-side just makes the decision clearer. Here’s a quick comparison to help you weigh things up.
| Skylight Type | Primary Benefit | Best For | Considerations |
|---|---|---|---|
| Fixed Skylight | Maximum, uninterrupted natural light | Hallways, living areas, studies | Does not offer ventilation. |
| Ventilating Skylight | Provides both light and fresh air | Kitchens, bathrooms, laundries | Has moving parts that may require more maintenance over time. |
For a more detailed look at all the different models available, you can explore our full guide to the different types of skylights.
The right choice really comes down to what the room is used for. A stuffy bathroom will benefit immensely from ventilation, while a dark corridor just needs a powerful dose of daylight.
Don’t forget to think about the little extras that can make a big difference. Features like integrated blinds give you total control over the light, while rain sensors can automatically close your ventilating skylight at the first drop of rain. These upgrades can seriously boost the convenience and comfort of your new skylight.
How Professionals Master The Installation Process
Putting a skylight in is a lot more than just cutting a hole in your roof. It’s a precise construction job where every single step is critical to getting a completely watertight, long-lasting result. While going the DIY route might seem like a good way to save a few dollars, the stakes are incredibly high with a flat roof. One small mistake can lead to persistent leaks and expensive structural damage down the track.
Professionals know that a successful flat roof with skylight installation relies on three pillars of waterproofing: the curb, the membrane, and the flashing. These parts have to work together in a specific order to create an impenetrable barrier. It’s a system where the whole is truly greater than the sum of its parts—get one step wrong, and you compromise the entire setup.
The Foundation: The Curb
The whole process starts with building the curb, which is sometimes called an upstand. This isn’t just a simple wooden box; it’s a custom-built frame that lifts the skylight up and away from the roof’s surface. A pro will make sure the curb is perfectly square, level, and securely anchored to the roof joists. This creates a rock-solid foundation that won’t shift or warp over time, and its height is carefully calculated to sit well above any potential for ponding water.
Creating A Seamless Seal
Next, the roofing membrane is meticulously applied. An installer doesn’t just lay the membrane around the curb; they run it right up the sides and wrap it over the top edge. This creates a continuous, seamless waterproof layer, almost like a tray. This technique cleverly eliminates any joints at the roof level, which is always the most vulnerable spot for water to find its way in.
This diagram shows how each layer builds on the last to create that perfect seal.
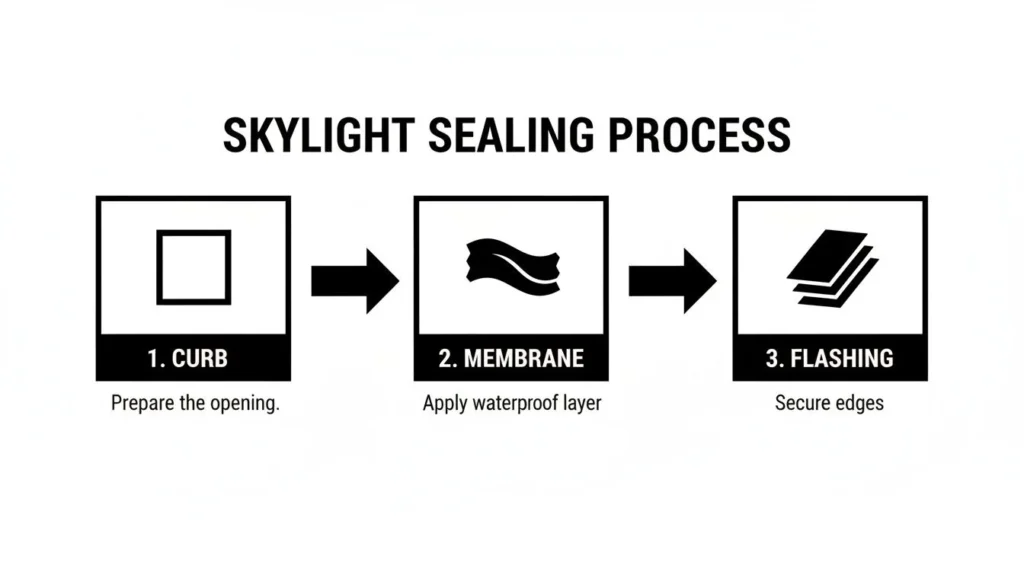
You can see how the curb provides the height, the membrane creates the primary waterproof seal, and the flashing adds that final layer of protection.
The Final Defence: The Flashing
With the membrane securely in place, the custom flashing kit is installed. Think of this metalwork as the skylight’s suit of armour. It’s fitted over the membrane on the curb and integrated with the skylight frame itself, mechanically forcing rain away from the unit. If a skylight includes motorised features or lights, understanding the various weatherproof electrical boxes types is also essential for a safe and secure installation.
“A professional installation isn’t about just stopping water; it’s about actively managing it. The multi-layer system of curb, membrane, and flashing is designed to channel water away from the opening long before it ever has a chance to test the seals.”
This methodical, multi-layered approach is what separates a professional, worry-free installation from a potential DIY disaster. It’s an investment in your peace of mind, ensuring your beautiful new source of natural light remains a feature you love, not a problem you have to fix.
Smart Placement Strategies For Maximum Sunlight
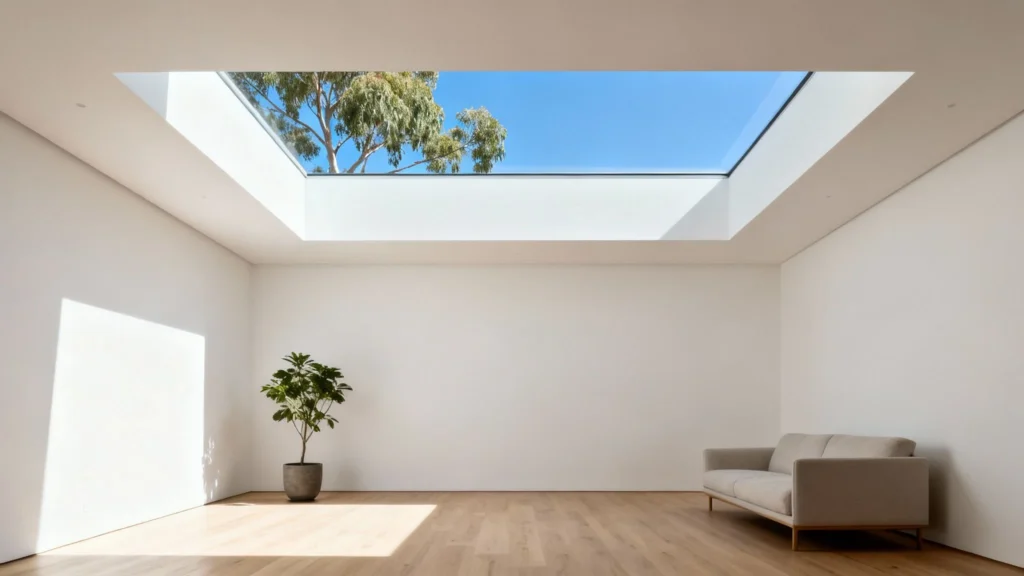
It’s one thing to choose a great skylight, but where you put it is just as crucial. Proper positioning turns a simple window in your ceiling into a dynamic light source that follows the sun’s natural path across the sky. Get it right, and you get a beautifully lit room. Get it wrong, and you might accidentally create a greenhouse.
The orientation of a flat roof with skylight really changes the quality of light you’ll get inside. Here in Australia, a south-facing placement is often the sweet spot. It delivers soft, consistent, and indirect sunlight all day long, without the harsh glare you can get from direct overhead sun.
On the flip side, a north-facing skylight will bring in some pretty intense, direct sun, especially in summer. While that can be a welcome bonus for warmth during a chilly winter, it often leads to unwanted glare and heat gain in the hotter months, which could see your cooling costs creep up.
Finding The Right Light Balance
A common worry is flooding a room with too much light, but there’s a handy guideline we use to get it just right. A great rule of thumb is to aim for the skylight’s total glass area to be between 5-10% of the room’s floor area. This ratio usually provides plenty of beautiful daylight without overwhelming the space.
For example, a 20-square-metre living room would feel perfectly lit with a skylight that has a glass area of about 1 to 2 square metres. This keeps the room from overheating while still feeling bright, open, and airy. It’s no surprise that the demand for this kind of daylighting is a key driver in the Australian flat roof skylight market, which is projected to grow by around 3.4% CAGR. You can read more about how daylighting boosts healthier indoor environments on archivemarketresearch.com.
Advanced Placement Techniques
Once you’ve got the basics down, you can think about some more creative strategies that the pros use:
- Wall Washing: Instead of sticking a skylight right in the middle of the ceiling, try placing it closer to a feature wall. This creates a stunning “wall wash” effect, where light cascades down the surface, making the entire room feel brighter and bigger.
- Multiple Smaller Units: If you’re working with a large room, think about installing two or three smaller skylights instead of one giant one. This is a fantastic way to distribute light more evenly across the space, getting rid of those gloomy corners and creating a much more balanced atmosphere.
Before any holes are cut, it’s absolutely essential to check what’s hiding between the ceiling and the roof. A professional installer will need to map out structural beams, joists, and any electrical wiring to make sure the spot you’ve picked is both safe and structurally sound.
Budgeting For Your Skylight And Its Long-Term Value
Let’s talk about the dollars and cents. Understanding the costs involved in adding a skylight to a flat roof is the first step in planning your project with confidence. The total investment really breaks down into two key parts: the cost of the skylight itself, and the price for a professional to install it.
In Australia, the skylight unit can vary quite a bit in price depending on its size, whether it’s a fixed or ventilating model, and the type of glazing you choose. Installation fees will also shift based on how complex the job is, your roof’s material, and even your specific location. A simple install on an easy-to-access roof will cost less than a trickier project that needs structural changes. Getting a detailed quote from a qualified installer is always your best bet.
For a really thorough breakdown of all the moving parts, check out our detailed guide to skylight installation cost.
Looking Beyond The Initial Cost
While the upfront price tag is a big factor, the real story is the incredible value a skylight brings to your home over the long haul. The most obvious win is on your power bills. When you flood a room with natural light, you’ll find yourself reaching for the light switch far less often, which adds up to real savings every single month.
The value of a skylight isn’t just measured in dollars saved on a power bill. It’s about investing in your home’s atmosphere, your family’s well-being, and its future market appeal.
The Intangible Returns
The long-term benefits go way beyond just energy savings. Modern, double-glazed skylights are fantastic insulators. They help keep your home warmer in winter and cooler in summer, which can trim down your heating and cooling costs and make your home a much more comfortable place to be, day in and day out.
And don’t forget about resale value. A bright, airy, light-filled home is something buyers are always looking for. A beautifully placed skylight isn’t just a window; it’s a premium architectural feature that makes spaces feel bigger and more welcoming. That can give your property’s value a serious boost when it’s time to sell.
Got Questions About Flat Roof Skylights? We’ve Got Answers.
Even after digging into all the details, it’s completely normal to have a few questions swirling around before you commit to adding a skylight to your flat roof. Getting those final queries answered is what gives you the confidence to move forward. Let’s tackle some of the most common ones we hear from homeowners across Australia.
Can a Skylight Go on Any Flat Roof?
This is usually the first question people ask, and the short answer is: almost always, yes. But the devil is in the details—specifically, your roofing material. If you have a membrane or metal roof, the installation is generally straightforward.
Things get a bit more complex with concrete slab or green roofs. These require specialised techniques to get the job done right, so a professional on-site assessment isn’t just a good idea; it’s essential.
What About Upkeep?
Another big one is maintenance. The great news is that modern skylights are designed to be incredibly low-maintenance. You’re not signing up for a lifetime of chores.
A simple check-up once a year is usually all it takes. It’s also smart to give the seals and flashing a quick look after a big storm, just to make sure no debris has built up. Keeping the glass clean is the easiest way to ensure you’re getting every last drop of that beautiful sunlight.
Won’t It Make My Room Boiling Hot?
A very fair question, especially with our Aussie summers in mind. Nobody wants to turn their living room into a greenhouse. Thankfully, quality skylights are engineered specifically to prevent this.
- Double-Glazing: This acts as a powerful thermal barrier, stopping heat from transferring into your home. Think of it like a thermos for your roof.
- Low-E Coatings: These are microscopic metallic layers that are practically invisible. They work by reflecting solar heat away while letting all the lovely visible light pour in.
- Integrated Blinds: For the ultimate control, blinds give you the power to block out the harsh sun during the peak heat of the day.
How Long Will a Flat Roof Skylight Last?
Finally, people want to know about the lifespan of their investment. When installed professionally using top-notch materials, a skylight is built to last for decades.
The secret ingredient is a perfectly executed waterproofing system—that’s the curb, membrane, and flashing working together. Get that right from day one, and your skylight will remain a stunning, leak-free feature of your home for many years to come.
Transform your home with the gift of natural light. Vivid Skylights offers premium, double-glazed skylights designed for Australian conditions, complete with a 10-year leak-free warranty. Explore our range and get a free estimate today.