

Picture this: a dark, forgotten corner of your home suddenly becoming the most loved room in the house. That’s the magic of a well-chosen flat roof skylight. This is more than just installing a window; it’s about completely transforming a room’s entire feel and purpose.
What a Flat Roof Skylight Can Do for Your Home
Think of this guide as your complete roadmap to getting it right. We’ll walk you through everything, from picking the perfect type of skylight for your space to understanding the nitty-gritty of waterproofing—the key to a leak-free result for years to come. By the end, you’ll feel confident talking to installers and making smart decisions that suit the unique demands of the Australian climate.
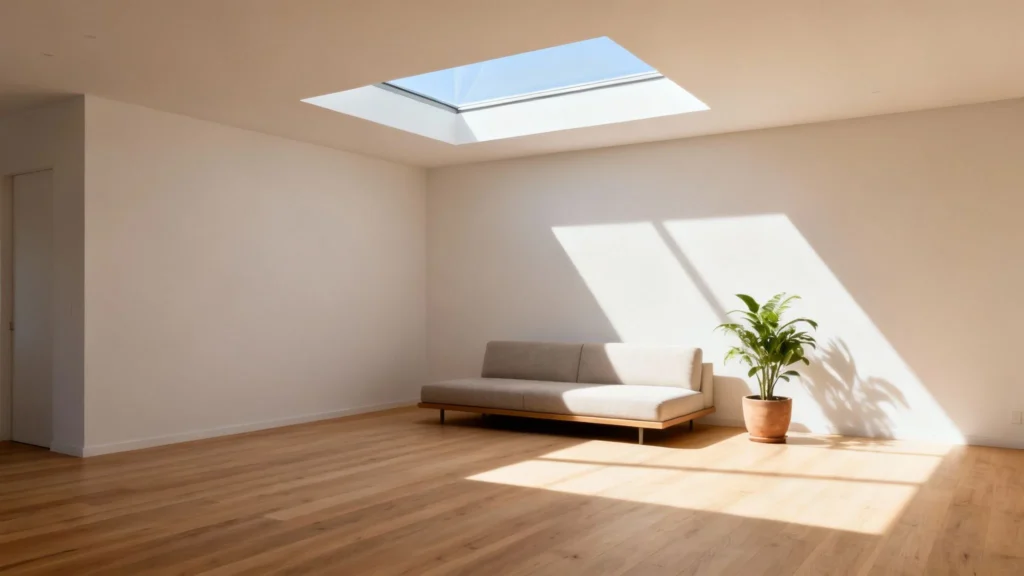
A skylight pours natural light in from above, creating a quality of light that vertical windows just can’t match. It opens up the room, making it feel more spacious and connecting you to the outdoors as you watch the light change throughout the day.
More Than Just a Window
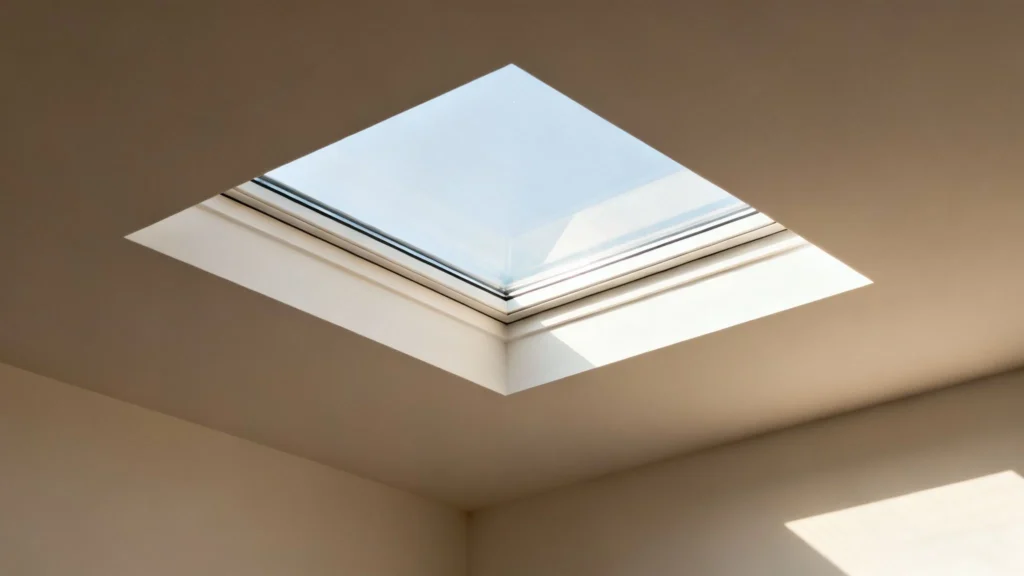
Unlike a standard window you’d put in a wall, a skylight for a flat roof is a whole engineered system. It’s specifically designed to integrate into a roof with little to no slope. This means it needs specialised parts to handle water drainage properly and keep your roof’s structure sound.
The right installation can completely change a room by:
- Boosting Natural Light: Slashing your need for artificial lights during the day can make a real dent in your power bills. Plus, natural light is a proven mood and productivity booster.
- Enhancing Aesthetics: A skylight can be a show-stopping architectural feature in its own right, adding a modern touch and boosting your property’s value.
- Improving Ventilation: Models that open (or “vent”) are fantastic for letting hot, stale air and moisture escape. This is a game-changer for improving air quality, especially in places like kitchens and bathrooms.
As a rule of thumb, aim for the skylight’s area to be roughly 3-5% of the room’s total floor area. This ratio usually provides plenty of daylight without creating too much glare or heat gain, hitting that sweet spot for most living spaces.
Ultimately, putting a skylight on your flat roof is an investment in your home’s usability and your family’s well-being. It’s all about creating spaces that are brighter, healthier, and simply more enjoyable to be in.
Finding the Right Skylight for Your Home
Choosing the right skylight for your flat roof isn’t just about picking a window for your ceiling. It’s about matching a design to your home’s unique layout and, more importantly, your family’s lifestyle.
The best choice for a living room could be completely wrong for a bathroom, so let’s break down the main types to find your perfect fit.
Think of each skylight as having its own personality. A fixed skylight is the quiet observer—a pure, sealed window to the sky. Its one and only job is to flood a space with as much natural light as possible. This makes it a brilliant choice for living areas, studies, or dining rooms where extra ventilation isn’t the top priority.
On the other hand, a venting skylight is the breather. It opens up, either manually or with the touch of a button, to let stale, warm air escape while drawing fresh air in. This makes it an absolute game-changer for rooms that deal with a lot of moisture and heat, like kitchens, laundries, and bathrooms. It’s fantastic for controlling steam and getting rid of lingering odours.
Matching Skylight Type to Your Room
The key is to think about what you do in a space. You wouldn’t put a permanently sealed window in a bathroom that desperately needs to air out after a hot shower, just like you probably don’t need a complex opening mechanism in a hallway that just needs a bit of light.
Here’s a simple way to think about it:
- For living rooms, hallways, or studies: A fixed skylight is almost always the best bet for beautiful, uninterrupted light.
- For kitchens, bathrooms, or laundries: A venting skylight is pretty much essential for managing air quality and moisture.
- For spaces without direct roof access: A tubular skylight can cleverly channel light into tricky spots like walk-in robes or internal hallways.
This practical approach ensures you get the full benefit of your new skylight flat roof installation, enhancing both the look and the feel of your home. If you’re keen to dive deeper, you can explore the various types of skylights to see detailed comparisons and examples.
To make it even easier, here’s a quick comparison of the main options.
Comparing Flat Roof Skylight Types
| Skylight Type | Best For | Key Benefit | Consideration |
|---|---|---|---|
| Fixed | Living areas, hallways, studies | Maximum, uninterrupted light | No ventilation provided |
| Venting | Kitchens, bathrooms, laundries | Excellent ventilation & light | Has moving parts; may cost more |
| Domed/Pyramid | Areas needing all-day light | Captures light from low angles | Often acrylic; aesthetics differ from flat glass |
| Tubular | Internal rooms, walk-in robes | Brings light to rooms without roof access | Light is diffused, not a direct sky view |
This table should help you quickly narrow down which type aligns best with the job you need it to do.
Specialised Skylights for Unique Needs
Beyond the standard fixed and venting models, you’ll find designs engineered for specific effects. Domed skylights, often made from super-durable acrylic, are fantastic at capturing sunlight from lower angles throughout the day. This means they effectively gather more light, especially during the early morning and late afternoon.
For those really tricky spots in a home, the tubular skylight acts like a sunlight delivery service. A small dome on the roof captures light and funnels it down a highly reflective tube to a diffuser in the ceiling below, brightening up even the most landlocked rooms.
The global demand for natural light is booming. The flat roof skylight market was valued at around $2.5 billion in 2023 and is projected to grow substantially. Australia is a key region driving this, thanks to our modern architectural trends and focus on sustainability.
Choosing the right type is the first, most important step. When you align the skylight’s features with your room’s purpose, you ensure your investment doesn’t just add light—it adds real, tangible value and comfort to your daily life.
Waterproofing a Flat Roof Skylight The Right Way
Let’s be honest, the single biggest worry for anyone thinking about a skylight is the chance of a leak. When you’ve got a flat roof where water doesn’t run off as quickly, that concern is dialled up to eleven.
Proper waterproofing isn’t just a nice-to-have—it’s the most critical part of a successful skylight flat roof installation. A truly professional job comes down to two key parts working together perfectly: the upstand and the flashing. Get these right, and you’ve built a rock-solid defence system that keeps your home dry, no matter what the Melbourne weather throws at it.
The Critical Role of the Upstand
Think of an upstand (sometimes called a curb) as a small retaining wall for your skylight. It’s a raised frame, usually built from timber, that gets fixed directly to your roof structure. Its main job is to lift the skylight a good 150mm or more above the flat surface of the roof.
Why is this elevation so important? It stops “ponding”—where rainwater gathers in pools on the roof—from ever getting near the skylight’s seals. Without an upstand, the skylight would sit flush with the roof, right in the path of any standing water. That’s just asking for trouble down the line.
An upstand isn’t just a barrier against water. It creates a clean, raised platform for the flashing to grip onto, establishing a vital separation between the roof membrane and the skylight itself. This is the golden rule of waterproofing a flat roof.
By lifting the whole unit up and away, the upstand ensures that water is always guided away from the most vulnerable parts of the installation.
This diagram shows how selecting the right kind of skylight is the first step toward a successful, leak-free installation in the right room.
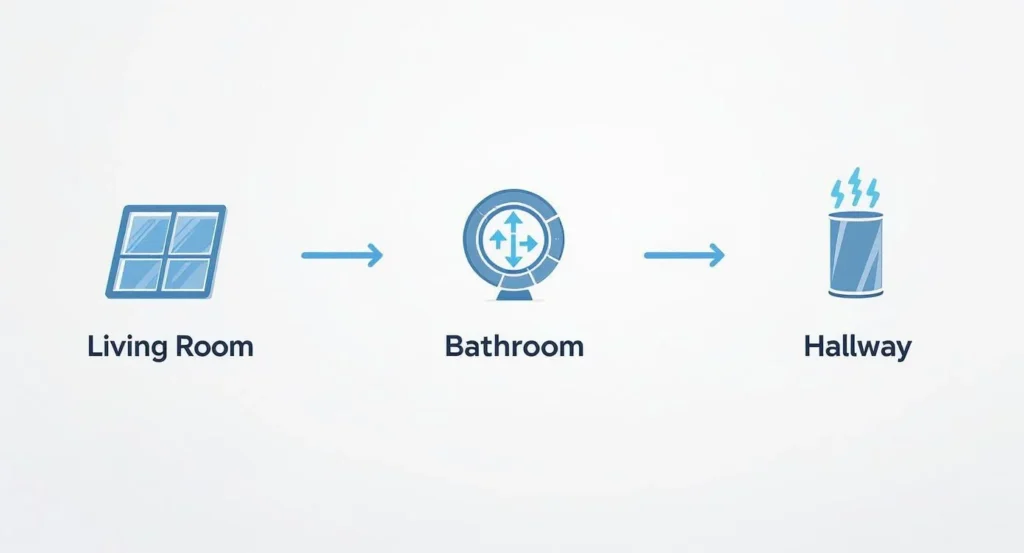
The flow from a fixed skylight in a living room to a venting one in a bathroom shows how the room’s function dictates the skylight’s form, which in turn affects what’s needed for installation.
How Flashing Creates an Impenetrable Seal
If the upstand is the wall, then the flashing is the custom-fitted raincoat that wraps around it, keeping everything completely dry. Flashing is a thin layer of waterproof material, typically metal, that covers the join between the upstand and your roofing material (like a membrane, bitumen, or metal sheeting).
It’s shaped with absolute precision and sealed to create a continuous, watertight barrier. Here’s how it works:
- Base Flashing: The first layer is fitted snugly around the bottom of the upstand and spreads out onto the roof surface.
- Membrane Integration: Your main roofing membrane is then laid and sealed over this base flashing, locking in the primary waterproof layer.
- Counter Flashing: A final piece of flashing is installed over the top, capping the upper edge of the membrane and sealing it tight against the side of the upstand.
This layered system makes sure there are absolutely no gaps or seams for water to sneak through. A high-quality skylight flashing kit is specifically engineered for this job and is non-negotiable for a guaranteed leak-proof finish. Cutting corners on waterproofing can lead to serious headaches like mould and rot; learning about the risks associated with a leaky flat roof makes it clear why this step has to be perfect.
When you bring together a properly built upstand and expertly installed flashing, you transform a potential weak point on your roof into a fortress. It becomes a durable, weather-tight feature that will let the light in for decades to come, without a single drop of water.
Choosing the Best Glass for Australian Conditions
The glass you pick for your skylight flat roof is just as critical as the frame itself, especially when you’re dealing with the harsh Australian sun. It’s best to think of high-performance glazing as sunglasses for your home; its job isn’t just to let light in, but to manage the heat and damaging UV rays that come along for the ride.
Today, the industry standard is double glazing. This setup uses two panes of glass with a sealed air or gas gap in between. This gap is a brilliant insulator, helping to keep your home cooler during those scorching summers and stopping precious warmth from leaking out in winter.
For an extra layer of performance, look for glass with a Low-E (low-emissivity) coating. It’s a microscopically thin, completely transparent layer that reflects thermal energy. In summer, it bounces the sun’s heat back outside. In winter, it reflects your home’s internal heat back inside. The impact on your energy bills can be significant.
Decoding Energy Ratings for Skylights
When you’re comparing skylights, you’ll run into two key energy ratings. They’re simple to understand and make sure you’re getting the right product for our climate.
- U-value: This number tells you how well the skylight stops heat from escaping. A lower U-value means better insulation, which is exactly what you want to keep your house cosy during a chilly Melbourne winter.
- Solar Heat Gain Coefficient (SHGC): This measures how much of the sun’s heat gets through the glass. A lower SHGC is better for us, as it means the glass is more effective at blocking solar heat and keeping your home from turning into an oven on hot days.
These ratings are all part of the Window Energy Rating Scheme (WERS), which is the trusted Australian standard. If a skylight has great WERS ratings, you know it’s been properly tested and proven to perform in local conditions.
Sizing Your Skylight for Balanced Light
Getting the size right is absolutely crucial. You want beautiful, balanced light without turning your room into a greenhouse. An oversized skylight can create unbearable glare and heat, while one that’s too small might not make the impact you were hoping for.
A simple and effective rule of thumb is to aim for the skylight’s total area to be between 3-5% of the room’s floor area. This ratio typically delivers ample natural light without compromising comfort or energy efficiency.
This isn’t just a design tip; it’s a guideline supported by Australian building practices. The National Construction Code (NCC), for example, sets limits on skylight areas to manage things like energy performance and even fire risk. Regulations also cover thermal values like U-values and SHGC, ensuring any new skylight meets strict standards. If you’re keen to learn more, you can discover more insights about Australian building codes.
Understanding Skylight Installation Costs and Timelines
When you’re budgeting for a new skylight, it’s easy to focus on the unit itself, but that’s only part of the story. A successful skylight flat roof project is really a trio of costs: the skylight, a purpose-built flashing kit, and the skilled labour to bring it all together.
Many homeowners are surprised to learn that installing a skylight on a flat roof is often more involved—and therefore more expensive—than on a typical pitched roof.
The reason? It all comes down to bulletproof waterproofing. An installer has to build a sturdy timber upstand from the roof deck and then meticulously integrate the flashing to ensure water never gets a chance to pool. It’s a specialist job that simply requires more time, materials, and expertise.
Breaking Down the Costs
When you get a quote, make sure you see the costs for both the materials and the expert fitting. The final investment will naturally change depending on the skylight’s size, its type (like fixed versus venting), and whether any extra structural work is needed to prepare your roof.
In Australia, a standard professional installation will fall within a certain range, but every roof is different. For a realistic idea of what your project might cost, take a look at our detailed guide on skylight installation costs. It’s the best way to get a clear picture based on real-world numbers.
It’s a growing market, too. The global demand for skylights was pegged at about USD 3.08 billion in 2022 and is expected to climb to USD 4.44 billion by 2028. Here in Australia, our roofing industry is booming, especially with the big push for energy-efficient homes in states like Victoria.
Mapping Out the Project Timeline
Getting a skylight installed properly isn’t a quick in-and-out job. It’s a careful, multi-stage process that usually spans a few days to guarantee a perfect, long-lasting finish.
Here’s a look at how a typical project unfolds:
- Quote and Site Assessment: It all starts with a chat. An installer will visit to check out your roof structure, listen to what you want, and figure out the best approach.
- Structural Work: Once the quote is approved, the team gets to work. They’ll precisely cut the opening in your roof and build the custom timber upstand.
- Waterproofing and Flashing: This is the most crucial step. The flashing is carefully installed and sealed, becoming a seamless part of your roof’s waterproof membrane. There’s no room for error here.
- Skylight Installation: With the groundwork laid, the skylight unit is finally fitted and securely fastened to the upstand.
- Internal Finishing: The last piece of the puzzle is finishing the ceiling inside. The team will plaster and prep the new opening, leaving you with a clean, seamless look that feels like it was always there.
Understanding these steps helps set the right expectations. This methodical, step-by-step process is exactly what ensures a leak-free skylight that will fill your home with light for decades to come.
Your Flat Roof Skylight Questions Answered
Even when you’ve got a solid plan, it’s totally normal to have a few last-minute questions before you commit to installing a skylight on your flat roof. This section tackles the most common queries we hear from homeowners, giving you clear, practical answers so you can feel completely confident about your project.
Can a Skylight Be Installed on Any Flat Roof?
The short answer is yes—you can install a skylight on pretty much any flat roof. Whether your roof is covered in a membrane, metal sheeting, or even concrete, there’s a way to make it work. The real key isn’t the roofing material itself, but using the right techniques and parts for the job.
For example, tackling a bitumen roof requires a completely different flashing and sealing method compared to a metal one. A professional installer’s first move is always to check your roof’s structure to make sure it can handle the skylight’s weight. From there, they’ll pick a system designed specifically for your roof type to create a perfect, watertight seal that doesn’t compromise your roof’s integrity.
Will a Flat Roof Skylight Leak in Heavy Rain?
A professionally installed skylight should never leak, even during a classic Melbourne downpour. When leaks happen, it’s almost always down to a shoddy installation, not a faulty product. The two heroes of leak prevention are the upstand and the flashing.
The upstand raises the skylight above the roof’s surface, acting like a small dam to stop water from pooling against the glass. The flashing then creates an unbreakable, custom-fitted seal between the upstand and the roof membrane.
Always go with a reputable installer who uses manufacturer-approved flashing kits and stands by their work. A little bit of simple maintenance, like clearing away fallen leaves a couple of times a year, also goes a long way in making sure water can always drain freely.
How Do You Clean and Maintain a Skylight?
Skylight maintenance is surprisingly simple. For the outside glass, all you really need is a soft cloth, some gentle soapy water, and a good rinse. It’s important to steer clear of abrasive cleaners or harsh chemicals that could scratch the glass or damage special coatings like Low-E.
A quick check twice a year to make sure the area around the skylight is free of leaves and debris is all it takes to prevent blockages. The inside glass can be cleaned just like any other window in your house. Better yet, many modern skylights now come with self-cleaning coatings that use UV rays and rainwater to break down and wash away dirt, making the job even easier.
What Happens if the Glass Breaks?
Modern skylights are built with safety as the top priority, usually featuring either laminated or tempered glass. Laminated glass, just like a car windscreen, has a plastic interlayer that holds the pane together even if it shatters. Tempered glass is heat-treated for extra strength and is designed to crumble into small, dull-edged pieces if it fails, which seriously reduces the risk of injury.
The chances of breakage from hail are incredibly low, especially with high-quality, impact-rated units designed for tough Australian conditions. In the rare event that a break does happen, the best thing to do is call a professional skylight or glazing company immediately to get the glass pane replaced safely and securely.
Ready to bring beautiful, natural light into your home? The team at Vivid Skylights is here to help you find the perfect solution for your flat roof. Explore our range of high-performance skylights and get a quick quote online. Visit us at https://vividskylights.com.au.