
There’s nothing quite like installing skylights in a flat ceiling to completely change the feel of a room. It’s one of the best ways to flood a dark, forgotten space with natural light, turning it into somewhere bright and inviting. But this job is more than just cutting a hole in the roof; it demands careful planning to make sure the final result is not only beautiful but also completely watertight—especially somewhere like Carnegie where the weather can keep you guessing.
Why a Skylight Is the Ultimate Upgrade
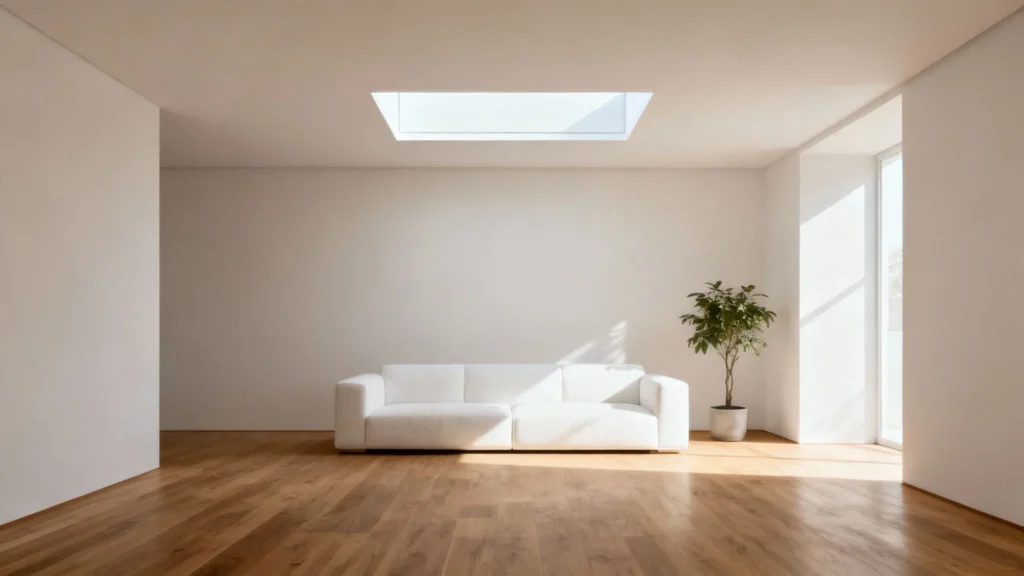
Bringing daylight into a room through a flat ceiling is a seriously powerful home improvement. It’s a project that fundamentally alters your living space, making it feel bigger, more open, and better connected to the outdoors. Beyond the obvious aesthetic lift, this upgrade brings some real, tangible benefits that homeowners in Carnegie are looking for these days.
For a lot of people, the biggest win is cutting down on the need for artificial lighting during the day. This isn’t just about shaving a bit off your power bill; it’s about creating a healthier, more natural atmosphere inside your Carnegie home.
This shift also ties into the growing focus on sustainable building practices across Australia. A 2023 survey found that commercial buildings using skylights in flat ceiling designs can reduce their lighting energy consumption by around 20-30%. You can dig deeper into these energy efficiency stats over at Arizton.
More Than Just Light
While letting the sun in is the main goal, the perks of a well-placed skylight go much further. Here’s what else you’re getting:
- Architectural Interest: A skylight acts as a dynamic focal point, breaking up an otherwise flat, uninteresting ceiling and adding a sense of height.
- Improved Mood and Wellbeing: It’s no secret that more natural daylight boosts your mood and helps regulate your body clock, making your home a genuinely nicer place to be.
- Increased Property Value: A bright, light-filled home is always a winner on the Carnegie property market. Skylights are a sought-after feature that can seriously bump up your property’s appeal.
A skylight doesn’t just light up a room; it transforms it. By carefully planning the placement and design, you can control how light interacts with your space throughout the day, creating a living piece of art.
This guide is designed to take you beyond the basics. We’ll walk you through the entire journey, from picking the perfect spot to applying those final, professional touches, giving you the confidence to get this project done right in your Carnegie home.
Planning Your Skylight Project From Start to Finish
A great skylight project starts well before you even think about picking up a saw. Proper, thoughtful planning is what separates a stunning, light-filled feature from a renovation headache. This is especially true when you’re installing skylights in a flat ceiling, because you’re doing more than just cutting a hole—you’re crafting a custom architectural element for your home.
Your first job is to find the perfect spot. Spend some time in the room at different times of the day to see how the sun tracks across your roof. A north-facing skylight in a Carnegie home, for instance, will give you consistent, soft light all day, while an east-facing one will flood the room with bright morning sun.
But it’s not just about the light. You have to consider what’s hiding above the ceiling. Your home’s existing structure is the ultimate decider of where a skylight can actually go. You’ll need to locate the ceiling joists and roof rafters, as the skylight’s opening will be framed between them. Cutting through these crucial supports is a serious structural change that requires an engineer’s sign-off, so it’s always best to work with the layout you’ve got.
Choosing the Right Type of Skylight
With a potential location mapped out, it’s time to pick the right kind of skylight for the job. Your two main choices for installation are curb-mounted and deck-mounted.
- Curb-Mounted: The skylight sits on a raised, custom-built frame (the “curb”) on the roof. This is the go-to for flat or very low-slope roofs because it lifts the unit up, helping water drain away and preventing pooling.
- Deck-Mounted: This style is installed directly onto the roof deck for a lower, more streamlined look. While it’s common on pitched roofs, it demands absolutely meticulous waterproofing to work on a flat roof.
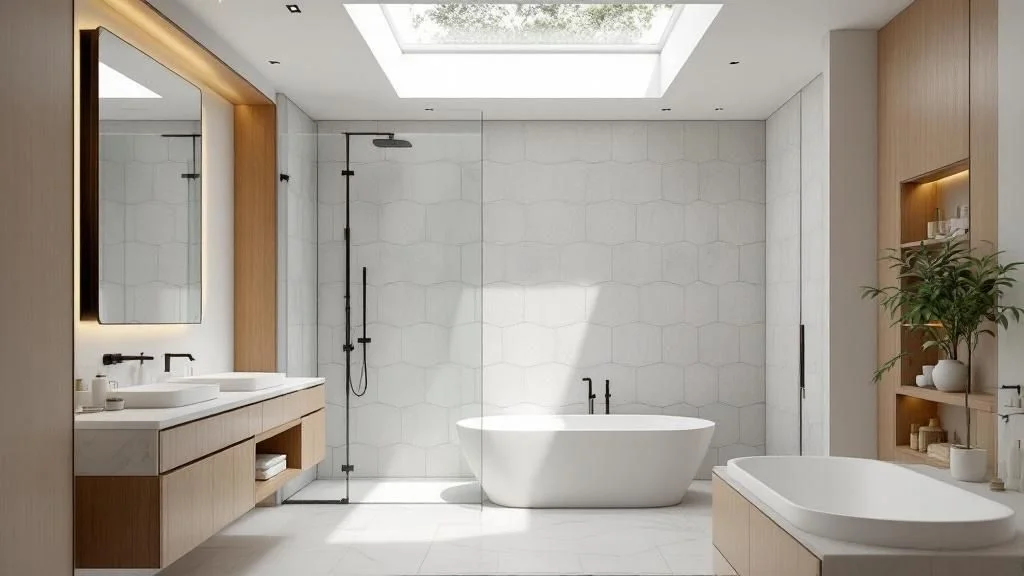
You’ll also need to decide between a fixed or a venting model. A fixed skylight is all about letting light in, that’s it. A venting skylight, on the other hand, can be opened (either manually or electrically) to release stale, hot air. For a kitchen or bathroom, a venting model is a brilliant choice for improving airflow and comfort. If you want a deeper dive, you can explore the full range of different types of skylights to see what really suits your home.
Before making a final decision, it’s helpful to see how these options stack up.
Choosing the Right Skylight for Your Flat Ceiling
This table breaks down the main skylight types suitable for flat ceilings, helping you weigh up the functionality, installation complexity, and overall cost.
| Skylight Type | Best For | Pros | Cons |
|---|---|---|---|
| Curb-Mounted (Fixed) | Most flat roof applications, especially low-slope roofs | Excellent water shedding, highly reliable, lower cost | Sits higher on the roof, which can affect aesthetics |
| Curb-Mounted (Venting) | Kitchens, bathrooms, and areas needing airflow | Provides both light and ventilation, improves air quality | More complex installation, higher cost than fixed models |
| Deck-Mounted (Fixed) | Achieving a low-profile, sleek look | Sits flush with the roofline for a clean aesthetic | Requires expert waterproofing, higher risk of leaks if not done perfectly |
Ultimately, the best choice depends on your specific roof, your budget, and whether you value ventilation as much as you do natural light.
Designing the Perfect Light Shaft
For any skylight in a flat ceiling, the light shaft is just as important as the skylight itself. This is the tunnel that connects the skylight on your roof down to the finished opening in your ceiling. The design of this shaft has a massive impact on how the light actually enters and fills your room.
A well-designed light shaft doesn’t just channel light; it diffuses and directs it. The angle and finish of the shaft’s walls can dramatically alter the brightness and character of the entire room.
A straight, vertical shaft will give you a direct, concentrated beam of light. But by angling or splaying the walls of the shaft, you can spread that light over a much wider area. Flaring the shaft—making it wider at the ceiling than it is at the roof—is a popular technique that creates a softer, more expansive glow. The interior finish matters, too. A high-gloss white paint will reflect up to 80% more light than a standard matte finish, maximising every bit of sunlight coming in.
Gathering Your Tools and Prioritizing Safety
Before you even think about making that first cut for your skylight, a bit of prep work will save you a world of headaches. Having every tool you need ready to go prevents those frustrating trips up and down the ladder and, more importantly, keeps the whole project running safely. This isn’t just about grabbing a saw; it’s about having the right one for each stage of the job.
You’ll definitely want a circular saw for making those long, clean cuts through your roofing and sheathing. But for the trickier work inside the attic or carefully navigating around trusses, a reciprocating saw is your best mate. And don’t forget the essentials: a solid ladder, measuring tape, chalk line, drill, and a decent set of hand tools are all non-negotiables for your kit.
Your Essential Skylight Installation Toolkit
Getting your tools organised beforehand helps the job flow smoothly. Treat this like a pre-flight checklist before you start work on your flat ceiling skylight.
- Ladders: You’ll need two. An extension ladder to get you safely onto the roof and a stepladder for all the interior work. Make sure they’re stable and properly rated for your weight.
- Cutting Tools: A circular saw for the main roof cuts and a reciprocating saw for getting into tight spots. A sharp utility knife is also a must-have for trimming back roofing materials.
- Marking and Measuring: A quality tape measure, a chalk line for snapping straight guides, and a builder’s square are absolutely critical for accuracy.
- Safety Gear: This is the most important part of your kit, hands down. You’ll need safety glasses, sturdy gloves, a dust mask, and a properly fitted safety harness for any time you’re on the roof.
Safety isn’t an optional extra; it’s the foundation of any successful DIY project. A securely placed ladder and a properly worn harness are your two best friends when you’re working at height.
A Focus on Rooftop Safety
Working on a roof, even a relatively flat one, comes with its own set of risks. The first rule is to always check the weather forecast before you start—high winds and rain are absolute project-stoppers. When you’re setting up your ladder, make sure it’s on level, solid ground and extends at least one metre above the roofline. This gives you something secure to hold onto as you get on and off the roof.
For any project involving skylights in a flat ceiling in a Carnegie home, using a safety harness that’s tied off to a secure anchor point is a must. It’s a simple piece of gear that offers critical protection. It’s also worth remembering, especially in older homes, that before you disturb any existing ceiling materials, it’s vital to be aware of the UK hazardous waste disposal regulations, as some materials might require special handling.
This safety-first mindset is becoming more common in the industry. Australian construction data from 2022 showed that about 45% of new commercial flat-roof buildings incorporated skylights, with a solid 35% of those featuring advanced options like automated blinds or rain sensors. You can read more about these trends in skylight technology.
A Practical Guide to Installing Your Skylight
Alright, you’ve done your planning and gathered the tools. Now for the exciting part—turning that solid ceiling into a beautiful new source of daylight. This is where your careful prep work really starts to pay off. Installing skylights in a flat ceiling is a methodical job that begins inside your home before moving up to the roof.
First things first, you’ll be working inside the room. Grab your tape measure and pencil to carefully mark out the exact spot for the ceiling opening. I always tell people to double-check their measurements against the skylight’s rough opening specs. Once you’re absolutely sure of the layout, you can go ahead and make that initial cut through the plasterboard.
From Ceiling to Rafters
With the interior hole cut, it’s time to head up into the attic or roof space. The next job is to build the light shaft, which is basically the tunnel connecting your ceiling to the roof. You’ll be framing out the opening with timber that matches your existing ceiling joists, creating a solid box to support both the plasterboard and the skylight unit.
This framing isn’t just for looks; it’s crucial for maintaining the structural integrity of your ceiling. It’s also the foundation for the light well you designed earlier. Take your time here—making sure this frame is perfectly square and level will save you a lot of headaches later on.
Taking the Work to the Rooftop
Now that the interior structure is sorted, you can transfer those measurements up to the roof itself. This is a step where accuracy is everything. From inside the attic, drill small pilot holes up through the roof sheathing at each corner of the frame. These tiny holes are your guides for marking out the cut on the rooftop.
Once you’re safely on the roof, use a chalk line to snap straight, clear lines between those pilot holes. This gives you a perfect template to cut along. Before you even think about starting the saw, take a moment to double-check your safety gear and setup.
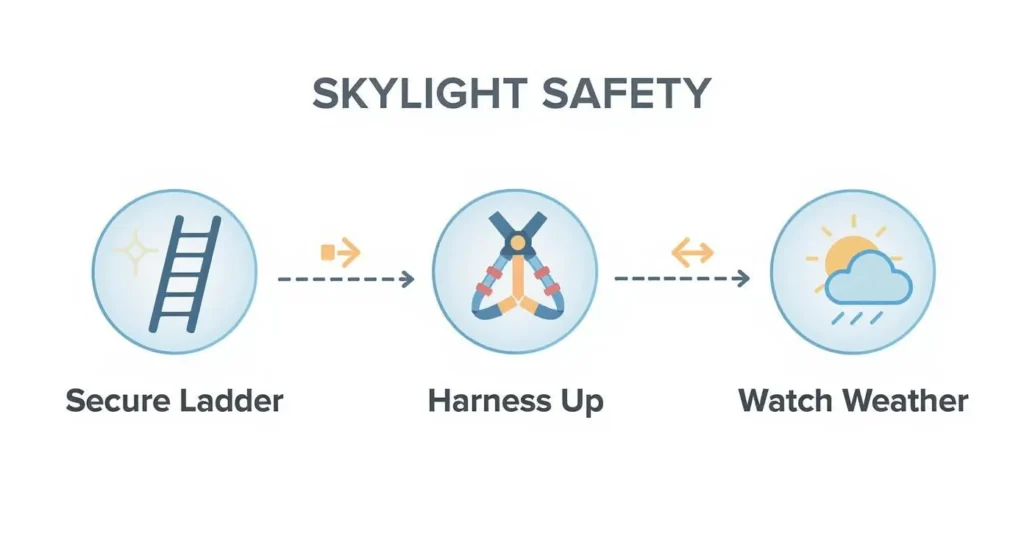
This visual is a great reminder that a safe, successful job is built on these simple checks. With safety confirmed, you can make the cut with your circular saw, removing the roofing material and sheathing to reveal the opening. Now you’re ready for what I consider the most critical part of the whole install.
Mastering the Flashing Installation
Honestly, if there’s one step that determines whether your skylight will be leak-free for years to come, it’s installing the flashing correctly. This layered metal system is what integrates the skylight with your roofing, creating a completely watertight seal. This is absolutely not the place to rush or cut corners.
Think of flashing as a series of overlapping channels designed to guide water down and away from the skylight opening. Each piece must be layered in the correct sequence—bottom, sides, and then the top piece—to work effectively.
You’ll start by fitting the sill flashing along the bottom edge of the opening. Next come the side flashing pieces, which must overlap the sill piece properly. Finally, the top piece, or “head” flashing, goes on over the side pieces. Each layer needs to be woven into your roofing material exactly as the manufacturer specifies to create a bulletproof barrier against rain and weather. For a deeper dive, check out our guide on the importance of a skylight flashing kit.
With the flashing secure, you can carefully lower the skylight into place on the prepared curb. Make sure it’s perfectly level before you fasten it down with the screws provided. Getting this right is your ticket to years of leak-free performance. While the average installation cost for skylights in a flat ceiling in the Carnegie area can range from AUD 1,200 to AUD 3,500, the energy savings mean the payback period is often just six to eight years, making it a solid investment in your home.
Achieving a Professional Interior Finish
Once your new skylight is securely fitted and watertight on the roof, the real magic happens inside. This final stage is what separates a decent job from a truly professional one, turning the installation into a seamless architectural feature that looks like it was always meant to be there. It’s all about the finesse.
First things first, you need to properly insulate the light shaft that connects your ceiling to the roof. Don’t skip this. Without proper insulation, the temperature difference between your warm home and the cooler roof space can lead to condensation, causing moisture issues down the track. Grab some high-quality insulation batts and fit them snugly between the timber framing of the shaft.
After the insulation is sorted, it’s time to line the shaft with plasterboard. Take your time here and cut each piece carefully to ensure a tight, clean fit.
Creating a Seamless Plastered Surface
With the plasterboard screwed into the timber frame, the next goal is to make all those joints and corners completely disappear. You’ll do this by applying joint tape over every seam, followed by several thin layers of joint compound. The trick is to feather each layer out a little wider than the one before it.
Patience is your best friend during this step. Let each layer of compound dry completely before you even think about sanding it. If you rush it, you’ll end up with a lumpy, uneven surface that will stick out like a sore thumb once the paint goes on.
A flawless interior finish is the signature of a professional job. Taking the time to properly tape and sand the light shaft ensures the final result is a clean, smooth surface that perfectly blends with your existing flat ceiling.
If you’re working with a particularly deep light well, mastering the art of painting high ceilings will be a huge help in getting that perfect, streak-free look.
Painting and Finishing Touches
The paint you choose can dramatically affect how much light your new skylight bounces around the room. I always recommend a high-quality ceiling paint with a high light reflectance value (LRV). A bright, brilliant white is almost always the best bet. It will maximise the natural daylight, making your Carnegie home feel even brighter and more open.
Once the paint is dry, the final detail is adding trim or architrave around the ceiling opening. This little touch neatly covers the edge where the new plasterboard meets your existing ceiling, creating a sharp, polished border. It’s the perfect frame for your new window to the sky.
For homeowners also thinking about light control, it’s worth exploring options for a skylight cover interior to block out intense sun when needed.
Got Questions About Flat Ceiling Skylights?
Even with the best-laid plans, it’s completely normal to have a few lingering questions before you start cutting a hole in your roof. Let’s tackle some of the most common queries we hear from homeowners in Carnegie when they’re thinking about skylights in a flat ceiling.
Will My New Skylight Leak?
This is the big one. It’s hands down the number one concern, and for good reason. The short answer? A modern, high-quality skylight that’s installed correctly should absolutely not leak.
When leaks do happen, it’s almost always a problem with the installation, specifically around the flashing. This isn’t a step where you can afford to cut corners. Premium skylights, especially those designed for flat or low-pitch roofs, come with advanced flashing kits engineered to create multiple, overlapping layers of protection. They’re designed to actively channel water away from the opening.
Following the manufacturer’s instructions for the flashing is non-negotiable. If you’re not 100% confident you can get this step perfect, it’s the one part of the job that is always worth calling in a professional for.
Glass or Acrylic: What’s the Better Choice?
Both materials have their pros and cons, but for most residential homes in Carnegie, one is the clear winner.
Acrylic (or polycarbonate) skylights are often cheaper and can be more resistant to impacts like hail. The downside? They tend to yellow and become brittle over time from UV exposure, and they scratch much more easily, which can leave them looking cloudy.
Glass skylights, on the other hand, offer far superior clarity and longevity. Crucially, they also provide better UV protection for your furniture and flooring, preventing fading. High-performance units will feature laminated or tempered glass and advanced Low-E coatings. These coatings are a game-changer for thermal efficiency, helping to block unwanted heat during a scorching Carnegie summer while keeping your home warmer in winter.
For most projects, a high-performance glass skylight is simply the better long-term investment.
What Kind of Maintenance is Involved?
The good news is that looking after a modern flat ceiling skylight is surprisingly straightforward. You don’t need a complicated or time-consuming routine.
- Exterior Cleaning: Give the outside glass a clean once or twice a year to ensure you’re getting maximum light. All you need is a soft cloth and some mild, soapy water—steer clear of harsh chemicals.
- Rooftop Check: While you’re up there, give the flashing and seals a quick inspection. Look for any build-up of leaves or debris, and check for any cracks or lifting that could stop water from draining away properly.
- Interior Care: Inside, just treat it like any other window. A quick dust of the frame and a clean of the interior glass during your regular home cleaning is all it takes.
Ready to bring beautiful, natural light into your Carnegie home? The team at Vivid Skylights specialises in premium, leak-free skylights designed for Australian homes. Explore our range of fixed and electric opening models and transform your space today at https://vividskylights.com.au.