

 Figuring out Velux skylight sizes and prices is pretty straightforward: the cost of the unit really comes down to its dimensions and what features you choose. In Australia, you can expect a standard Velux skylight unit to be anywhere from AUD 600 to AUD 1,800. The sizes are designed to work well with common Aussie roof constructions and room layouts.
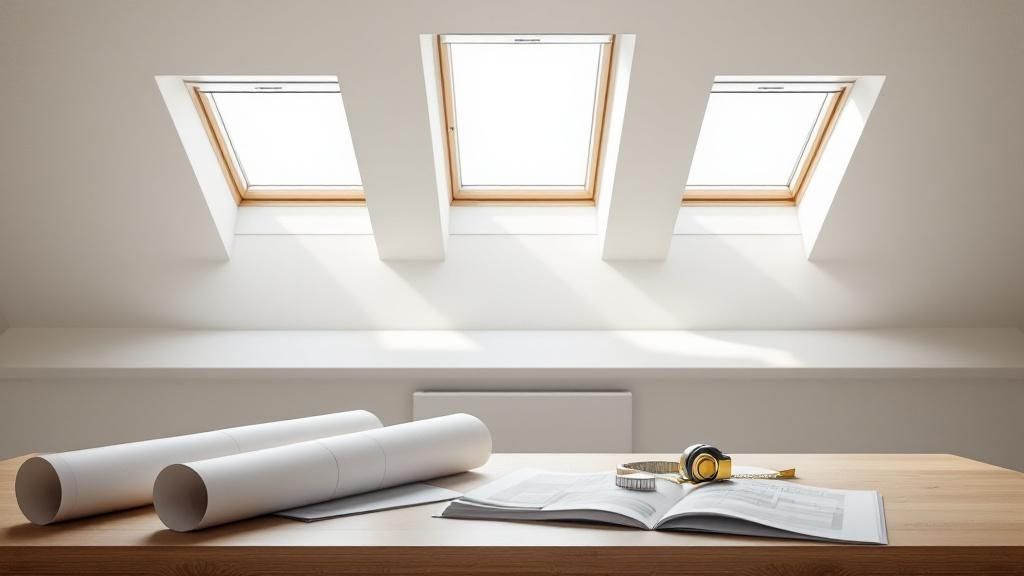
A Guide to Velux Skylight Sizes and Price Points
Picking the right skylight means you need to get your head around the relationship between its size, what you want it to do, and the total cost. For homeowners in places like Middle Park, choosing a skylight is more than just about looks; it’s about hitting that sweet spot between getting plenty of natural light, good thermal performance, and making sure it’s structurally sound. The good news is Velux designs its products to fit standard Australian roof constructions, which makes the whole selection process a lot less of a headache.
What Drives the Unit Cost?
A few key things determine the final price tag on a Velux skylight unit. Size is the big one, of course. Bigger skylights need more materials and more advanced glass, so they naturally cost more. But other details play a big part too.
- Type of Glazing: High-performance double glazing, laminated glass for extra safety, or special UV coatings will all nudge the final cost up.
- Frame Material: The choice between a classic timber frame or a durable aluminium one can also affect the price.
- How it Opens: Manual opening models are the most budget-friendly. If you want the convenience of an electric or solar-powered version with a remote control and rain sensors, you’ll be looking at a higher price point.
If you look at what’s popular on the market, Velux models in Australia typically range from about 550 mm x 780 mm up to 1340 mm x 1400 mm, with prices that reflect these different features. For a bit more context on pricing tiers, it can be helpful to explore a market overview of commercial skylights.
While this guide focuses on Velux, it’s worth noting that Vivid Skylight have a full range of double glazed skylights and all our sizes and prices are conveniently listed on our website, ready for instant purchase. Or you can call and email your order through all skylights kept in stock ready for delivery or local pickup.
To make things easier, here’s a quick reference table to give you a clearer picture of what to expect.
Quick Guide to Velux Skylight Sizes and Estimated Unit Prices
This table gives you a snapshot of some popular Velux skylight dimensions available in Australia and a ballpark retail price for the unit itself. Keep in mind these are estimates and don’t include installation.
| Model Size (Approx. W x H in mm) | Typical Use Case | Estimated Unit Price (AUD) |
|---|---|---|
| 550 x 700 | Small bathrooms, hallways, or walk-in robes | $600 – $850 |
| 780 x 980 | Mid-sized bedrooms, studies, or small kitchens | $850 – $1,100 |
| 780 x 1400 | Kitchens, living areas, or larger bedrooms | $1,100 – $1,400 |
| 1140 x 1180 | Open-plan living spaces, dining rooms, or stairwells | $1,400 – $1,800+ |
This should give you a solid starting point for budgeting. The final choice always comes down to matching the skylight’s size and features to your specific room and needs.
Choosing Your Ideal Velux Skylight Model
While the size and price tag are often the first things people look at, picking the right skylight model is just as crucial for getting the functionality you actually want in your home. Velux organises its range based on how the skylights operate, and this directly impacts where they’ll work best.
Getting your head around these differences is the key to matching the right product to your needs. A simple hallway that just needs a bit of brightening has completely different requirements from a bathroom or kitchen, where things like steam and cooking heat need to be managed. This way, you don’t end up paying for features you’ll never use, or worse, missing out on something that could have made your home way more comfortable.
Fixed Non-Opening Skylights
As the name suggests, fixed skylights are the simplest and most cost-effective option on the market. They don’t open, so their one job is to pour natural light into a room. This makes them a fantastic choice for any area where extra ventilation isn’t really a concern, but darkness is.
You’ll find fixed models are perfect for places like:
- Hallways and Stairwells: These spots rarely have windows and benefit massively from a dose of daylight.
- Living Rooms with High Ceilings: When you just want to light up a big space without needing more airflow, fixed models are ideal.
- Walk-in Robes: A bit of natural light makes a huge difference in seeing the true colour of your clothes.
Their straightforward design means fixed skylights usually come with the lowest upfront cost, making them a great entry point into the world of natural lighting. They offer a beautiful, unobstructed view of the sky and can make a cramped space feel much more open.
Venting Skylights: Manual, Electric, or Solar
For any room that could use both light and a bit of fresh air, venting skylights are the way to go. These models can be opened up to boost air circulation, letting you release stale, warm air and cut down on humidity. It’s a game-changer in kitchens and bathrooms.
One of the biggest perks of a venting skylight is its role in passive cooling. Because hot air naturally rises, opening a skylight gives it a direct escape route. This can help lower the temperature inside your home and cut down your reliance on the air conditioner during those hot Aussie summers.
You’ve got three main types to choose from here:
- Manual Venting: Operated with a simple hand crank or a telescopic rod, this is a budget-friendly choice for skylights you can easily reach.
- Electric Venting: Absolutely perfect for high ceilings. These can be opened and closed with the flick of a switch or the press of a remote control.
- Solar-Powered Venting: This is the ultimate in convenience. A small, built-in solar panel powers the opening mechanism, so there’s no need for wiring. They nearly always come with a rain sensor that automatically closes the skylight the moment it starts to drizzle.
A Detailed Velux Skylight Size and Dimension Chart
When it comes to a successful skylight installation, precision is everything. Getting the exact specifications right from the start ensures the entire project, from initial planning to final fitting, goes off without a hitch. This section is your go-to reference, packed with the critical numbers that architects, builders, and even the most diligent DIYers need.
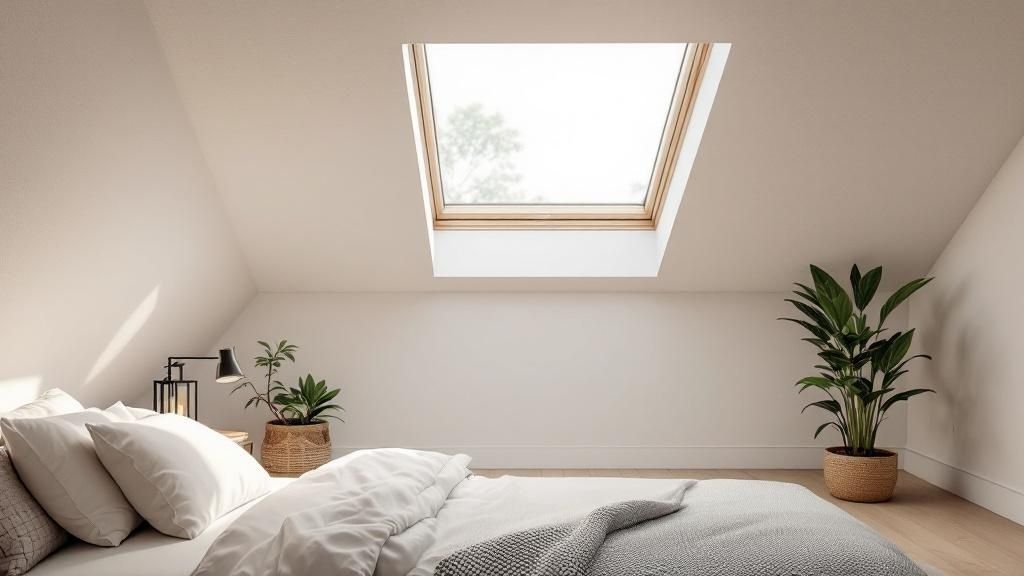
Getting a handle on the relationship between a skylight’s model code, its external frame size, and the required roof opening is the absolute foundation of a flawless result. Think of it this way: a massive 1140 x 1180 mm skylight can completely transform a living area in a Middle Park home, opening it up and flooding it with light. On the other hand, a compact 550 x 780 mm model is the perfect solution for bringing daylight into a cramped bathroom or hallway without overwhelming the space.
Understanding the Key Measurements
Before you even think about cutting into a roof, you need to be certain about your dimensions. Every Velux skylight has three key measurements, and mixing them up can lead to some seriously costly mistakes.
- Model Code: This is the skylight’s unique identifier, like C01 or M08. Each code corresponds to a specific, set size.
- External Frame Dimensions: This is the overall width and height of the entire skylight unit, measured from the absolute outer edges of the frame.
- Required Roof Opening: This is the exact size of the hole you need to cut into your roof sheathing to properly fit the skylight frame.
To help you visualise how size impacts cost, the chart below gives a quick look at the average price ranges for small, medium, and large skylights.
As you can see, the price naturally steps up as the skylight gets bigger, which helps you align your budget with the dimensions you’re after.
Official Velux Model Sizes and Required Roof Openings
To make things crystal clear, here’s a detailed breakdown of the standard Velux models. This table lists the model codes alongside their precise external frame dimensions and the corresponding roof cutout size you’ll need for installation.
| Velux Model Code | External Frame Dimensions (mm) | Required Roof Opening (mm) | Recommended Room Size |
|---|---|---|---|
| C01 | 550 x 780 | 550 x 780 | Small bathrooms, hallways, or walk-in robes |
| C02 | 550 x 980 | 550 x 980 | Ensuites, small kitchens, or studies |
| C04 | 550 x 1180 | 550 x 1180 | Narrow bedrooms or galley kitchens |
| F06 | 660 x 1180 | 660 x 1180 | Medium-sized bedrooms or home offices |
| M04 | 780 x 980 | 780 x 980 | Standard bedrooms, kitchens, or small living areas |
| M06 | 780 x 1180 | 780 x 1180 | Larger bedrooms or dining areas |
| M08 | 780 x 1400 | 780 x 1400 | Master bedrooms, living rooms, or open-plan spaces |
| P10 | 940 x 1600 | 940 x 1600 | Large living areas, lofts, or vaulted ceilings |
| S06 | 1140 x 1180 | 1140 x 1180 | Expansive living rooms, kitchens, or entryways |
| S08 | 1140 x 1400 | 1140 x 1400 | Very large open-plan areas or architectural features |
This table serves as a reliable guide for planning your project, allowing you to match the right skylight model to your room’s dimensions and your installer’s requirements.
It’s worth remembering that while these dimensions are standardised to make selection easier, it’s always best practice to double-check the specific data sheet for your chosen model. This just makes sure you account for any minor variations before you start.
For anyone looking for a complete list, Vivid Skylights provides a clear breakdown of available double-glazed skylight dimensions with all the necessary specifications ready for instant purchase. This really simplifies the ordering process, letting you pick the perfect size with confidence, knowing it’s in stock and ready for delivery or pickup.
Understanding the Total Skylight Installation Cost
When you’re looking at Velux skylights sizes and prices, it’s easy to focus on the cost of the unit itself. But that’s only part of the story. To really get a handle on your budget, you need to think about the complete picture: all the crucial components and the professional labour required to put it all together.
A proper installation is much more than just the skylight. It involves critical elements that guarantee a secure, weatherproof, and fully functional addition to your home. Understanding what goes into the final quote helps you plan properly and avoid any last-minute surprises.
Breaking Down the Full Cost
The final price you’ll pay is a combination of a few distinct parts, and each one is vital for the long-term performance and durability of your new skylight.
Here’s what a typical quote will cover:
- The Skylight Unit: This is the core expense. The price tag here is set by the size, model (whether it’s fixed or opens up), and the type of glazing you choose.
- Flashing Kit: This isn’t optional; it’s an absolute must-have. The flashing kit creates a watertight seal between the skylight’s frame and your roofing material, whether you’ve got tiles or a metal roof.
- Optional Accessories: This is where you can add extra functionality. Things like blockout blinds, insect screens, or solar-powered operators will add to the cost but can seriously improve comfort and convenience.
- Professional Labour: This is the fee for the installation service itself, covering the expertise needed for a safe, leak-free fit that will last for years.
The total cost for a Velux installation in Australia bundles these elements together. On average, you can expect the total cost for buying and installing a mid-sized Velux skylight to fall somewhere between AUD 1,200 and AUD 2,500. This often includes mandatory upgrades for energy efficiency compliance. A standard installation usually takes about 3 to 5 hours, with labour charges running from AUD 75 to AUD 100 per hour, depending on the installer and how complex your roof is.
Factors Influencing Installation Labour
Labour costs aren’t one-size-fits-all; they can change based on the specifics of your home. Any good installer will assess a few key factors before giving you a firm quote.
Accessibility is a big one. A steep roof pitch or a tricky spot to reach means more time, specialised safety gear, and sometimes an extra pair of hands. All of that will be factored into the labour cost.
Other common variables include:
- Roof Pitch and Material: Steeper roofs or complex materials like slate can add to the installation time.
- Structural Modifications: If a roof truss or rafter needs to be cut and reinforced to make room for the skylight, this adds significant labour and sometimes engineering costs to the job.
- Interior Finishing: The quote should also cover making good the internal ceiling, which means plastering and painting around the new skylight shaft for a seamless look.
By keeping these factors in mind, you can build a much more accurate budget. For a deeper dive into all these variables, check out our guide on the full cost of Velux skylights.
Selecting the Right Glazing and Custom Features
Once you’ve got an idea of the Velux skylight size and price point that works for you, the next step is customising it. This is where you can really dial in the comfort, safety, and energy efficiency with features that turn a simple window into a high-performance part of your home.
High-performance double glazing is the standard for a very good reason. It offers excellent thermal insulation, which is a lifesaver for maintaining a comfortable indoor temperature all year round. This is especially crucial in a place with a varied climate like Middle Park.
For extra peace of mind, especially in rooms where family and friends gather, laminated glass is a vital safety upgrade. If the glass ever breaks, a special interlayer holds all the fragments together, working just like a car windscreen.
Essential Add-Ons for Comfort and Control
Beyond the glass itself, a few key accessories can dramatically lift your skylight’s game. These add-ons give you proper control over light, airflow, and privacy, making them pretty much essential for creating the perfect indoor atmosphere.
- Blockout Blinds: An absolute must-have for bedrooms or media rooms where you need complete darkness. These blinds do a fantastic job of blocking incoming light, so you can get a restful sleep or watch a movie without any glare.
- Insect Screens: If you’re going for a venting skylight, an insect screen is a no-brainer. It lets you enjoy fresh air circulating through your home without inviting in all the local bugs and pests.
- Solar-Powered Accessories: For the ultimate in convenience, solar-powered blinds and venting operators are a brilliant choice. They don’t need any wiring, are super easy to control with a remote, and give you an energy-efficient way to manage your skylights.
A great practical example is pairing a solar-powered venting skylight with a blockout blind in a master bedroom. This setup lets you effortlessly ventilate the room during the day and get total darkness at night, all at the touch of a button and without adding a cent to your electricity bill.
Choosing the right mix of glazing and features ensures your skylight doesn’t just look great but also performs perfectly for your lifestyle. It’s an investment that adds real value and comfort to your home.
Your Go-To Skylight Solution in Middle Park
Finding the right skylight for your project here in Middle Park shouldn’t be a complicated affair. We’re local specialists, and our focus is simple: providing premium, double-glazed skylights designed for Australian homes. They combine top-tier performance with effortless style and real durability.
Our whole approach is built on making things convenient and transparent for you. We get it. Whether you’re a homeowner in the middle of a renovation or a tradesperson on a tight schedule, you need reliable service and clear, honest information. That’s why we’ve made our process straightforward from start to finish.
Streamlined Ordering And Immediate Availability
We don’t think you should have to wait weeks to get your project moving. Vivid Skylight have a full range of double glazed skylights and all our sizes and prices are conveniently listed on our website, ready for instant purchase. Or you can call and email your order through all skylights kept in stock ready for delivery or local pickup.
Because we keep all our skylights in stock, they’re ready for immediate dispatch. This means you get quick delivery or can arrange for local pickup, helping you keep your project on track without any of those frustrating delays.
This commitment to availability makes us a reliable partner for any building or renovation job. If you’re planning the fitting process, it’s worth checking out our detailed guide on Velux skylight installation to see what’s involved.
We cater to both homeowners and tradespeople who demand a fast, dependable supply chain. Our goal is to remove the typical friction points of sourcing building materials, offering a direct path to acquiring high-quality skylights.
If you’re looking for a partner to help with all your home improvement needs, including the installation itself, you might explore local companies offering a broad range of general home services. By choosing a supplier who prioritises your schedule, you can complete your project efficiently and with total confidence.
Your Velux Skylight Questions Answered
When you’re thinking about adding skylights, it’s completely normal to have a few practical questions pop up. Getting straight answers helps you plan your project with confidence, so you know exactly what to expect from the installation and how your new skylight will perform day-to-day.
A lot of homeowners ask about the installation time. You might be surprised to learn that a standard Velux skylight installation is a pretty efficient job, usually taking between three to five hours for a single unit. Of course, this can change depending on things like a complex roofline or if any extra structural work is needed, like cutting into a rafter.
What Kind of Roofs Can Velux Skylights Be Installed On?
One of the first things people want to know is whether a Velux skylight will even work with their roof. The good news is that Velux designs its products to be incredibly versatile, making them a great fit for the vast majority of Australian homes.
They can be fitted to most common roofing materials you’ll find here, including:
- Tiled Roofs: Both terracotta and concrete tiles are no problem.
- Metal Roofs: Corrugated metal and other profiles are easily handled with the right flashing kit.
The pitch of your roof is also a key factor. Velux skylights are engineered for pitched roofs, generally needing a slope somewhere between 15 and 90 degrees. This range covers almost every common residential roof design, ensuring you get a secure, watertight fit.
Will a Velux Skylight Be Noisy When It Rains?
This is a big one. Nobody wants to trade a dark room for a noisy one, especially during a downpour. While any window will let some sound through, modern Velux skylights are specifically designed to keep this to a minimum.
The secret is the high-performance double glazing used in their construction. This advanced glass has excellent acoustic dampening qualities, which really helps to soften the drumming sound of raindrops. The end result is a much quieter, more peaceful room compared to what you’d get with older or single-glazed models.
When you choose a quality skylight, you’re not just investing in light and air. You’re also making sure your home stays a quiet retreat, even when the weather outside is wild. That acoustic performance is a subtle feature, but one you’ll really appreciate.
Getting these practical details sorted helps take the mystery out of the process, making it much easier to see how a Velux skylight can be a seamless and brilliant addition to your home.
For a complete range of premium double-glazed skylights with transparent pricing and immediate availability, explore the options at Vivid Skylights. We offer instant online purchasing, fast Australia-wide delivery, and expert advice to help you find the perfect solution for your home. Visit us today at https://vividskylights.com.au.