
Bringing natural light into your Bayside home is a fantastic upgrade, but the success of your Velux skylight installation hinges entirely on the installer’s skill. This isn’t just another weekend project—it’s a specialised job where precision is non-negotiable. Hiring a certified professional is the only way to guarantee the work is done right the first time, protecting both your home and your investment.
Why a Specialist Velux Skylight Installer Is Essential
Deciding to install a Velux skylight is a big move. The difference between a stunning, light-filled room and a source of constant headaches often comes down to the person cutting that hole in your roof. While a general builder might seem capable, a specialist Velux skylight installer brings a depth of expertise that is absolutely critical for a flawless, long-lasting result.
Their knowledge goes far beyond basic construction. They understand the specific engineering of Velux products, the subtle differences in Bayside roof structures, and exactly how to create a completely weatherproof seal that can handle Melbourne’s famously unpredictable climate.
The Risks of Non-Specialist Installation
Hiring someone without specific Velux training is a gamble that can lead to a host of problems. An improper installation often results in:
- Leaks and Water Damage: This is the most common and costly issue, usually caused by incorrect flashing installation. A small mistake here can lead to extensive structural repairs down the track.
- Voided Warranties: Velux offers an excellent warranty, but it’s almost always dependent on the skylight being installed by a certified professional using the right components. A DIY or non-specialist job could easily void this protection.
- Poor Energy Efficiency: Incorrect sealing creates drafts and allows heat to escape, completely undermining the energy-efficient design of your double-glazed skylight.
- Structural Integrity Issues: Cutting into your roof requires a solid understanding of rafters and roof loads. A mistake can compromise the very structure of your home.
Skylight installation is a complex job that should always be left to certified professionals. It’s crucial to understand which are the DIY jobs you shouldn’t attempt yourself, and cutting a hole in your roof is definitely one of them.
The Bayside Advantage with a Professional Team
For homeowners in the Bayside area, local knowledge is a massive plus. A professional installer who knows the area understands local building codes and council requirements, ensuring your project is fully compliant from day one.
This is where an experienced team truly shines. At Vivid Skylights, we have an experienced install team for our own range of double-glazed skylights. From booking to handover our expert team will give you the right advice so that your skylight installation runs very smoothly, meeting the high standards your Bayside home deserves. That professional oversight gives you peace of mind and guarantees a perfect finish.
Getting to Grips with Velux Models and Unit Costs
Choosing the right Velux skylight isn’t just about size. It’s about matching the product to how you use the room, your home’s style, and, of course, your budget. Before you even pick up the phone to a Velux skylight installer, knowing the different models and what they do puts you in the driver’s seat.
This groundwork means you can have a much more productive chat, make sense of the quotes you get, and land on the perfect solution for your Bayside home.
The first step is to get familiar with the three main types of Velux skylights. Each is built for a different job, and your choice will shape both how the space feels and the final cost.
Fixed vs Manual vs Solar-Powered Skylights
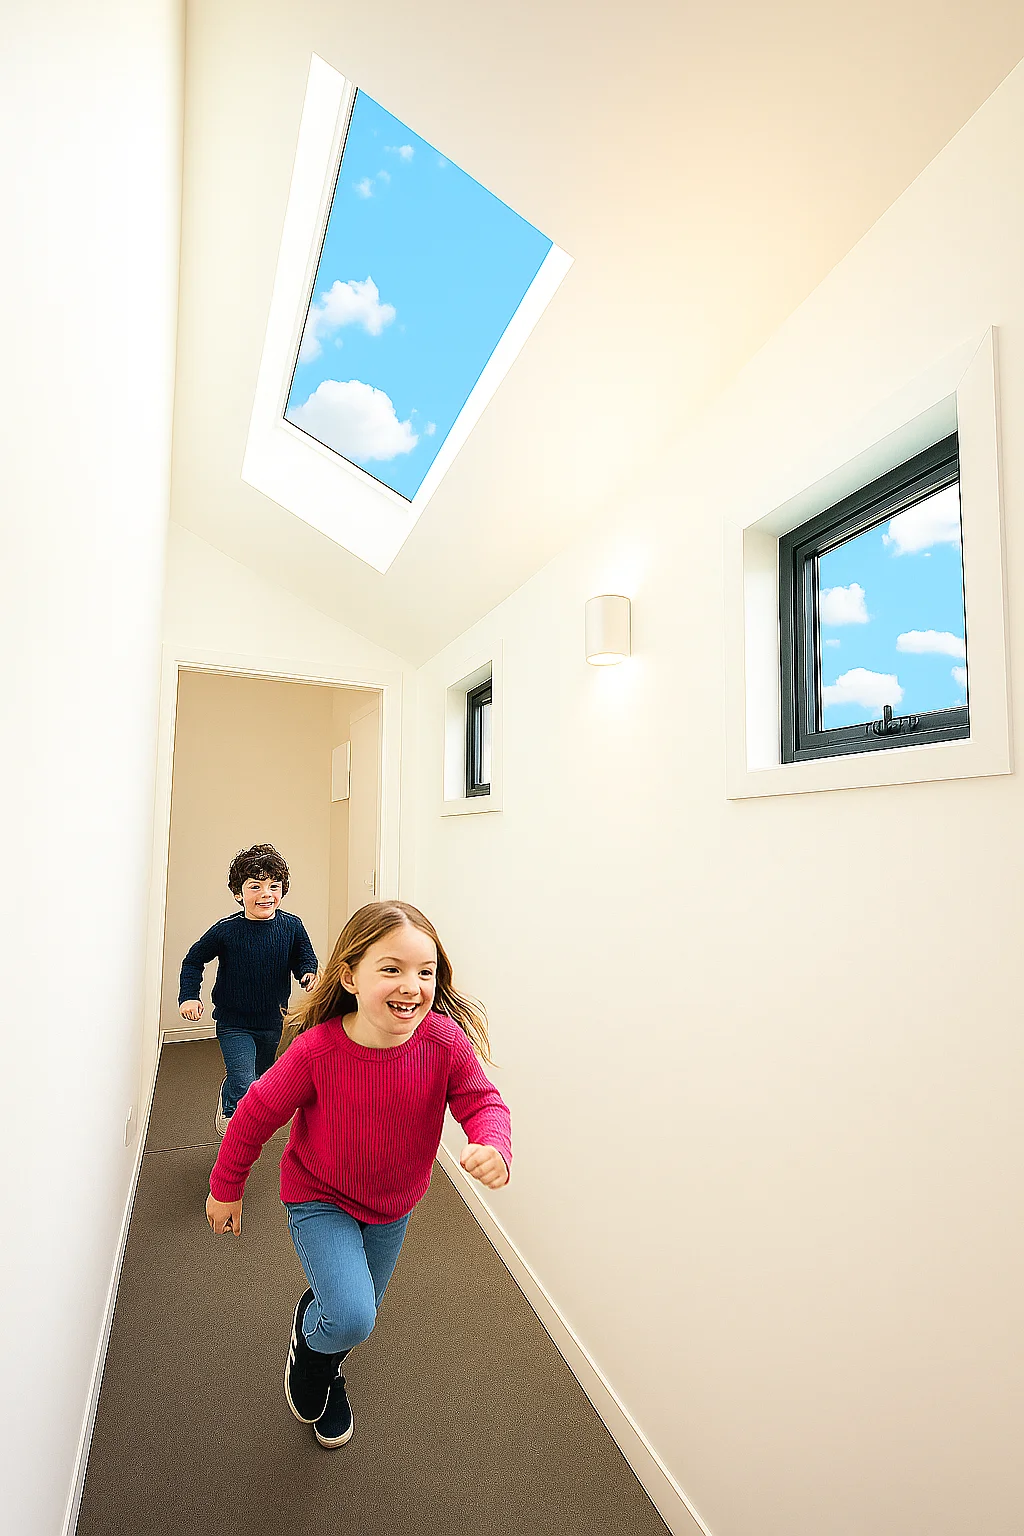
The most straightforward option is the Fixed Skylight. As the name implies, it doesn’t open. This model is perfect for places where you just want to flood a space with natural light without needing ventilation—think hallways, stairwells, or rooms that already have plenty of windows.
Next up is the Manual Venting Skylight. This one can be opened with a simple winder handle or a telescopic rod, giving you the best of both worlds: beautiful light and a breath of fresh air. It’s a brilliant choice for kitchens and bathrooms, where getting rid of steam and odours is a must.
At the top of the range, you’ll find the Solar-Powered “Fresh Air” Skylight. This is the ultimate set-and-forget solution. It has a small solar panel that powers the opening mechanism, and it comes with a remote control. Best of all, an integrated rain sensor automatically shuts the window at the first drop of rain, so you never have to worry.
How Size and Features Drive the Price
The model you pick is just one piece of the puzzle. The size of the unit and any extra features you add will also have a big impact on the final cost. It makes sense that a small skylight for a compact bathroom in Bayside will be more wallet-friendly than a huge one designed to light up an entire open-plan living area.
Here’s a quick rundown of how different elements affect the price tag:
- Glazing Options: Velux offers different types of glass, including high-performance glazing for better insulation and noise reduction.
- Integrated Blinds: Adding factory-fitted blinds—whether they are blockout, light-filtering, or honeycomb styles—will bump up the unit cost. But the value you get in controlling light and heat is immense.
- Custom Flashing: Standard flashing is included, but some roof types might need a custom-made solution, which can adjust the price.
It’s important to remember that these initial costs are just for the unit itself. The price doesn’t cover the professional installation, which is a separate but vital investment in your home’s future.
Real-World Cost Scenarios
To give you a clearer picture, let’s talk numbers. Here in Australia, a typical Velux skylight unit will set you back somewhere between AUD 600 and AUD 1,800.
For instance, smaller models around 550 x 700 mm—perfect for a small bathroom or walk-in robe—usually cost between AUD 600 to AUD 850. At the other end of the scale, larger skylights measuring about 1140 x 1180 mm, which are great for big living spaces, can start from AUD 1,400 and go up to AUD 1,800 or more.
This price difference is exactly why thinking about your needs beforehand is so crucial. When you know your options, you can go to your installer with a clear vision, making sure the final result is a perfect fit for your lifestyle and your budget. For a deeper dive into the product range, you might be interested in our comprehensive overview of Velux skylights.
How to Budget for Your Skylight Installation
It’s easy to focus on the price tag of the skylight itself, but that’s only one part of the picture. The real investment—the part that guarantees your skylight will be leak-free, efficient, and structurally solid for years—is the professional installation.
Getting a handle on the factors that shape the final quote from a Velux skylight installer is the first step to setting a realistic budget. It allows you to compare quotes with confidence and truly appreciate the skill that goes into a perfect installation in your Bayside home.
Unpacking the Core Installation Costs
The complexity of the job is, without a doubt, the biggest factor driving the installation price. Swapping out an old skylight for a new one of the same size is a relatively straightforward job. It’s a whole different story when you’re cutting into your roof for the first time.
Several key variables will influence that final number on your quote. Knowing what they are will help you see why one installer’s price might differ from another.
- Roof Pitch and Material: Working on a steep roof is tougher and requires more safety gear and time than a flatter one. Likewise, tile roofs are more labour-intensive than metal ones because each tile around the skylight needs to be carefully lifted and re-laid.
- Structural Alterations: Sometimes, the perfect spot for your skylight is right over a roof rafter. That means the rafter has to be cut, braced, and reinforced. This is a major structural task that adds significant time and cost.
- Interior Finishing Work: The job isn’t done when the skylight is weatherproofed on the roof. We still need to build, plaster, and paint a light shaft to connect it seamlessly to your ceiling. The height and complexity of this shaft will naturally affect the labour costs.
Setting a Realistic Budget in Bayside
So, what should you really expect to pay? When you’re planning a major upgrade, getting some context by understanding installation costs for home improvements can be incredibly helpful.
Generally, for standard Velux skylight installations in Bayside, you can expect costs to range from AUD 1,200 up to about AUD 5,000. If you’re looking at more complex projects—think vented models with motorised shades—the cost can start from AUD 5,000 and go up. Vented skylights with manual, electric, or solar operation can push the price anywhere between AUD 2,000 and AUD 8,000.
These numbers show just how much the final cost can vary. For a much more detailed breakdown of how different models and features affect the price, check out our complete guide on the full cost of Velux skylights.
The cheapest quote is rarely the best value. A suspiciously low price often means corners are being cut—whether it’s on materials, safety, or proper sealing. Those shortcuts can lead to very expensive repairs down the track.
Additional Factors That Can Influence Your Quote
Beyond the big-ticket items, a few other details can nudge your final quote up or down. It’s always a good idea to bring these up with your installer during the initial chat.
- Property Access: If your Bayside home is tricky to get to and requires special equipment like scaffolding, that will be factored into the quote.
- Existing Roof Condition: Sometimes, we get up on a roof and find underlying issues with the structure or sarking. These need to be fixed before a skylight can be safely installed.
- Extras and Upgrades: Adding features like solar-powered blinds, rain sensors, or hooking your skylight into a home automation system are brilliant upgrades, but they will add to the overall project cost.
Ultimately, budgeting for a skylight is about seeing the whole picture. A detailed, transparent quote from a reputable Velux skylight installer will break everything down, so you know exactly where your money is going and the incredible value that professional expertise brings to your Bayside home.
Finding and Vetting Your Bayside Installer
Once your budget is sorted and you’ve got a Velux model in mind, it’s time for the most critical step: choosing the right person to bring your vision to life. Finding a skilled and trustworthy Velux skylight installer in Bayside is what makes the difference between a stunning, leak-free result and a future headache.
This isn’t just about collecting quotes. It’s about doing your homework to verify their expertise, check credentials, and find a professional who will treat your home with respect. Get this part right, and your investment will pay dividends for decades.
Kicking Off Your Search in Bayside
The best place to begin is by looking for local installers who have specific Velux experience. Sure, a general roofer or builder might know their way around a roof, but a certified Velux specialist has been trained on the products themselves. They know the flashing kits and installation quirks inside and out, which is absolutely vital for a perfect, watertight seal.
Your first move should be to create a shortlist of three to four potential installers. A quick search for “Velux skylight installer Bayside” is a great start, as is asking for recommendations in local Bayside community groups. Vivid Skylights, for example, have an experienced install team for our own range of double-glazed skylights, so we understand the level of skill Bayside homeowners rightfully expect.
Once you have a few names, it’s time to dig a little deeper.
The Essential Vetting Questions
A true professional will welcome your questions and have clear, confident answers ready. This first chat is your best chance to size up their experience and professionalism. Don’t be shy—here are the non-negotiable questions to ask every single installer.
- “Are you a Velux Certified Installer?” This is the big one. Certification means they’ve been trained by Velux and are up-to-date on the latest products and best practices.
- “Can you provide proof of your license and current insurance?” Always ask to see a copy of their public liability insurance and any relevant building licenses. This is your safety net, protecting you and your property if anything unexpected happens.
- “Can I see a portfolio of your recent work in the Bayside area?” An experienced installer will be proud to show you photos of their finished projects. This proves the quality of their work and shows they have experience right here in your local area.
A great installer doesn’t just show up on the day; they guide you through the entire process. From booking to handover our expert team will give you the right advice so that your skylight installation runs very smoothly.
To help you keep track, we’ve put together a quick checklist for vetting your potential hires.
Your Installer Vetting Checklist
Use this quick reference guide to confidently evaluate and compare potential Velux skylight installers in the Bayside area.
| Verification Point | What to Look For | Why It Matters |
|---|---|---|
| Licensing & Insurance | A current, valid copy of their public liability insurance and builder’s license. | Protects you and your property from liability in case of accidents or damage. |
| Local Portfolio | Photos of recent, completed skylight projects specifically in the Bayside area. | Demonstrates their quality of work and familiarity with local building styles. |
| Detailed Quote | An itemised quote breaking down costs for the unit, flashing, labour, and materials. | A vague quote is a red flag. Transparency shows professionalism and prevents surprise costs. |
| Professionalism | Punctual, listens to your needs, inspects the site thoroughly before quoting. | These small details are indicators of their overall reliability and respect for your home. |
This checklist gives you a solid framework for making an informed decision, ensuring you partner with a reputable professional.
Analysing the Quote
The quotes you get back are more than just numbers—they’re a window into an installer’s thoroughness. A vague, one-line quote is a major red flag. What you want is a detailed, professional document that breaks down every single cost.
A proper quote should clearly itemise:
- The Velux skylight unit and model number
- The price of the specific flashing kit for your roof type
- Labour costs covering the entire job, from roof work to interior finishing
- Any extra costs for structural work, like cutting and reinforcing rafters
- The cost of materials for the internal light shaft (plasterboard, paint)
- Fees for rubbish removal and site clean-up
A transparent quote like this shows the installer has carefully thought through every part of your project. It’s the mark of a true professional who values clear communication.
Spotting the Signs of a Trustworthy Professional
Beyond the paperwork and quotes, pay close attention to the small things. A trustworthy Velux skylight installer stands out from the rest.
They’ll be punctual for the initial consultation, listen carefully to what you want, and offer practical advice on placement and models. They won’t just give you a number over the phone; they’ll want to inspect your roof and attic space properly before finalising a quote.
Ultimately, you’re looking for a partner in this project—someone who communicates clearly, respects your home, and has the proven skill to deliver a flawless installation. Taking the time to properly vet your Bayside installer is the best guarantee of a result you’ll love for years to come.
What to Expect on Installation Day
Knowing what’s going to happen when the installation crew turns up can make the whole experience feel less like a construction zone and more like the exciting home upgrade it is. A professional Velux skylight installer doesn’t just show up and start cutting holes; they follow a tried-and-tested process to get the job done safely, cleanly, and with as little disruption as possible.
A bit of prep work and a clear idea of the day’s timeline will help everything run smoothly. Let’s walk through what to expect, from the moment the team arrives to the final clean-up.
Preparing Your Home for the Installers
A little bit of prep on your end can go a long way. The crew will need a clear path to the work area, both inside and out, so make sure there aren’t any obstacles in their way.
Your installer will come equipped with drop sheets to protect your floors and furniture, but it’s always a smart move to clear the immediate area under where the skylight is going. Think about moving any fragile or valuable items—lamps, photo frames, ornaments—to another room. This just prevents any accidental bumps and gives the team the space they need to work efficiently.
The installation process, especially cutting the ceiling and plastering the light shaft, can kick up a surprising amount of dust. While the pros do a great job of sealing off the room, throwing an old sheet over any nearby furniture gives you an extra layer of protection and peace of mind.
The Core Stages of Installation
Once your home is prepped and protected, the real work gets underway. The entire process is a carefully planned sequence designed to make the skylight look like it was always a part of your home.
First up is creating the opening. The installer will take precise measurements to mark the exact spot on both your ceiling and your roof. They’ll then carefully cut through the interior plaster and the external roofing materials, paying close attention to avoid any structural rafters.
Next comes the most crucial part: weatherproofing. The team will fit a custom Velux flashing kit that’s specifically designed for your roof type, whether you have tiles or metal sheeting. This kit creates a series of overlapping layers that expertly channel water away from the opening, forming a completely watertight seal. This is where a specialist Velux skylight installer really earns their keep—a botched flashing job is the number one reason skylights leak.
With the opening ready and sealed, the skylight itself is carefully lifted into place and secured to the roof deck. The team then replaces any roof tiles or sheets they removed, integrating them perfectly around the new frame.
Finishing the Interior Light Shaft
The job isn’t done just because the skylight is on the roof. The final, and arguably most satisfying, part happens inside your home: building the light shaft. This is the tunnel that connects the skylight to your ceiling, funneling all that beautiful daylight down into the room.
Installers will build a timber frame for the shaft before lining it with plasterboard. They’ll then finish the joins and sand everything smooth, leaving you with a surface that’s ready for a coat of paint. This detailed interior work is what makes the final result look like a seamless, intentional piece of architecture. You can get a good feel for what’s involved by checking out the steps in a professional Velux skylight installation.
As you can see, the upfront investment in materials and skilled labour pays off over time, adding real value to your property.
Common Questions About Velux Skylight Installations
As you get closer to deciding, it’s completely normal for a few last-minute questions to pop into your head. For most Bayside homeowners we talk to, getting these queries sorted is the final step before they commit to bringing more light and life into their homes.
We’ve pulled together the most common questions we hear on the job and answered them straight. This should give you the confidence to move forward, knowing you’ve got all the details covered.
How Long Does an Installation Take?
For a standard installation on a typical Bayside roof, a Velux skylight can often be fitted within a single day. It’s a surprisingly quick way to completely transform a room with very little disruption to your daily routine.
Of course, some jobs are more complex and might stretch into two or more days. Things like needing to cut and reinforce roof rafters, tricky roof access that calls for extra safety gear, or building out a tall light shaft with extensive interior plastering can add to the timeline. Any professional Velux skylight installer will give you a clear, realistic timeframe after having a proper look at your home.
Will a Skylight Make My Home Hotter in Summer?
This is a really important question, especially for anyone living through a Bayside summer. The good news is that modern Velux skylights are engineered from the ground up for energy efficiency, specifically with our climate in mind.
They’re built with high-performance double glazing that has a low-E coating and is insulated with argon gas. This combination is incredibly effective at its job, blocking roughly 75-80% of the sun’s radiant heat.
You can also choose a model with integrated blinds. A blockout or honeycomb blind adds another layer of serious insulation, putting you in complete control of both light and heat. It’s the perfect way to keep your room comfortable, even on a scorching Bayside afternoon.
What Kind of Maintenance Does a Skylight Need?
Velux skylights are designed to be almost maintenance-free. The exterior glass often has a special coating that uses sunlight to break down organic dirt, which then simply washes away with the next rainfall.
Your main task is incredibly simple. Every so often, just check that the flashing around the skylight is clear of leaves or other debris. This ensures water can always drain away properly. The inside glass can be cleaned just like any other window in your house.
Can a Velux Skylight Be Installed on Any Roof?
One of the best things about Velux is how versatile their skylights are. They can be installed on almost every roof type you’ll find around Bayside, including:
- Tiled roofs (both terracotta and concrete)
- Metal roofs (like COLORBOND®)
- Slate roofs
They’re also designed for a huge range of roof pitches, generally anywhere from 15 to 90 degrees. The key to a perfect, weatherproof fit is using the right flashing kit—one that’s specifically made for your roofing material. A good installer will know exactly what’s needed to create a durable, watertight seal that lasts.
Is My Velux Warranty Guaranteed?
Velux offers a fantastic warranty, but whether it’s valid comes down to one crucial detail: professional installation. The warranty covering the installation is only honoured if a certified installer uses the official Velux flashing kits for the job.
This is another huge reason why choosing a qualified Velux skylight installer is so important. It’s not just about getting the job done right; it’s about protecting your investment and ensuring you have full coverage for complete peace of mind. Vivid Skylights have an experienced install team for our own range of double-glazed skylights because we know expert installation is everything. From booking to handover our expert team will give you the right advice so that your skylight installation runs very smoothly, and your warranty is locked in.
Ready to bring beautiful, natural light into your Bayside home? The team at Vivid Skylights is here to help you every step of the way. Explore our range of high-quality skylights and get a free estimate today. Find out more at Vivid Skylights.