
Replacing a skylight cover isn’t just about swapping out a piece of plastic. A proper job means looking at the whole system—seals, flashing, the lot—to make sure you’ve got a watertight solution that’ll last. Getting this right is crucial for preventing future water damage, especially with the kind of weather we get here in Australia.
Knowing When to Replace Your Skylight Cover
Before you even think about getting on the roof, you need to be sure a full cover replacement is actually what’s needed. I’ve seen homeowners mistake minor issues for a total write-off, and others who’ve ignored little warning signs that were screaming “imminent disaster.” Knowing the difference will save you a heap of time and money.
Sure, the most obvious sign is a massive, gaping crack. Maybe it was a freak hailstorm, a fallen branch, or just old age finally catching up. But not all the red flags are that dramatic. Often, the real troublemakers are much more subtle.
Beyond the Obvious Cracks
Keep an eye out for hairline fractures. These tiny fissures are the quiet whispers of future leaks. They’re often tough to spot from the ground, but they seriously compromise the cover’s integrity. Under the harsh Aussie sun, these little cracks expand and contract, day in and day out, until they finally let moisture seep through. If you can see a fine web of these lines, a replacement is definitely on the horizon.
Another big one is a change in the dome’s texture. If an acrylic or polycarbonate cover feels chalky or brittle when you touch it, that’s a clear sign of major UV degradation. This process basically breaks down the plastic, making it incredibly fragile and ready to shatter in the next big storm. A healthy cover should feel smooth and solid.
Pro Tip: Don’t just look—get a feel for it. If you can safely get to it, run a gloved hand over the dome’s surface. A chalky residue or a brittle texture isn’t always visible from a distance, but it’s a dead giveaway that the material is on its last legs.
Clues from Condensation and Water Intrusion
Ever notice persistent condensation trapped between the panes of a double-glazed skylight? That’s a massive red flag. It means the airtight seal has failed, letting moist air creep in. Once that seal is gone, so are the skylight’s insulating properties. Worse, that trapped moisture can lead to mould and ugly water stains on your ceiling.
It’s also really important to figure out if you’re dealing with a skylight problem or a roofing issue. A simple water test can give you a clear answer. On a dry day, grab a heavy-duty tarp and cover the entire skylight securely. Then, run a hose over that section of the roof. If the leak inside stops, you’ve found your culprit: the skylight. If it keeps dripping, the problem is likely with your roof flashing or tiles.
In Australia, water getting in is the number one reason skylights get replaced. A skylight isn’t just a dome; it’s a whole system of frames, seals, and flashings that all age together. Local industry experience shows that just replacing the plastic dome without checking the surrounding components often leads to the same leaks coming back. You can learn more about how these parts work together by exploring skylight dome replacement insights. Taking a holistic view is the key to a repair that actually lasts.
To help you pinpoint the problem, here’s a quick diagnostic guide.
Skylight Problem Diagnosis
Use this table to quickly identify common skylight problems and determine if a cover replacement is the right course of action for your home.
| Symptom | Likely Cause | Recommended Action |
|---|---|---|
| Fog or moisture between panes | Failed airtight seal | Full skylight cover replacement is needed. The insulating value is lost. |
| Yellowing or discolouration | UV degradation | Replacement is recommended for better light quality and material strength. |
| Water stains on the interior ceiling | Active leak | Inspect seals and flashing first; cover replacement is likely necessary. |
| Brittle, chalky surface texture | Severe material decay | Immediate replacement is advised to prevent shattering and major leaks. |
| Small, web-like hairline cracks | Stress fractures from age/impact | Plan for a replacement soon, as these will worsen and eventually leak. |
By taking the time to carefully check your skylight for these specific signs, you can make a properly informed decision. Catching the problem early and understanding what’s really going on is the best way to stop a small issue from snowballing into a massive, costly repair down the track.
Choosing the Right Skylight Material for Australia
Picking the right material is easily the most critical part of any skylight cover replacement, especially here in Australia. Our climate doesn’t mess around—it throws everything at a roof, from blistering sun and torrential downpours to destructive hail in some regions. The material you choose will dictate not just how long your new cover lasts, but also the quality of light inside, noise levels during a storm, and your home’s overall energy efficiency.
This isn’t just about plugging a leak; it’s a genuine opportunity to upgrade. The three main players in the game are acrylic, polycarbonate, and laminated glass. Each one has its own set of pros and cons, making them better suited for different Aussie homes and climates.
Acrylic: The Budget-Friendly Favourite
For a straightforward, cost-effective replacement, acrylic is often the go-to. It’s optically clear, surprisingly lightweight, and much easier on the wallet than the other options. For many homeowners, its affordability and decent durability make it a perfectly sensible choice, particularly in areas with a lower risk of severe weather.
But acrylic has a glaring weakness: impact resistance. While it can handle general wear and tear just fine, it’s the most likely of the three to crack or shatter from a direct hit, like a falling branch or a nasty hailstorm. It’s a solid, reliable option, but probably not the best pick for a home in a hail-prone area.
Polycarbonate: The Tough All-Rounder
When durability is your number one priority, polycarbonate is the undisputed champion. This stuff is incredibly tough—in fact, it’s around 250 times more impact-resistant than glass and roughly 30 times stronger than acrylic. This makes it the clear winner for homes in places like Western Sydney or Brisbane, where hailstorms are a real and present danger.
That strength is an investment in peace of mind. Polycarbonate can take a serious beating without shattering, which is a massive advantage during a wild storm. It does tend to cost more than acrylic and can be more prone to scratching if you’re not careful during installation, but that resilience is almost always worth the extra cash.
Polycarbonate’s superior strength makes it the default choice for high-risk environments. The extra upfront cost can prevent a far more expensive repair bill—and interior water damage—after the next big storm.
It’s also worth noting that many Aussie suppliers now offer custom-cut panels in materials like UV-stabilised acrylics, engineered to fight off the yellowing and brittleness that our harsh sun can cause over time. You can learn more about these custom skylight solutions and how they are designed to handle local weather challenges.
Laminated Glass: The Premium Choice
Laminated glass brings a premium feel with benefits the plastics just can’t match. It’s made of two layers of glass bonded with a transparent interlayer, much like a car windscreen. This construction provides fantastic UV protection and, perhaps most importantly, far better sound insulation.
If the drumming sound of heavy rain on a plastic dome drives you crazy, laminated glass is your answer. It seriously dampens noise, creating a much quieter and calmer indoor space. It’s also highly secure and won’t shatter into dangerous shards if it breaks. The main downsides? It’s heavy, which might mean you need extra structural support, and it comes with a higher price tag.
Skylight Cover Material Comparison
To make the decision a little easier, here’s a side-by-side look at the most common skylight cover materials. This should help you weigh the pros and cons based on your specific location and what you need from your skylight.
| Material | Pros | Cons | Best For |
|---|---|---|---|
| Acrylic | Most affordable, lightweight, excellent clarity. | Prone to cracking from impact, less durable in harsh weather. | Budget-conscious projects in low-risk weather areas. |
| Polycarbonate | Extremely impact-resistant (up to 250x stronger than glass), great for hail-prone areas. | More expensive than acrylic, can scratch if not handled carefully. | Homes in areas with severe weather like hailstorms. |
| Laminated Glass | Superior sound insulation, excellent UV protection, high-end look, very secure. | Heaviest option (may need roof reinforcement), most expensive. | Quieter living spaces, premium homes, and areas where noise is a concern. |
Each material has its place. Your final choice really comes down to balancing your budget against the climate risks and the specific qualities you value most, whether that’s toughness, quietness, or cost.
Choosing Your Finish: Clear vs. Opal
Beyond the core material, the finish you choose will completely change the type of light that enters your home.
- Clear Finish: This option gives you the maximum amount of direct sunlight and a crisp, clear view of the sky. It’s perfect for workshops, art studios, or any space where you crave bright, unfiltered light to work or live in.
- Opal (or Frosted) Finish: This translucent finish diffuses the sunlight, spreading a soft, even glow throughout the room. It gets rid of harsh glare and sharp shadows, making it ideal for living rooms, kitchens, and bathrooms where you want a gentle, ambient light.
Think about how you use the room. A home office might thrive on the bright energy of a clear skylight, while an opal finish in a hallway can create a warm, welcoming atmosphere without the full intensity of direct sun.
Making the right choice on material and finish is the foundation of a successful skylight cover replacement. Take a moment to consider your local climate, your budget, and what the room below needs to ensure your new cover serves you well for years to come.
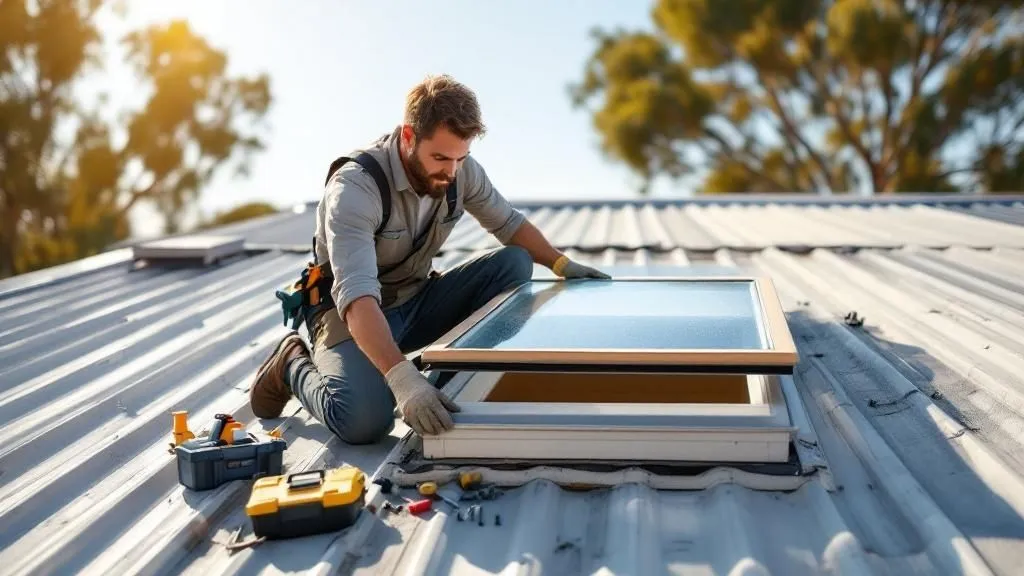
Your Practical Guide to Replacing a Skylight Cover
Alright, let’s get into the hands-on part. Swapping out a skylight cover is a totally achievable DIY project, but it’s one of those jobs where prep and attention to detail are everything. If you rush it, you’ll be dealing with a frustrating leak down the track, so let’s walk through this properly to get a professional, watertight result.
This guide will give you the confidence to tackle your skylight cover replacement on your own. We’ll go through it all—from the crucial safety checks before you even touch the ladder to laying that final bead of sealant that locks it all in place.
This visual flow helps simplify the initial decision-making process before you begin your project.
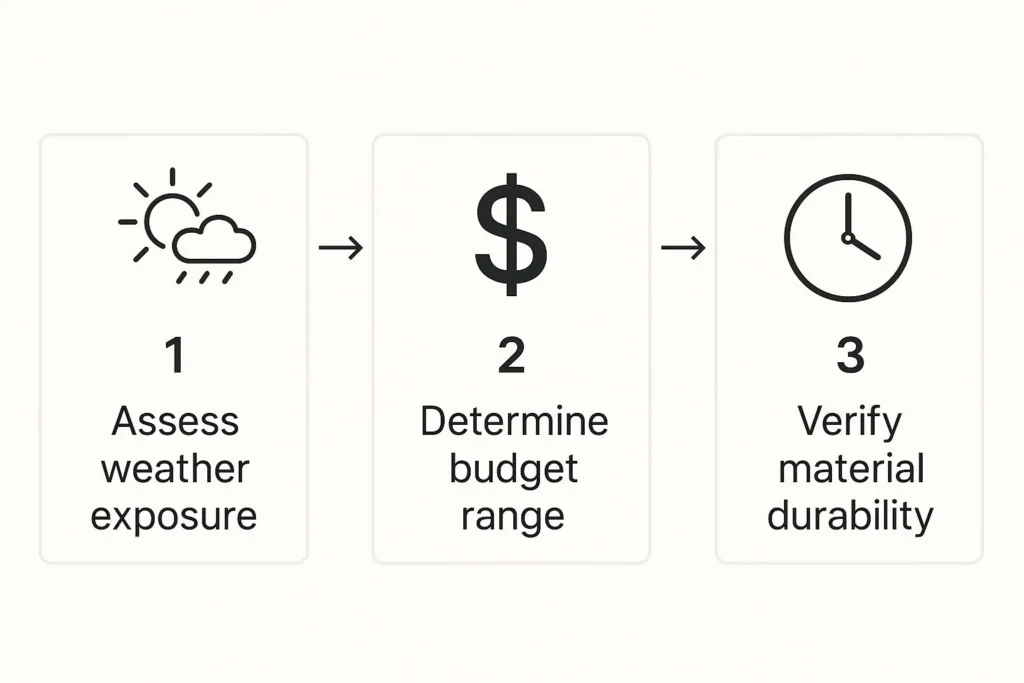
The key takeaway is to balance your local climate needs with your budget to select a material that offers the best long-term value and durability.
Essential Safety Preparations First
Before a single tool comes out, we need to talk safety. Working on a roof comes with obvious risks, and cutting corners here is not an option. Your first job is to set up a secure and stable work environment.
Start with your ladder. Make sure it’s on solid, level ground and extends at least a metre above the roofline for safe access. Always keep three points of contact when you’re climbing—that’s two hands and one foot, or two feet and one hand, on the ladder at all times.
Once you’re up there, be conscious of your footing, especially on tiled or steep roofs. Wear sturdy, non-slip shoes. A good pair of work gloves is also a must-have to protect your hands from sharp edges, crusty old sealant, and your tools.
Safety isn’t just a step; it’s the foundation of the entire project. A few extra minutes spent securing your ladder and organising your workspace can prevent a serious accident.
Removing the Old, Damaged Cover
With safety sorted, it’s time to get that old cover off. This part requires a bit of patience, especially if the original sealant has been baking in the sun for years. The goal here is simple: get the cover off without damaging the skylight frame or the roof tiles around it.
You’ll usually see a series of screws holding the cover’s flange to the frame. Carefully back these out with a drill or screwdriver. If the screw heads are buried under old sealant, you’ll need to gently scrape it away with a putty knife to get access.
Once the screws are out, the cover should lift off. Should. More likely, years of hardened sealant will be holding it down tight. Use your putty knife to carefully work your way around the edge, slicing through the old sealant to break the bond. Go slow and don’t force it—that’s how you crack a roof tile or warp the metal frame.
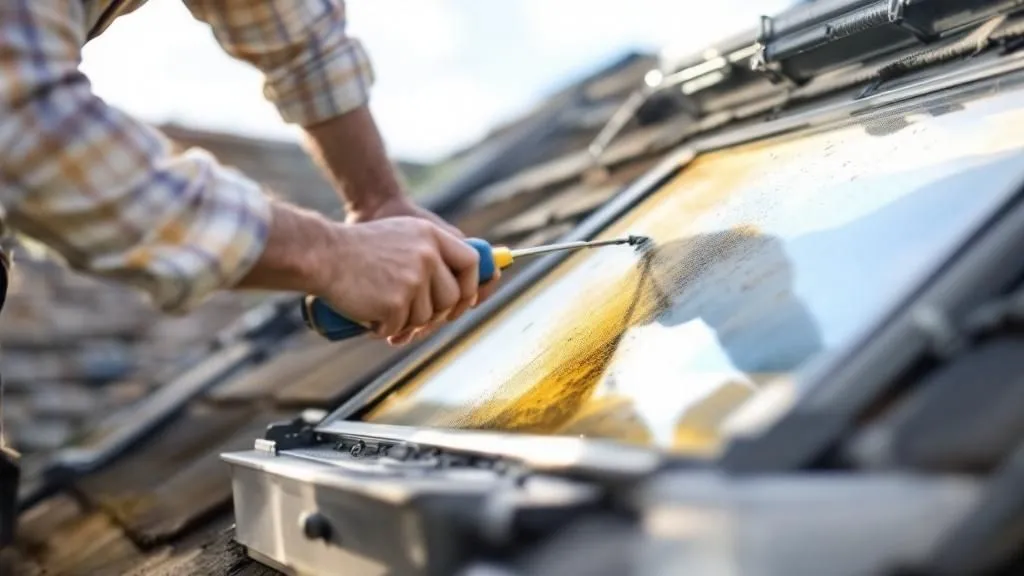
Prepping the Frame for a Perfect Seal
This is arguably the most critical stage for a leak-free finish. Any leftover gunk from the old sealant will stop the new seal from bonding properly. You need a perfectly clean, smooth surface for the new sealant to grab onto.
With the old cover gone, grab your putty knife and scrape away every last bit of the old caulk from the skylight frame. This can be a tedious job, especially if the sealant is brittle and baked-on.
For the really stubborn stuff, you might need some help:
- Solvents: Mineral turpentine can help soften old silicone, making it easier to scrape off. Always test it on a small, hidden area first to make sure it doesn’t damage the frame’s finish.
- Heat Gun: On a low setting, a heat gun can soften sealant, but be extremely careful. You don’t want to damage your roofing material or the frame.
- Patience: Honestly, sometimes the best tool is just methodical scraping. Put on some music and take your time.
Once all the old gunk is gone, give the frame a final wipe-down with a clean cloth and methylated spirits. This removes any lingering dust, oils, or solvent residue. The surface needs to be immaculate before you even think about picking up that sealant gun. This same level of care is vital for any installation, as we detail in our comprehensive guide on how to install a skylight.
Applying Sealant and Fitting the New Cover
Now for the rewarding part—getting the new cover on. Before you get anything sticky, do a “dry fit.” Place the new cover onto the clean frame and check that it sits perfectly flat and all the screw holes line up. This is your last chance to spot any problems.
Happy with the fit? Time for sealant. Use a high-quality, 100% silicone or polyurethane sealant made specifically for roofing and outdoor use. Apply a continuous, generous bead of sealant directly onto the skylight frame where the cover’s flange will sit. Don’t be stingy, but don’t make a huge mess either. A consistent 5-8mm bead is usually spot on.
Carefully lower the new cover onto the fresh sealant, pressing it down firmly and evenly. You want to see the sealant spread out just a little, creating a complete gasket between the flange and the frame.
Securing the Cover and Final Touches
Insert your new, rust-proof screws into the pre-drilled holes. Tighten them bit by bit in a crisscross pattern to apply even pressure across the frame. Be careful not to over-tighten them. This is a classic mistake that can instantly crack a new acrylic or polycarbonate cover. The screws should be snug enough to compress the sealant, but not so tight they put stress on the cover.
For the final waterproofing step, run another bead of sealant over the entire outer edge of the cover’s flange where it meets the frame. Follow that by putting a small dab of sealant over each screw head. This gives you a crucial second layer of defence against water getting in.
Let the sealant cure completely according to the manufacturer’s instructions—usually at least 24 hours—before it sees any rain. By following these steps, you’ll have a professional, durable, and completely watertight skylight cover replacement that will protect your home for years.
Avoiding Common DIY Installation Mistakes
Even a seemingly straightforward skylight cover replacement can go sideways if you fall into one of the classic DIY traps. Getting it right the first time isn’t just about saving yourself a Saturday afternoon; it’s about preventing the kind of costly water damage that a failed installation inevitably causes. Let’s walk through the common errors that can turn your simple project into a massive headache.
The success of your replacement really hinges on the small details. Little missteps, often made with the best of intentions, can compromise the entire job and lead to those frustrating leaks that only show up a few months down the line. Knowing what these mistakes are is the best way to steer clear of them.
The Wrong Sealant: A Recipe for Disaster
One of the most frequent and damaging errors I see is choosing the wrong sealant. Just grabbing a general-purpose or interior-grade caulk from the shed is a guaranteed way to ensure your new skylight fails. These products simply can’t handle the extreme temperature swings and harsh UV exposure on an Australian roof.
Before long, they become brittle, crack, and pull away from the frame. This creates perfect little channels for rainwater to sneak in. You absolutely must use a 100% silicone or advanced polyurethane sealant specifically made for roofing and outdoor use. Always double-check that it’s UV-resistant and compatible with your cover’s material, whether that’s acrylic or polycarbonate.
A high-quality sealant isn’t an optional upgrade; it’s the single most important material for creating a durable, watertight seal. Spending a few extra dollars here can save you hundreds in future water damage repairs.
Over-Tightening Screws: The Instant Crack
You’ve got the new cover perfectly in place, and you want to make sure it’s secure. It’s so tempting to give those screws an extra turn for good measure, but this is a classic, costly mistake. Over-tightening is the number one cause of cracked new skylight covers, especially with acrylic and polycarbonate domes.
These materials need a bit of room to expand and contract with the temperature changes. When you crank the screws down too hard, you create stress points that can easily spiderweb into a network of cracks radiating from the screw holes. The goal is snug, not strangled. Tighten them just enough to gently compress the sealant and create a firm seal—and no more.
To get it right, just follow these simple guidelines:
- Use a screwdriver, not an impact driver. You’ll have far more control over the torque.
- Tighten in a star pattern. Just like changing a car tyre, this applies pressure evenly across the flange.
- Stop when you feel resistance. The screw should feel firm, but you shouldn’t have to force it.
Rushing the Surface Preparation
Another common shortcut is failing to properly clean the skylight frame after you’ve taken the old cover off. It’s a tedious job, I know, but leaving behind even a thin film of old, crusty sealant will completely sabotage your new seal. A fresh bead of silicone just can’t bond properly to a dirty, uneven surface.
You need to scrape, scrub, and wipe the frame until it is completely free of old residue, dust, and oils. Use a putty knife to get the thick bits off, then finish with methylated spirits on a clean rag for a pristine surface. This step is completely non-negotiable if you want a professional, leak-free finish. Skipping it is like trying to put a new sticker on a dirty, peeling surface—it’s just not going to stick.
For a deeper dive into preparation and other crucial steps, it’s worth reviewing the five essential things you must know before installing a skylight.
By avoiding these common pitfalls—using the right sealant, applying gentle pressure, and meticulously prepping your surfaces—you set yourself up for a successful skylight cover replacement that will perform flawlessly for years to come.
Deciding When to Call a Professional Roofer
Knowing how to handle a DIY skylight cover replacement is only half the battle. The other half—and honestly, the more critical part—is recognising when it’s time to put the tools down and call in a professional. This isn’t about admitting defeat; it’s about making a smart, safe, and financially sound choice for your home.
Some situations can quickly turn a simple replacement into something far more complex and dangerous. Pushing through these scenarios can lead to serious injury, voided warranties, and costly damage that far outweighs what you’d pay a roofer in the first place. It all comes down to knowing your limits and protecting your biggest investment.
Red Flags That Demand a Professional
If you get that old cover off and find more than just some crusty sealant, it’s time to pause. The single biggest warning sign is discovering soft, damp, or rotted timber in the skylight’s frame or the roof structure around it. This is a dead giveaway of a long-term leak that has compromised the integrity of your roof.
Simply slapping a new cover over rotting wood is just kicking a very expensive can down the road. A professional roofer needs to get in there, assess the full extent of the damage, and replace any compromised timber to make sure your roof is structurally sound.
Then there’s the issue of roof accessibility and safety.
- Steep Pitch: If your roof has a steep pitch, getting around up there safely requires specialised gear and a whole lot of experience. The risk of a fall goes up dramatically.
- Roofing Material: Trying to work on brittle, old terracotta tiles or a slippery metal roof is asking for trouble. A pro knows how to handle these surfaces without causing more damage or risking their own neck.
- Height: A multi-storey home presents challenges that just don’t exist on a single-storey property. The risks that come with that extra height are not worth taking for a weekend project.
Choosing a professional in complex situations is an investment in safety and quality. It prevents dangerous accidents, guarantees a proper seal over hidden damage, and protects the long-term structural integrity of your home’s roof.
Warranty and Complexity Considerations
Beyond just safety, there are some very practical reasons to call in an expert. If your skylight is part of a larger, newer unit that’s still under warranty, doing the replacement yourself could void that protection instantly. Many manufacturers are very specific that only certified installers can carry out repairs if you want to keep the warranty intact.
On top of that, severe weather events in Australia, like hail storms, can cause widespread issues that complicate a simple replacement. This problem is often made worse because many skylight brands disappear over the years, making it a nightmare to find reliable parts. A seasoned professional has the network and knowledge to track down the correct components.
It’s also worth remembering that many professional roofers now use advanced tools like drone roofing inspection software to get a precise, comprehensive look at your entire roof system. This tech helps them spot issues from the air that you would almost certainly miss from a ladder. If your “simple” replacement uncovers deeper problems, a pro has the skills and the right gear to handle it properly.
Your Top Skylight Replacement Questions Answered
Even the most straightforward DIY jobs come with questions. When you’re dealing with something as important as your roof, you want to be sure you’re getting it right. We get a lot of queries from homeowners about replacing their skylight cover, so let’s tackle the most common ones head-on.
How Much Does a Replacement Cost in Australia?
This is the big one, and the answer really depends on how you approach it.
If you’re tackling the job yourself, the cost of the materials is your main outlay. A basic acrylic dome might only set you back $150 to $300. Of course, if you’re looking at higher-end materials like high-impact polycarbonate or custom-laminated glass, that figure will climb.
Getting a professional roofer involved will naturally add labour costs, typically somewhere between $400 and $800. This can change based on where you live, the complexity of your roof, and how steep its pitch is. It’s always a smart move to get a few quotes to weigh up the cost of materials versus a full professional installation.
Should I Replace Just the Dome or the Whole Unit?
This is a critical decision. If the frame, seals, and metal flashing around your skylight are still in great shape, then just swapping out the cover can be a perfectly sensible, cost-effective fix.
But it pays to be realistic. All the components of a skylight tend to age at a similar pace. If that dome is brittle and cracked after years of Aussie sun, chances are the rubber seals are just as perished. You need to give the whole unit a really thorough inspection before you decide.
Look for any signs of rust on the frame, check if the seals are cracked and inflexible, or see if the metal flashing is warped. If you find any of these issues, replacing the entire unit is the smarter long-term investment. You’ll tackle every potential failure point in one go, preventing future leaks and giving you proper peace of mind.
What Is the Best Sealant for a Skylight Cover?
Choosing the right sealant is non-negotiable for a leak-free result. Don’t cut corners here.
You absolutely need a high-quality, 100% silicone or advanced polyurethane sealant that’s made for roofing and constant outdoor exposure. Look for a product that specifically states it is UV-resistant and will stay flexible. This is key because it has to handle the constant expansion and contraction that comes with daily temperature swings.
Whatever you do, don’t grab a cheap tube of interior-grade acrylic caulk. The harsh Australian sun will make it go hard and crack within a year, and you’ll be dealing with leaks before you know it. One last tip: always double-check that the sealant is compatible with your dome material—some chemicals can actually damage acrylics.
For a deeper dive into the whole process, our guide to skylight replacement covers all the material choices and steps you’ll need.
Ready to bring beautiful, natural light into your home? At Vivid Skylights, we offer premium, double-glazed roof windows designed for the Australian climate. Explore our range of fixed and electric opening skylights and transform your space today at https://vividskylights.com.au.