
Thinking about installing a skylight? The first question on everyone’s mind is usually about the cost. In Australia, a professionally installed skylight will typically set you back somewhere between $1,500 and over $5,000.
This price tag covers both the skylight unit itself and the critical professional labour needed to ensure it’s fitted securely and, most importantly, without any leaks. Of course, the final quote will hinge on the specific type, size, and extra features you decide on.
Your Quick Guide to Australian Skylight Costs

Trying to figure out the cost of a new skylight can feel a bit like buying a car. You’ve got your dependable, no-frills models that get the job done beautifully, and then you have the premium options loaded with all the latest bells and whistles.
Each tier is there for a reason and comes at a different price point, which actually makes it easier to find the perfect match for your home and budget. This guide will break down all the costs involved, so you have a crystal-clear picture of what to expect.
Understanding the Price Tiers
Just like cars, skylights fall into a few main categories that really shape the final price. These are the three most common options you’ll come across:
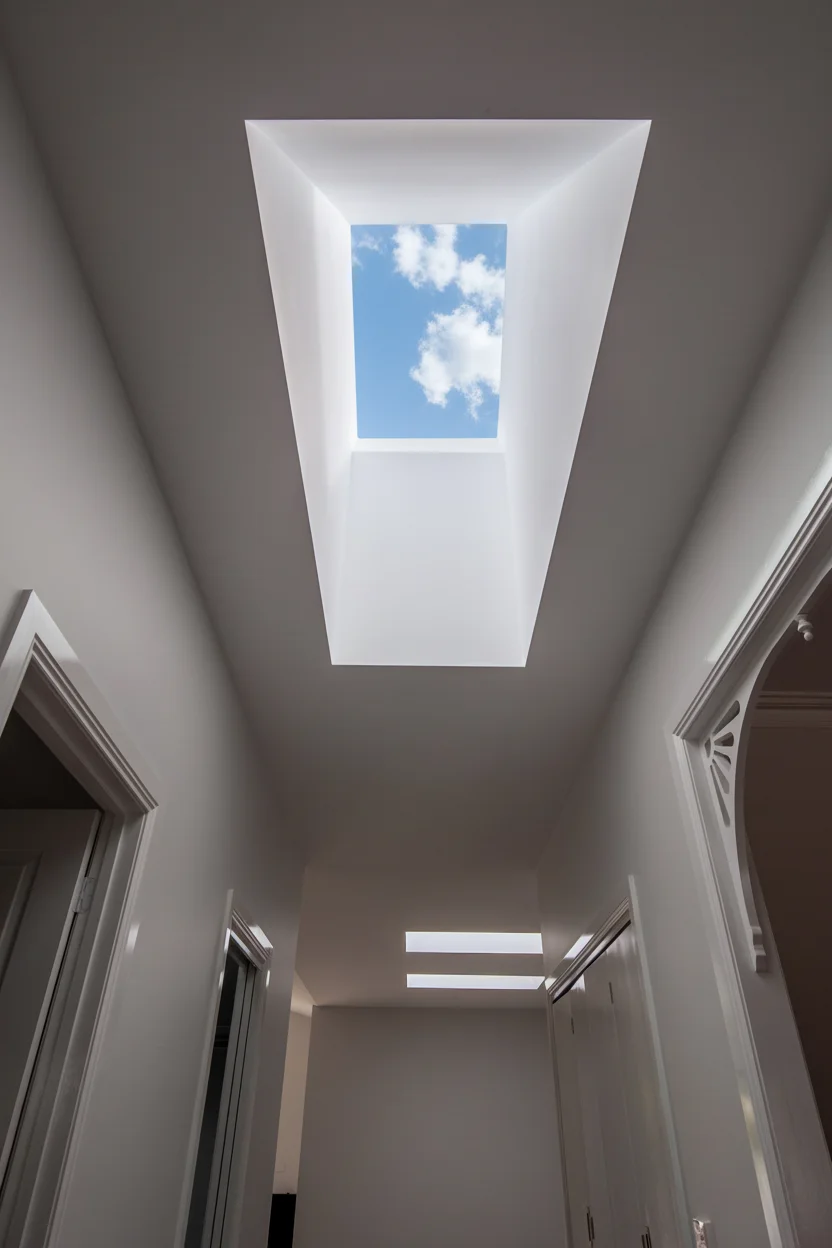
Fixed Skylights: These are the classic, standard models. They don’t open but are absolutely fantastic for flooding a room with natural light. Think of them as a picture window for your roof—perfect for living areas, kitchens, or hallways where you just want more sun.
Ventilated Skylights: This is the next step up. These skylights can open up to let fresh air circulate, which is a game-changer for stuffy rooms. Models like Vivid Skylights’ solar-powered and electric options add a layer of convenience, letting you vent out hot air and improve air quality with just the touch of a button.
Tubular Skylights: These are a basic solution. They’re designed to funnel light through a reflective tube into those smaller, darker spots like walk-in robes, pantries, or little bathrooms where a traditional skylight just wouldn’t fit.
A Realistic Budget Breakdown
Let’s get down to the numbers. Here’s a quick overview of what you can expect to pay for a fully installed skylight.
Estimated Skylight Installation Costs at a Glance
This table gives you a snapshot of the all-inclusive estimated costs for different types of skylights, helping you quickly compare your options.
| Skylight Type | Average Unit Cost (AUD) | Average Installation Labour (AUD) | Total Estimated Cost (AUD) |
|---|---|---|---|
| Fixed Skylight | $720 – $1,600 | $1,200 – $2,000 | $1,920 – $3,600 |
| Ventilated Skylight | $1,600 – $3,500 | $1,500 – $2,500 | $3,100 – $5,000+ |
| Tubular Skylight | $500 – $1,200 | $1,000 – $1,800 | $1,500 – $3,000 |
Keep in mind these figures are a general guide. The complexity of your roof, your location, and any extra features can nudge the final price up or down.
For a standard fixed skylight in a busy market like Melbourne, the total installed price usually lands between $1,500 to over $5,000. This covers the unit itself (around $720–$1,600) and the professional labour, which can be anywhere from $1,200–$2,000. It is absolutely crucial to factor in a professional fitting—a poor installation can lead to leaks, a frustrating issue that affects up to 15-20% of improperly installed units.
At Vivid Skylights, we try to make this easier. All our units come with high-performance double-glazing and the necessary flashing kits included in the price, which helps simplify the total cost. This all-in-one approach means you get a top-quality, energy-efficient product without getting stung by hidden fees for essential parts.
To see how these factors add up, feel free to explore our detailed guide on skylight installation costs.
What Really Determines Your Skylight Cost
Figuring out the final cost of a skylight is a bit like baking a cake. You have your base ingredients—the skylight unit itself—but the final price tag depends on everything else you add to the mix. The number you see on the product page is just one piece of a much larger puzzle.
From the type of skylight you choose to the very structure of your roof, a handful of key factors shape the final quote you’ll receive. Let’s break these down so you can budget accurately and avoid any nasty surprises down the track.
The Skylight Unit Itself
First up, naturally, is the skylight you pick out. It’s like choosing between a basic hatchback and a luxury SUV; the features, materials, and functionality set the starting price.
Type and Functionality: A simple fixed skylight is your most budget-friendly option, designed purely to let in light. If you want fresh air as well, stepping up to a ventilated model—like the solar-powered or electric opening skylights from Vivid Skylights—adds functionality for airflow and moisture control, which bumps up the unit cost.
Size Matters: The bigger the skylight, the more materials go into making it, which directly impacts the price. A larger unit also means a bigger hole in your roof, which can add to the installation time.
Materials and Glazing: Quality materials are an investment that pays off. Vivid Skylights units are built with durable, powder-coated aluminium frames that stand up to the Aussie climate. The glass is another huge factor; our standard high-performance double-glazing with a Low-E coating is essential for energy efficiency, stopping heat from escaping in winter and keeping your home cooler in summer.
Your Roof’s Role in the Equation
Your roof is the canvas for this project, and its specific characteristics are one of the biggest variables affecting both the cost and the complexity of the job. An installer doesn’t just plonk a skylight on top; they have to integrate it perfectly into your existing roof structure.
A straightforward installation on a standard-pitched, single-storey tiled roof is the dream scenario. But things can get more complicated—and more expensive—pretty quickly.
Think of it this way: installing a skylight on a flat, easily accessible roof is like painting on a smooth, primed canvas. Installing one on a steep, multi-level slate roof is like trying to paint a detailed mural on a textured brick wall—it just takes more skill, more time, and more specialised gear.
Here are a few common roof-related factors that can push up the price:
Roof Pitch (Steepness): Really steep roofs demand extra safety equipment and more time for the installers to move around, which means higher labour costs. On the flip side, very low-pitch or flat roofs need special flashing and installation techniques to make sure water runs off properly and doesn’t pool.
Roofing Material: Working with standard tiles or metal roofing is usually pretty straightforward for an experienced installer. But materials like slate, concrete, or custom-profile metal can be more delicate and time-consuming to cut and seal around, and your quote will reflect that.
Structural Work: Your installer needs to cut a hole in your roof, which sometimes means cutting through a rafter or truss. If a structural beam needs to be cut and reinforced with a header, this adds significant labour and materials to the job. It’s a non-negotiable step to ensure the integrity of your roof isn’t compromised.
The “Hidden” Costs of Installation
Beyond the skylight unit and the roof work, there are a few other costs that can sneak into your final bill. These are the finishing touches and admin steps that turn a hole in the roof into a seamless, beautiful feature inside your home.
Interior Finishing: The Light Shaft
The gap between your ceiling and your roof needs to be connected. This is done by building a “light shaft,” and the cost can vary massively.
Framing: A timber frame is built to create the tunnel.
Plastering: Plasterboard is fitted, and the joints are taped and finished for a smooth look.
Painting: The new shaft needs a couple of coats of paint to match your ceiling.
A short, straight shaft in a home with easy attic access is a relatively simple job. But if you have a long, angled shaft that needs to navigate around ductwork or other obstructions, it’s going to take a lot more labour and materials, potentially adding hundreds or even thousands to the final cost.
Council Permits and Approvals
While many standard skylight installations fly under the radar, you should never just assume you don’t need council approval. You might need a permit if:
Your home is heritage-listed.
The job involves significant structural changes to your roof frame.
You live in a bushfire-prone area with specific building code requirements.
Checking with your local council beforehand is a crucial step to avoid potential fines or having to undo the work. The cost of getting a permit is another expense you’ll need to factor into your budget.
Choosing the Right Skylight for Your Space
Not all skylights are created equal. Picking the right one is a bit like choosing a window for a specific room in your house—some are purely for the view, others are for letting in a fresh breeze, and some are small but mighty, designed to light up a tricky corner. Skylights work in much the same way.
The three main options you’ll come across are fixed, ventilated, and tubular skylights. Each one solves a different problem, and understanding what makes them tick is the key to making a smart investment. Your choice will directly impact the light quality, airflow, energy efficiency, and of course, the overall cost of your skylight and its installation.
Fixed Skylights: The Architectural Choice
Think of a fixed skylight as a stunning picture window for your ceiling. Its one and only job is to drench a space in beautiful, consistent natural light. It doesn’t open or close; it just provides an uninterrupted view of the sky and lets the sunshine pour in.
These are a fantastic choice for common areas where maximum light is the main goal, like:
Living rooms and open-plan family areas.
Kitchens that need bright, functional task lighting.
Hallways or entryways that feel dark and closed off.
Thanks to their simpler design, fixed skylights are usually the most cost-effective option among traditional skylights. Models like the Vivid Skylights’ standard fixed units are designed as architectural features, using high-performance double glazing to let in as much light as possible while minimising heat transfer. The result? Bright, comfortable living spaces.
Ventilated Skylights: Light and Fresh Air
A ventilated (or opening) skylight does everything a fixed one does, but with the added superpower of fresh air. This transforms it from just a window to an active part of your home’s climate control system. By opening up, it allows hot, stale air—which naturally rises—to escape, creating a natural cooling draft known as the “chimney effect.”
This makes them perfect for rooms where moisture and odours tend to build up, like kitchens and bathrooms. They’re also brilliant for making bedrooms or living spaces more comfortable during the warmer months, offering an energy-efficient way to cool your home without cranking up the air-con.
Ventilated skylights are a lifesaver in places with humid summers, like Melbourne. They typically cost between AUD $2,100–$5,500 installed, with the unit itself ranging from $1,630–$2,500 and labour adding another $1,800–$3,000. Many come with motorised, rain-sensing openers that automatically vent moisture and can improve air quality up to 30% more efficiently than fixed models. Vivid Skylights specialises in these solar-powered and electric opening options, often paired with fly screens and block-out blinds for total control. You can get a better sense of how these features affect your budget by checking out these insights on skylight pricing from Vivid Skylights.
This diagram breaks down the main factors that go into the total price of a skylight project.
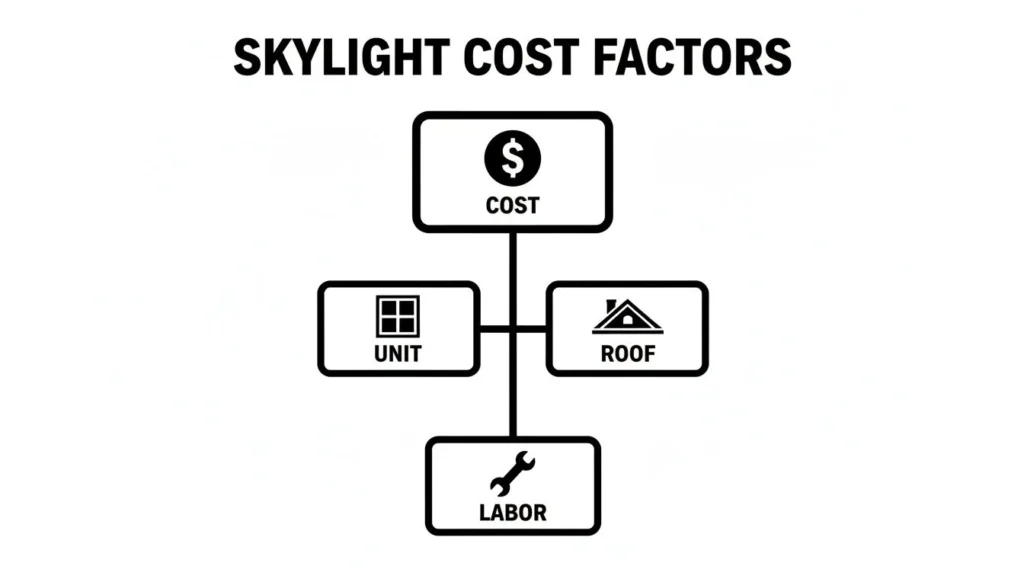
As you can see, the final cost is a blend of the skylight unit itself, the complexity of your roof, and the hands-on work needed to put it all together.
Tubular Skylights: The Problem Solver
Now, tubular skylights are a completely different beast. They aren’t designed to give you a grand view of the sky or make a big architectural statement. Their job is much more specific: capture sunlight on your roof with a small dome and funnel it down a highly reflective tube into small, windowless spaces.
A tubular skylight is like a periscope for sunlight, cleverly bending and directing light into places it could never otherwise reach. It’s less about the view and all about pure, functional illumination.
They are the perfect solution for those tricky spots:
Walk-in wardrobes
Small bathrooms or powder rooms
Pantries
Laundry rooms
While Vivid Skylights focuses on creating expansive light with fixed and opening models for main living areas, tubular skylights definitely have their place in brightening up the forgotten corners of a home. They are generally the most affordable option and have the simplest installation, often fitting neatly between roof trusses without needing any structural changes.
Fixed vs Ventilated vs Tubular Skylight Comparison
To help you decide, here’s a quick rundown of how the three main types of skylights stack up against each other. This table breaks down their key features, helping you match the right skylight to your space and budget.
| Feature | Fixed Skylight (e.g., Vivid Standard) | Ventilated Skylight (e.g., Vivid Solar) | Tubular Skylight |
|---|---|---|---|
| Primary Function | Maximise natural light; architectural feature | Natural light and fresh air ventilation | Illuminate small, dark, or windowless spaces |
| Best For | Living rooms, kitchens, hallways | Bathrooms, kitchens, bedrooms | Wardrobes, pantries, small bathrooms, hallways |
| View of the Sky | Yes, provides a clear, uninterrupted view | Yes, provides a clear view and opens up | No, provides diffused light but no direct view |
| Cost | Most affordable traditional option | Higher cost due to opening mechanism and motor | Generally the most budget-friendly option |
| Installation | Standard installation; requires framing of roof and ceiling | More complex due to wiring (electric) or solar panel placement | Simplest installation; often fits between existing roof trusses |
| Energy Efficiency | High (especially with double glazing) | High, plus natural cooling benefits | Very high, minimal heat transfer |
| Vivid Skylights? | Yes, a core product offering | Yes, available in solar-powered and electric models | No, Vivid specialises in larger, architectural skylights |
Ultimately, making the right choice is about aligning the skylight’s strengths with your goals, whether that’s flooding your living room with light, airing out a steamy bathroom, or simply brightening a dark closet.
Professional vs DIY Skylight Installation
So, you’ve picked out the perfect skylight. Now comes the next big fork in the road: who’s going to install it? This is the classic project dilemma—do you call in the experts or roll up your sleeves and tackle it yourself?
Think of it like deciding between a meal from a top chef and a gourmet home-cooking kit. One path gives you guaranteed results, flawless execution, and total peace of mind from a seasoned pro. The other offers a hands-on, rewarding experience with the chance to save a serious amount on labour, but it’s not without its risks.
Either way, the goal is a beautiful, light-filled room. Let’s break down both professional and DIY installation so you can figure out which route makes the most sense for your skills, budget, and timeline.
The Professional Installation Route
For most people, hiring a professional installer is the smartest and safest bet. These experts have the experience, the specialised tools, and a deep understanding of roofing structures—all essential for getting the job done right.
Bringing in a pro is about more than just convenience; it’s about protecting your home’s most important shield. An improperly installed skylight is one of the most common causes of roof leaks, and the water damage that follows can be a nightmare to fix.
A professional installation is really an investment in a leak-free guarantee. Installers aren’t just fitting a window; they’re performing surgery on your roof and ensuring it remains completely weatherproof when they’re done.
When you hire a qualified installer, here’s what you should expect:
-
A Thorough Assessment: They’ll inspect your roof’s structure, material, and pitch to spot any potential curveballs before the work even starts.
-
Precision Cutting: A pro has the right gear to make clean, accurate openings in your roof and ceiling without weakening the structure.
-
Expert Waterproofing: This is the make-or-break step. Installers are masters at fitting flashing kits and sealing membranes to create a watertight seal that can handle harsh Australian weather.
-
Warranty Protection: A professional job is often required to keep the manufacturer’s warranty valid. Vivid Skylights provides a 10-year leak-free warranty, which depends on the correct installation of both the skylight and its included flashing kit.
This debate isn’t unique to skylights. To get more perspective on when to call in the experts, it’s helpful to explore the nuances of DIY vs. professional approaches to residential window care.
The DIY Skylight Installation Path
For the confident and handy DIYer, installing a skylight can be an incredibly satisfying project. We’ve designed Vivid Skylights to be as user-friendly as possible, and our online resources are there to help you map everything out. The biggest draw, of course, is saving on labour, which can easily be half the total project cost.
But let’s be clear: this isn’t a weekend job for a beginner. It involves working at heights, making major cuts to your home’s structure, and meticulous waterproofing. You need to be brutally honest with yourself about your skills and comfort level before diving in.
A DIY skylight installation typically breaks down into these key stages:
-
Prep and Layout: Carefully measuring and marking the skylight’s exact position, both from inside the attic and on the roof.
-
Cutting the Openings: Creating the hole in your ceiling, then cutting through the roofing material and sheathing.
-
Framing the Opening: If you have to cut a roof truss or rafter, you must build a support frame (with headers and trimmers) to maintain the roof’s structural integrity.
-
Installing the Skylight: Securing the unit into the opening you’ve prepared, following the manufacturer’s instructions to the letter.
-
Flashing and Waterproofing: This is where everything can go wrong. You have to correctly layer the flashing kit components with your roofing material to create a failsafe barrier against water.
-
Interior Finishing: Building the light shaft, then insulating, plastering, sanding, and painting it for a seamless look.
If you feel up to the challenge, our detailed guide walks you through a successful DIY skylight installation.
Ultimately, the choice boils down to a trade-off between cost and risk. A professional ensures the job is done right, protecting your investment and your home. A DIY approach saves money and offers bragging rights, but it puts all the responsibility for a leak-free result squarely on your shoulders.
The Long-Term Value of Your Skylight Investment
It’s easy to get caught up in the upfront cost of a skylight, but that’s only a small part of the story. A skylight isn’t just another renovation expense; it’s a long-term investment in your home’s value, your energy bills, and even your family’s well-being. Once it’s in, it starts paying you back in more ways than one.
Thinking about it this way is a game-changer. Instead of seeing a debit on your bank statement, picture it as an upgrade that delivers real, tangible returns for years to come. From making your home more appealing to buyers to cutting down your reliance on artificial lights, the benefits are both financial and personal.
Boosting Your Property Value and Appeal
Natural light is a hot commodity in real estate. It’s one of the first things potential buyers notice, and a bright, airy home simply feels bigger, cleaner, and more welcoming. Installing skylights is one of the most effective ways to create that atmosphere, giving your property a serious edge on the market.
Rooms that were once dark corners suddenly become inviting, usable spaces. This kind of transformation can completely change a buyer’s perception and how much they’re willing to offer. Homes filled with natural light don’t just feel better; they often sell faster and for a higher price. You can dive deeper into how skylights increase home value in our dedicated guide.
A well-placed skylight doesn’t just light up a room—it elevates the whole home. It becomes an architectural feature that signals quality and thoughtful design, leaving a lasting impression on anyone who walks through the door.
Realising Tangible Energy Savings
The financial payback from a skylight starts from day one. By letting daylight flood your home, you’ll find yourself reaching for the light switch far less often. This simple change can make a surprising dent in your quarterly electricity bills.
This is particularly true for more affordable options designed to brighten smaller areas. For example, tubular skylights are a popular, budget-friendly choice, typically costing AUD $800–$2,000 fully installed in Australia. Their popularity has soared, with a 25% jump in uptake among homeowners looking to fight rising energy costs by slashing daily lighting electricity usage by 40-60%. This trend has also caught the attention of investors, who are seeing property value lifts of 3-5%.
But the savings don’t stop with lighting:
-
Passive Heating: In the cooler months, the sun streaming through your skylight acts as a natural heater, giving your heating system a much-needed break.
-
Natural Cooling: With a model that opens, like Vivid Skylights’ solar-powered options, you can vent the hot, stale air that naturally rises to the ceiling. This creates a cooling chimney effect, reducing your dependence on air conditioning.
Enhancing Wellness and Durability
The benefits of natural light go far beyond your wallet. Living and working in a naturally lit space is proven to boost mood, improve focus, and regulate our sleep cycles. It just creates a calmer, more pleasant atmosphere to be in.
This long-term value is only as good as the product you choose. Vivid Skylights are built to last, with tough, powder-coated aluminium frames and high-performance double glazing engineered for the harsh Australian climate. Backed by a comprehensive 10-year warranty, you can be confident your investment is protected, giving you a leak-free, high-performing addition to your home for years to come.
Answering Your Skylight Installation Questions
As you get closer to deciding, it’s natural for a few practical questions to pop up. Think of this as your final checklist—a quick run-through of the most common things we get asked about, designed to clear up any last-minute uncertainties and help you move forward with confidence.
How Long Does a Typical Skylight Installation Take?
For a straightforward job, like on a single-storey home with a standard pitched tile roof, a pro can usually get it all done in one day. We’re talking about 4 to 8 hours from start to finish. It’s a surprisingly quick transformation.
Of course, some projects are more involved. If you’re dealing with a low-pitch roof, need to cut and reinforce rafters, or are building a long light shaft through an attic space, the timeline will stretch. For these more complex installations, it’s best to plan for it to take a couple of days.
Will Installing a Skylight Make My Room Hotter in Summer?
That’s a classic concern, but one that modern skylights have been engineered to solve. A quality unit isn’t just a piece of glass; it’s a high-performance window for your roof. Every Vivid Skylight, for example, comes standard with double-glazing and a special Low-E coating. This coating is like a smart filter—it’s brilliant at reflecting infrared heat back outside while letting all that lovely visible light pour in.
If you want even more control, you can add an integrated block-out blind. Or, even better, an opening solar-powered model can actively help cool your home by letting you vent hot air that naturally rises and gets trapped at the ceiling.
A well-designed skylight shouldn’t be a heat trap. With today’s glazing technology, it becomes a source of light and comfort, not a magnifying glass for the summer sun.
Do I Need Council Approval to Install a Skylight in Australia?
In many cases, putting in a skylight is considered a minor alteration and you won’t need a council permit, especially if it doesn’t mess with your roof’s main structure. But—and this is a big but—local regulations can vary wildly from one council to the next.
You’ll almost certainly need approval if your home is heritage-listed or if the job involves cutting into major structural supports like roof trusses. The smartest and safest bet is to always have a quick chat with your local council before any work kicks off. That one phone call can save you a world of headaches down the track.
What Happens if My Skylight Leaks?
Leaks are the number one fear for anyone thinking about a skylight, but here’s the reality: the problem is almost never the skylight itself. The vast majority of leaks happen because of a shoddy installation. This is precisely why getting a professional installer who knows what they’re doing is non-negotiable.
A reputable product also brings peace of mind. Vivid Skylights, for instance, comes with a 10-year leak-free warranty when installed correctly with the supplied flashing kit. If a leak does happen, your first call should be to your installer. If it turns out to be a rare product fault, the manufacturer’s warranty has you covered.
Ready to bring beautiful natural light into your home with complete confidence? Vivid Skylights offers premium, energy-efficient skylights designed for the Australian climate, backed by a robust 10-year warranty. Explore our range of fixed and opening models today at https://vividskylights.com.au.