
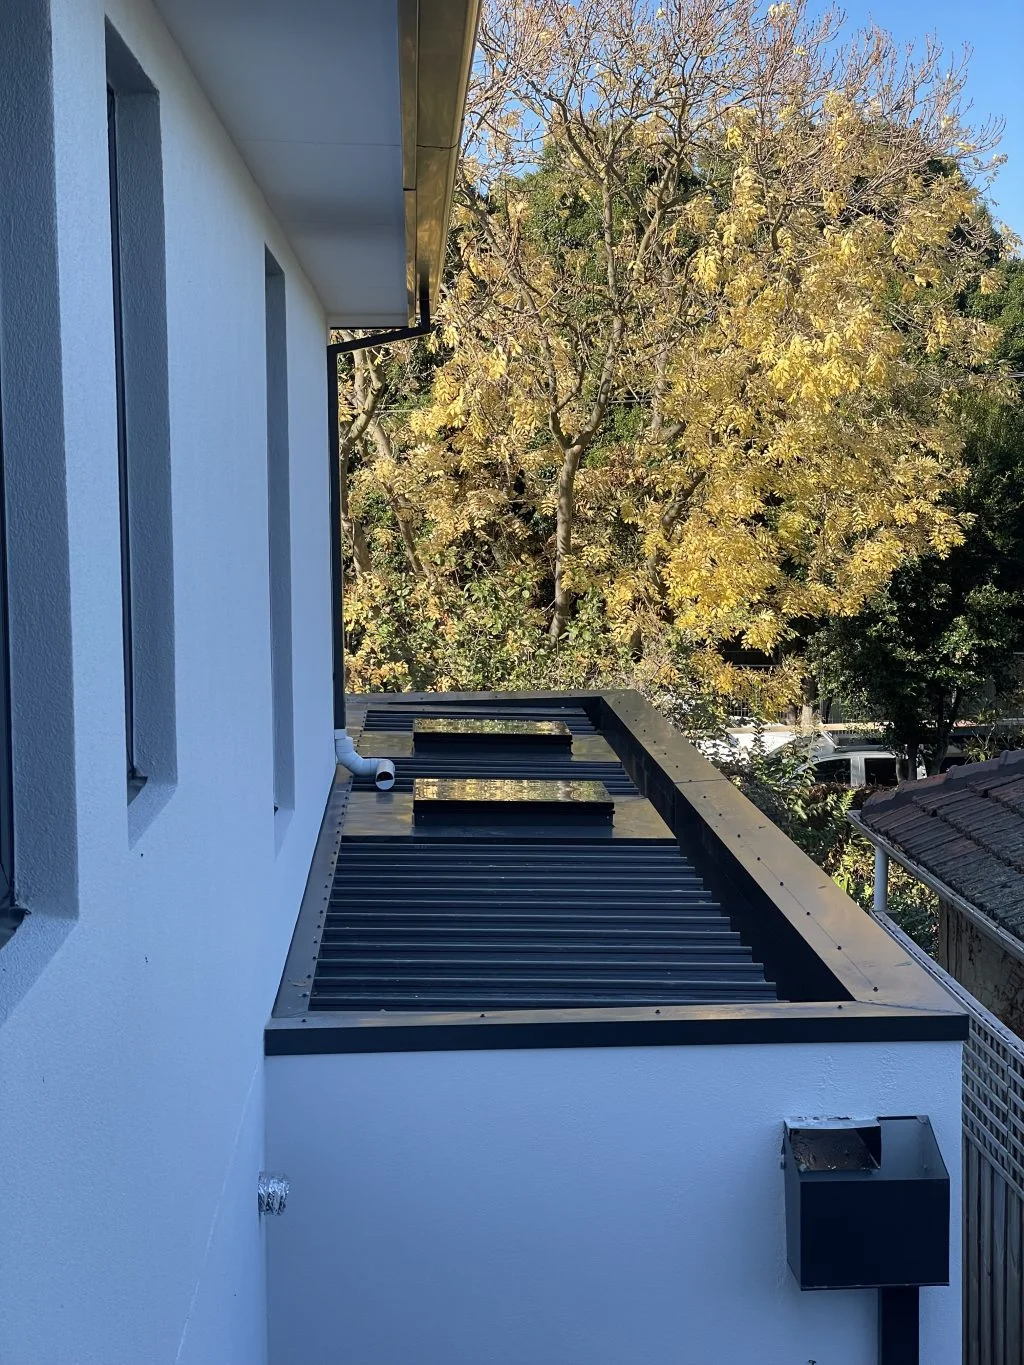
Of course you can install a skylight on a flat roof. While it might seem like a recipe for leaks, modern skylights and clever installation methods make it a surprisingly safe and effective way to flood a room with natural light. The trick isn’t to fight the roof’s flat surface but to work with it by creating a slight pitch where one doesn’t exist.
So, How Does a Skylight Actually Work on a Flat Roof?
It’s a common worry. Homeowners often picture water pooling on the glass, inevitably finding a way inside. This fear is understandable, but it’s mostly based on outdated designs. A properly installed modern skylight on a flat roof is an engineered solution that cleverly sidesteps the problem.
The Secret is the Curb Mount
The magic lies in a simple but brilliant component called an upstand, or curb. Think of it as a raised, box-like frame that’s built directly onto the roof deck before the skylight is fitted.
This curb is the key to everything, serving two vital roles:
- It physically lifts the skylight up and away from the roof surface, keeping it clear of any potential standing water after a downpour.
- It provides a solid base for installing the skylight at a slight angle, giving rainwater a clear path to run off instead of sitting on the glass.
This simple structure turns the biggest challenge—the flat surface—into a non-issue. By building this mini-slope for the skylight to sit on, the system effectively mimics the natural drainage of a pitched roof, but on a very small, localised scale. It’s smart water management and structural support rolled into one.
Think of it this way: by building a curb, you’re creating a small, pitched foundation just for your skylight. Getting this elevation right is the single most important part of ensuring a leak-free, long-lasting installation on any flat or low-pitch roof.
This guide will walk you through everything you need to know. We’ll look at how to handle drainage, compare the best skylight types for the job, and break down what the installation involves. With the right approach, you can confidently turn a dark, forgotten room into a bright, welcoming space.
Why Flat Roofs Need a Special Approach
Putting a skylight on a flat roof isn’t like installing one on a typical sloped roof. It comes with its own unique set of challenges. Think about it: a sloped roof acts like a slide, naturally shedding rainwater thanks to gravity. A flat roof, on the other hand, is more like a giant tray—water doesn’t run off; it spreads out and sits there.
This simple difference is why flat roofs demand a specialised game plan. Without that natural slope, any cut or opening, like for a skylight, instantly becomes a prime spot for water to sneak in. Just cutting a hole and popping in a standard window would be asking for trouble. Water would pool around the edges and eventually find its way inside your home.
Conquering Water Pooling
The main enemy here is water pooling, sometimes called ponding. After a good downpour, even a roof that looks dead flat will have tiny low spots where water collects. A skylight installed flush with the roof would become a small island in a puddle, constantly putting its seals to the test.
To get around this, installers build an artificial slope using a structure called a curb or an upstand. This is basically a raised, box-like frame that lifts the whole skylight unit up off the roof surface, usually by at least 150mm. This elevation keeps the skylight high and dry, well above any potential water pooling.
The curb does more than just lift the skylight; it’s the foundation for creating a watertight seal. It provides a clean, vertical surface for the roof’s waterproof membrane and the skylight’s flashing to be properly integrated, forming an impenetrable barrier against moisture.
This curb also allows the skylight itself to be installed on a slight angle, typically between 3 to 5 degrees. It’s a subtle pitch, but it’s enough to encourage water to run off the glass, stopping it from sitting stagnant and keeping your view crystal clear. It’s a clever bit of engineering that makes a flat surface work perfectly.
Managing Condensation Risk
The other big challenge is invisible: condensation. It happens when the warm, moist air inside your house hits the cold surface of the skylight glass. It’s the same reason a cold can of drink “sweats” on a hot day.
On a flat roof, this can be a real headache. Any moisture that forms has nowhere to go and can drip back down, leading to damp patches or even mould on your ceiling. This is where modern design and the right materials for a skylight on a flat roof become absolutely critical.
Today’s skylights are engineered to stop condensation before it even starts. The key features to look for are:
- Double Glazing: This is non-negotiable for a quality skylight. Two panes of glass are separated by a sealed gap filled with air or gas, which acts as an insulator. This keeps the inner pane of glass closer to room temperature, drastically cutting down the chances of condensation.
- Low-Emissivity (Low-E) Coatings: This is an invisible metallic layer on the glass that reflects heat. In winter, it keeps the heat in your room, and in summer, it reflects the sun’s heat out. This helps keep the glass temperature stable.
A perfect seal between the skylight, the curb, and the roof is also crucial. This is done with specialised parts designed to lock together seamlessly. Taking a look at the components in a high-quality skylight flashing kit is a great way to see how everything works to create a totally waterproof barrier. By tackling both water pooling and condensation from the very beginning, a flat roof skylight will perform beautifully for years to come.
Choosing the Right Skylight for Your Flat Roof
Alright, so you’re sold on the idea of a skylight for your flat roof. Brilliant. Now comes the fun part: picking the right one. This is about more than just size; it’s about matching the skylight to your home’s needs, our Aussie climate, and what you actually want from it—light, air, or both. It can feel like a lot of options, but really, it boils down to just a few key decisions.
The absolute industry standard for flat roofs is the curb-mounted skylight. As we touched on earlier, this design elevates the unit on a raised frame, creating that all-important slope for water to drain away. This is non-negotiable for a successful, leak-free installation. With that sorted, your main choice is whether you want a skylight that’s fixed in place or one that can open up.
Fixed vs Ventilating Skylights Which is Right for You
First up, the big question: are you just chasing light, or do you want fresh air too?
A fixed skylight is the simplest and often most budget-friendly path. Its job is singular: to let natural light pour into a room. Because they’re completely sealed units with no moving parts, they’re a fantastic, low-maintenance choice for places like hallways, studies, or living areas where you just want to brighten things up.
On the flip side, a ventilating skylight (often called an opening skylight) gives you both light and airflow. These are absolute game-changers for rooms that trap heat and humidity—think kitchens, bathrooms, and laundries. Popping it open lets you vent all that rising steam and hot air, dramatically improving comfort, especially during a hot Aussie summer.
Modern ventilating models come with some pretty clever features:
- Electric Openers: Open or close your skylight with a simple remote or wall switch. No manual winding required.
- Solar-Powered Options: A great eco-friendly choice. A small, integrated solar panel powers the opening mechanism, so there’s no need for an electrician to run internal wiring.
- Rain Sensors: This is peace of mind in a feature. The skylight senses the first drops of rain and closes automatically, so you’re never caught out by a sudden downpour.
While an opening skylight costs a bit more and has mechanical parts that might need a look-in down the track, the ability to completely change a room’s atmosphere is a massive win.
Understanding Glazing and Glass Technology
The glass in your skylight isn’t just a window to the sky; it’s a high-performance shield protecting your home. The right glazing has a huge impact on your home’s energy bills, your comfort, and even stops your furniture from fading.
For any skylight in Australia, double glazing is the absolute minimum you should accept. It’s made of two panes of glass with a sealed gap in between, creating a powerful thermal break. This simple design is incredibly effective at stopping heat transfer, which means your home stays cooler in summer and warmer in winter.
But it doesn’t stop there. Look for advanced coatings and clever designs. Low-E (low-emissivity) coatings are an invisible metallic layer that reflects heat, which is a massive boost for energy efficiency and keeping your indoor temperature stable. Some premium models, like those from Vivid Skylights, even have a frameless top glazing. It’s a sleek look, but the practical benefit is that water and debris just slide right off.
This kind of advanced glass technology is really pushing the industry forward. With the global flat roof skylight market sitting at an estimated USD 2.5 billion in 2023 and still growing, the demand for smarter daylighting is clear. Most of the innovation is happening in high-performance glazing, with models now offering serious radiant heat reduction and 99% UV protection to keep your floors and furnishings from sun damage. You can find more about these market trends on archivemarketresearch.com.
For extra peace of mind, especially if you live somewhere prone to wild storms, consider impact-resistant or laminated glass. Some skylights also come with a “self-cleaning” coating on the outside. It’s a neat feature that uses sunlight and rain to break down dirt and wash it away.
By thinking through whether you need ventilation and choosing the best glass you can, you’ll end up with a skylight on your flat roof that doesn’t just brighten your home, but makes it a more comfortable and efficient place to live for years to come.
The Installation Process: DIY vs. Professional
Turning the dream of a skylight on a flat roof into a reality is where the magic really happens. This is where careful carpentry, roofing, and waterproofing skills come together, and precision is absolutely non-negotiable. Whether you’re a hands-on type or you’d rather leave it to the pros, it pays to know what’s involved.
The first step is always mapping out the exact spot and carefully cutting the opening through the roof’s structure and membrane. From there, the crucial curb is built and secured. Think of this raised timber frame as the foundation for your skylight—it provides the slight slope needed to make sure water drains away properly.
Once the curb is solid, the most critical stage begins: the waterproofing. This involves integrating the skylight’s flashing (custom-fit metal channels) with your existing roof membrane. It’s a meticulous process of layering and sealing everything to create one seamless barrier that forces every drop of rain to flow away from the opening, not into it.
The DIY Approach: A High-Stakes Project
For the confident home renovator, installing your own skylight can be an incredibly rewarding project. There’s nothing quite like the satisfaction of bringing that beautiful natural light into your home with your own two hands. But let’s be clear, this isn’t like painting a wall or putting together flat-pack furniture. The stakes are much, much higher.
One small misstep when waterproofing a skylight on a flat roof can lead to serious headaches down the track. An imperfectly sealed flashing or a poorly joined membrane could compromise your entire roof, causing slow, hidden leaks that lead to structural damage over time. The margin for error here is razor-thin.
If you’re leaning this way, preparation is everything. You need to be comfortable working at height, have a good grip on basic roofing principles, and have the right tools for the job. Our detailed guide is a fantastic place to start if you want to see what’s involved and honestly assess if you’re up for a DIY skylight installation. It’s a job where the old saying “measure twice, cut once” has never been more true.
Why Professional Installation is Often the Smartest Choice
While tackling it yourself is certainly possible, hiring a qualified professional is usually the fastest route to a perfect, stress-free result. An experienced installer brings years of specialised knowledge to your home. They’ve worked on every type of flat roof, know the ins and outs of different roofing materials, and can quickly solve any unexpected curveballs the job throws at them.
A pro’s expertise is most valuable during the waterproofing. They know exactly how to fuse the flashing with your specific roof membrane—whether it’s torch-on bitumen, EPDM, or something else entirely—to create a seal that is absolutely watertight. This isn’t just theory; it’s a skill they’ve perfected over countless installations.
Hiring a professional isn’t just paying for labour; it’s an investment in peace of mind. A reputable installer will provide a warranty on their workmanship, meaning you’re protected against leaks caused by installation errors. This guarantee is invaluable.
This infographic outlines the key decisions involved when selecting your skylight, from its function to its glass type.
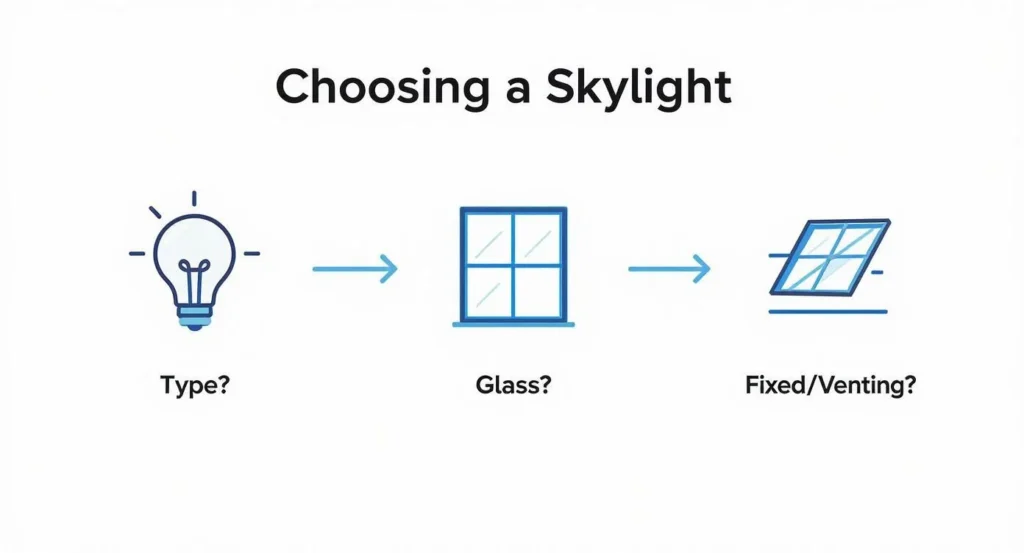
Going through these options with a professional ensures the final product is a perfect fit for both your home’s structure and your vision.
Finding the Right Installer
If you do decide to go with a pro, knowing how to choose a qualified contractor is the most important step. Not every builder or roofer is a skylight specialist, so you need to do a little homework.
Here’s what to look for in a top-tier installer:
- Proven Experience: Ask to see a portfolio of their previous flat roof skylight jobs. Seeing their work in the wild is the best proof of their skill.
- Proper Licensing and Insurance: Make sure they have all the necessary trade licenses and are fully insured. This is non-negotiable for protecting you and your home.
- Strong References: Chat with some of their past clients. Ask them about the installer’s professionalism, how tidy they were, and if the skylight has performed well over time.
- Clear, Detailed Quotes: A true professional will give you a comprehensive quote that breaks down all the costs for materials and labour. No surprises.
Choosing the right installer turns what could be a stressful project into an exciting upgrade for your home. You get to lean on their experience, relax with the security of a warranty, and enjoy a flawless, leak-free finish that will light up your home for years to come.
Planning Your Project: Codes and Considerations
Before you even think about picking up a tool, the real success of your skylight on a flat roof is decided in the planning phase. A truly great installation isn’t just about looks; it’s about performance and meeting all the legal requirements. That means taking a moment to get your head around the key building codes and design principles that apply to skylight installations here in Australia.
Think of it as the blueprint for a perfect result. Getting this right from the start ensures your project is compliant, safe, and genuinely adds value to your home, saving you from major headaches down the track.
Mastering Light and Balance
Bringing daylight into a room is both an art and a science. Too little, and you barely notice the difference. Too much, and you’ll create uncomfortable glare or turn your living room into a greenhouse every summer. Luckily, Australian building standards give us some solid rules of thumb to strike that perfect balance.
Industry guidelines are pretty clear on skylight sizing. A key principle to follow is maintaining a floor-to-skylight ratio between 3-5%. This is the sweet spot for getting plenty of natural light without causing crazy heat gain or loss. For even light distribution, it’s also a good idea to space skylights approximately 1.5 times the height of the ceiling from the floor. You can get a deeper understanding of these Australian design rules on roofingoptions.com.au.
Following this 3-5% rule is crucial. It’s what transforms a dark, gloomy room into a bright, welcoming space while keeping it thermally comfortable—so you’re not forced to crank the air conditioner all day.
On top of that, the National Construction Code (NCC) limits the total area of skylights, especially in bushfire-prone areas. To reduce fire risk, combustible skylights can’t take up more than 20% of the total roof area—a critical safety measure you can’t ignore.
Decoding Energy Efficiency Ratings
Beyond just size and placement, the thermal performance of your skylight is a huge deal, particularly with Australia’s wild climate swings. Two key ratings will tell you everything you need to know about how a skylight will affect your home’s comfort and energy bills.
- U-value: This number measures how well the skylight stops heat from escaping. When it comes to U-value, lower is always better. A low U-value means better insulation, which helps keep your home warm and cosy in winter.
- Solar Heat Gain Coefficient (SHGC): This measures how much of the sun’s heat the skylight blocks out. For the Australian climate, a lower SHGC is what you want. It means less unwanted heat getting in during our scorching summers, which takes the pressure off your cooling systems.
Getting familiar with these ratings is non-negotiable for choosing a product that works with your climate, not against it. A well-chosen, energy-efficient skylight on a flat roof is more than just a window to the sky; it’s a smart part of your home’s thermal design that helps cut down energy use and keeps you comfortable all year round. A bit of careful planning now will pay you back for decades.
Peeking at the Price Tag: Costs, Care, and Long-Term Payback
Putting a skylight on a flat roof isn’t just an expense; it’s a genuine investment in how your home feels and what it’s worth. Getting your head around the costs, the minimal upkeep, and the long-term benefits is key to making a decision you’ll be happy with for years to come. The final bill is always more than just the unit itself—it’s a blend of the product and the skilled hands needed for a perfect, watertight installation.
The price of the skylight unit itself will swing based on what you choose. A big, simple fixed skylight will naturally cost less than a smaller, motorised version that closes itself when it rains. Ticking the boxes for upgrades like high-performance energy-efficient glass or block-out blinds will also nudge the price up. It’s all about finding that sweet spot between your budget and the features that will bring the most comfort and value to your space.
Factoring in Installation and Upfront Costs
Professional installation is a non-negotiable part of the budget. While the skylight has its price, the installation fee hinges on how complex your roof is, how easy it is to access, and the going rates for labour in your area. The best move is to get a detailed quote that splits the material and labour costs so you can see the complete financial picture. To help with your planning, you can explore a full breakdown of what goes into the final skylight installation cost and work out a realistic budget.
The demand for high-performance skylights is definitely on the rise, pushed along by a national focus on building more sustainably. The global skylight market was valued at around USD 3.08 billion in 2022 and is tipped to hit USD 4.44 billion by 2028. This isn’t just a number; it shows a real trend where Australian homeowners are actively choosing energy-efficient models with features like low-E double glazing to cut down on heat transfer, save on power bills, and hit building code targets.
Simple Maintenance for Decades of Performance
The good news? Looking after a modern skylight is surprisingly simple. The most important job is just keeping an eye on it.
- Keep it Clear: Make a habit of checking that the area around the skylight and its flashing is clear of leaves, twigs, and other gunk. This stops water from pooling and makes sure it drains away properly.
- Inspect the Seals: After a big storm or heavy rain, just have a quick glance from inside. Look for any tell-tale signs of moisture around the frame, as this could hint at a potential issue with the seals.
Proactive care is everything. A few minutes of inspection a couple of times a year can stop a tiny issue from becoming a major headache, ensuring your skylight does its job beautifully for its entire life.
To really stay on top of ongoing maintenance and protect the long-term value of your investment, modern tools like drone roofing inspection software can be a massive help.
Beyond the easy upkeep, the long-term value really stacks up. A skylight doesn’t just cut your reliance on artificial lighting and trim your electricity bills; it adds a huge amount of appeal. That bright, airy feeling it creates is a massive selling point, measurably boosting your property’s market value when it’s time to sell.
Common Questions About Flat Roof Skylights
Even with the best plans laid out, it’s natural to have a few lingering questions about putting a skylight on a flat roof. We get it. Here are some of the most common queries we hear from homeowners, with straightforward answers to help you move forward with confidence.
Will My Skylight Be Noisy When It Rains?
This is probably the number one concern, especially if you’re haunted by memories of rain drumming loudly on old acrylic domes. The great news is that modern, high-quality skylights are a world away from that.
Today’s standard is double-glazed glass, which is a fantastic sound insulator. This setup effectively deadens the vibrations from raindrops, turning what could be a roar into a soft, gentle patter. You might hear a light, soothing sound during a heavy downpour, but it’s nothing like the disruptive noise from older plastic or single-pane models.
Can I Install a Skylight on an Existing Flat Roof?
Yes, absolutely. Most existing flat roofs are perfect candidates for a skylight retrofit. The process involves a professional roofer carefully cutting a new opening through your roof’s structure and its waterproof membrane.
Once the opening is made, they’ll build the crucial curb and then fit the skylight itself. The most important part is meticulously integrating the flashing system with your existing roofing material to forge a permanent, watertight seal. A structural check is always the first step, just to confirm your roof can safely handle the new addition.
What Happens If My Skylight Starts Leaking?
Leaks are the biggest fear, but it’s important to understand where they come from. A leak involving a modern, well-built skylight on a flat roof is almost always down to an installation error, not a fault with the skylight itself.
The usual suspect is incorrectly installed flashing where it meets the roof membrane. If you spot a leak, your first call should be to a qualified roofer or the original installer. Whatever you do, avoid quick fixes like slapping on silicone sealant. These temporary patches can trap moisture and lead to much bigger problems down the road. A professional will properly diagnose the issue and repair the flashing for a solution that lasts.
How Much Light Will I Actually Get?
You’ll get a lot of light—often a surprising amount. Exactly how much depends on the skylight’s size, its position on the roof, and your ceiling height. As a general rule of thumb, a skylight delivers over three times more light than a vertical window of the same size because it’s perfectly positioned to catch direct overhead sun.
To get that beautiful, balanced light without creating uncomfortable glare, Australian building guidelines often suggest aiming for a total skylight area that’s between 3-5% of the room’s floor area. It’s a simple formula that helps you pick a size that will truly transform your space.
Ready to bring beautiful, natural light into your home? The experts at Vivid Skylights offer a premium range of fixed and opening skylights designed specifically for Australian homes. Explore our options and get a fast, accurate price estimate online today at https://vividskylights.com.au.