
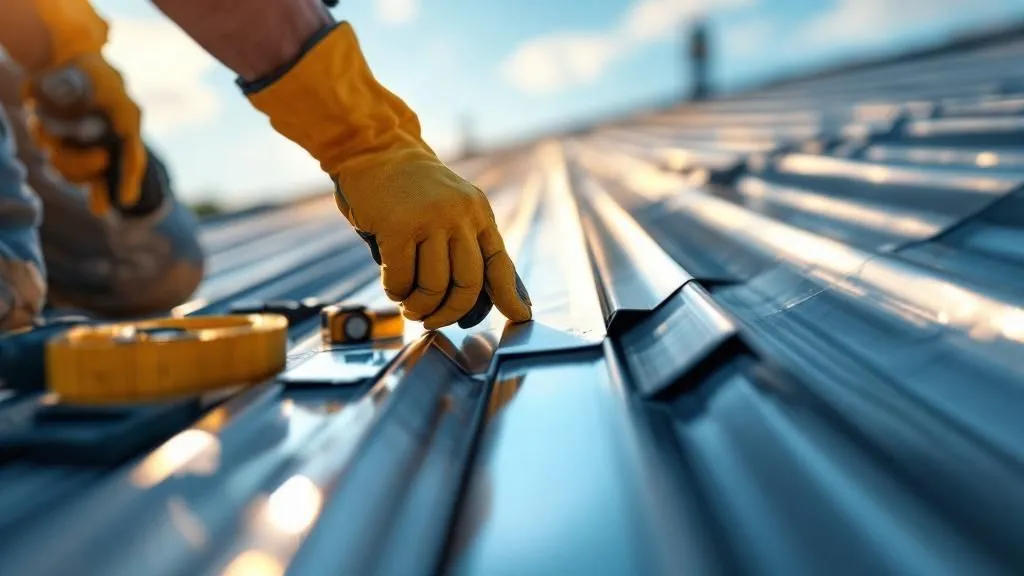
Why Corrugated Roofs Need Special Attention
Let’s talk corrugated roofs. They’re not flat. Seems obvious, right? But it’s a point so many people miss when it comes to choosing flashings. Those ridges and valleys create little waterways that direct water flow in very specific ways, and standard flashing just isn’t up to the task. I’ve talked to roofers all over Australia, and they’ll tell you the same thing – slapping generic flashing on a corrugated roof is practically begging for leaks.
This leads to those dreaded moments when homeowners find water damage where they least expect it. Why does this happen? Because regular flashing doesn’t fit the contours of a corrugated roof. It’s designed for flat surfaces, not the unique profile of these roofs. The result? Water sneaks around the flashing instead of flowing over it.
Thinking long-term is crucial, especially with the Australian roofing market expanding. The market, currently valued at AUD 6.91 billion, is projected to grow at a CAGR of 4.50% between 2025 and 2034. This growth highlights the importance of durable roofing components, especially flashings for corrugated roofs, which are vital for withstanding Australia’s tough weather. Discover more insights about the Australian roofing market.
And choosing the right flashing isn’t just about preventing those immediate leaks. It’s about the longevity of your entire roof. I’ve personally seen cases where properly installed corrugated roof flashings actually outlasted the roofing material itself! This translates into significant savings on repairs later – a lesson some learn the hard way.
Choosing the Right Flashing Material
So, what is the right flashing? Well, it depends on your specific roof and situation. There’s no one-size-fits-all answer. Let’s delve into some common options. To help you navigate this, I’ve put together a handy table summarizing the key differences.
To make things clearer, here’s a comparison table breaking down the common flashing types, their ideal uses, and what materials they’re typically made of:
Corrugated Roof Flashing Types and Applications
Flashing Type | Best Application | Material Options | Typical Lifespan | Cost Range |
|---|---|---|---|---|
Valley Flashing | Where two roof slopes meet to form a valley | Galvanized steel, Zincalume®, Colorbond® | 20-50 years | $$ – $$$ |
Ridge Flashing | Capping the horizontal peak of the roof | Galvanized steel, Zincalume®, Colorbond® | 20-50 years | $ – $$ |
Apron Flashing | Protecting the joint where a roof meets a vertical wall | Galvanized steel, lead, aluminum | 15-30 years | $$ – $$$ |
Side Wall Flashing (Step Flashing) | Sealing the gaps between roofing and a side wall, following the corrugated profile | Galvanized steel, Zincalume®, Colorbond® | 20-50 years | $ – $$ |
Pipe Flashing (Penetration Flashing) | Sealing around pipes, chimneys, or other protrusions | Lead, EPDM rubber, silicone | 10-25 years | $ – $$$ |
As you can see, the lifespan and cost can vary quite a bit. Galvanized steel, Zincalume®, and Colorbond® are popular choices for their durability and corrosion resistance. Lead is great for its flexibility, especially around tricky penetrations, while EPDM rubber and silicone offer excellent sealing properties.
Remember, choosing the correct flashing is a crucial investment that can save you a lot of headaches (and money!) in the long run. Don’t just grab the cheapest option – think about longevity and what’s best suited to your particular roof.
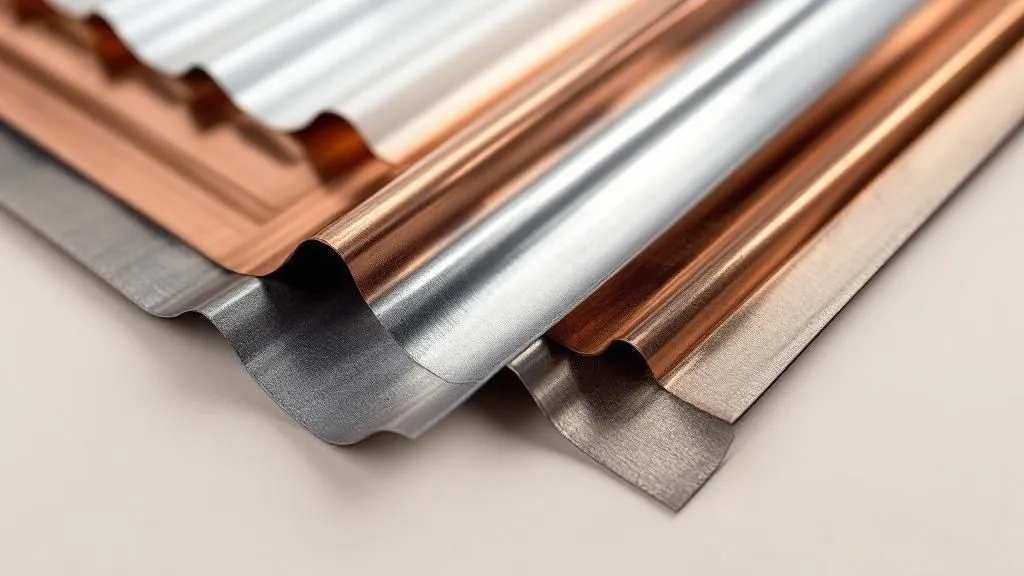
Materials That Actually Survive Australian Weather
Picking the right flashing for a corrugated roof can feel like navigating a minefield. It’s easy to assume all materials are created equal, but that’s a trap many DIYers, and even some experienced tradies, fall into. I’ve chatted with roofers who’ve seen flashings fail spectacularly, and others who’ve seen certain materials last for decades. The secret? Choosing materials that can genuinely handle the Australian climate.
Think about it: Queensland’s brutal UV is a completely different challenge compared to the salt spray constantly hitting coastal properties. Product brochures rarely highlight these unique challenges. That’s why real-world experience is invaluable.
Choosing the Right Material
Colorbond steel, for example, is a popular choice. It’s tough, designed for Aussie conditions, and offers great corrosion resistance. But in coastal areas, aluminium might be a better choice because of its superior resistance to salt. It’s all about matching the material to the environment.
Then there’s the question of lead. Traditionally, it was the go-to because of its flexibility, especially around tricky roof penetrations. Now, modern alternatives are challenging lead, often offering similar workability without the environmental baggage. But are they as durable over time? It’s a discussion worth having.
And what about those tempting budget-friendly options? Sometimes they’re a steal, other times they’re a disaster waiting to happen. I once saw a homeowner choose a thinner gauge flashing to save a few bucks. Seemed okay at first, but within a few years, the harsh Australian sun had wrecked it, leading to leaks and a much larger repair bill.
Interestingly, the demand for tough roofing components like flashings is growing. The metal roof and guttering manufacturing sector in Australia has seen a 4.3% compound annual growth rate between 2018 and 2023. This growth highlights the increasing need for quality flashings to protect corrugated roofs. Learn more about the Australian metal roof and guttering manufacturing industry here.
Focusing on Long-Term Value
So, how do you avoid these problems? By understanding that cheap materials often end up costing you more in the long run. Focus on long-term value. We’ll explore which materials consistently perform well, and which ones to avoid, regardless of how attractive the price tag might be. Because when it comes to protecting your home, quality flashings are an investment, not an expense.
Setting Yourself Up for Success Before You Start
Let’s be honest, the difference between a perfectly flashed corrugated roof and a leaky nightmare often comes down to one thing: preparation. I’ve chatted with enough roofers over the years to know the horror stories. Trust me, getting the prep work right is absolutely essential.
Forget those generic tool lists you see online. We’re diving into the nitty-gritty here. The tools that really make a difference. A high-quality sealant gun, for example. Don’t skimp on this one. A smooth, consistent bead of sealant is everything, and a good gun makes that happen. Invest in a decent one, it’s worth its weight in gold. Another crucial, and often overlooked, tool is a roofing square. This little helper keeps your angles perfect when cutting flashing, giving you that professional finish.
Experienced installers always have a few tricks up their sleeves. Take chalk lines for instance. Seriously, they’re a game-changer for marking cutting lines on your flashing. So much faster and more accurate than measuring and marking each piece individually. Another pro-tip: use cleats to temporarily hold your flashings in place before permanently fixing them. This frees up your hands and stops them from sliding around, especially on a steeper roof.
Assessing Your Roof
Before you even think about touching the flashing, take a good, long look at your roof. What’s the pitch? Any issues with the existing gutters? Spotting potential problems early is key – it’s so much easier to fix them now than when you’re halfway through the installation. This is particularly important if you are considering adding a skylight; understanding roof preparation is crucial. Interested in learning more about skylights? Check out our guide on installing a skylight.
Different roof pitches require different approaches. A steep pitch might require extra safety gear, like a roof harness. A shallow pitch has its own set of challenges when it comes to water runoff. And those gutters that are slightly off? Fix them before starting the flashing. You’ll be glad you did.
Finally, never underestimate the Australian weather. Even if it seems calm on the ground, strong winds or a sudden downpour can turn a simple job into a risky one. Knowing when to call it a day is a valuable skill. All this prep work is what separates a successful flashing job from a DIY disaster.
Ridge Flashings That Actually Keep Water Out
Ridge flashings. Often the last thing you think about, right? Just a quick cap to button everything up. Wrong. Let me tell you, ridge flashings are a notorious source of leaks. I’ve seen it firsthand – too many times – where a poorly installed ridge flashing turns into a major headache (and water damage) down the line.
So, what’s the secret to a truly watertight ridge? Understanding metal. Metal moves. It expands and contracts with temperature changes. Your flashing needs to handle that. The overlap isn’t just about looks; it’s about creating a flexible seal that can breathe with the metal. Too little overlap, and you’ll get gaps in the summer heat. Too much, and you’ve got a bulky, ugly mess.
Nailing the Overlap (and More)
Getting the overlap right is key, sure, but it’s only part of the battle. The real test comes with tricky roof intersections. What happens when the ridge hits a valley, or bumps into another roof section? This is where you separate the pros from the DIYers. You might need to get creative with custom cuts, or use techniques like crimping or soldering to guarantee a watertight seal. And if you’re thinking about skylights, don’t forget about flashing around those penetrations. A pre-fabricated skylight flashing kit can be a lifesaver there.
Speaking of the roofing industry, things haven’t been easy lately. The Australian roofing services market saw a 1.6% annual decline in revenue between 2019 and 2024. Even so, with the residential construction sector looking strong, there’s definitely growth on the horizon. Want to learn more about the Australian roofing services industry? Check out this report.
When Theory Meets Reality
Sometimes, the best-laid plans go awry. Maybe your sheet profiles don’t quite line up, or you run into unexpected structural issues. This is where experience really shines. I’ve learned a ton from talking to roofers who’ve been called back to fix their own early mistakes. These are the guys who’ve seen how theory can clash with reality out in the field. They’ve developed tricks and techniques to deal with those frustrating situations. And that’s what I want to share with you here – the kind of practical, hard-earned wisdom that you won’t find in a textbook. This is about building ridge flashings that last, no matter what curveballs the job throws at you.
Conquering Wall Flashings and Tricky Penetrations
Wall flashings and penetrations. This is where the rubber meets the road, even for seasoned pros. It’s also where DIY ambitions can sometimes go sideways. Let’s talk about getting truly weathertight seals around chimneys, vents, and those awkward wall intersections – the kind that last for years, not just until the next downpour.
You’ll encounter all sorts of wall materials out there, from brick veneer to weatherboard. The standard textbook approach often falls short with corrugated roofing. The corrugated profile throws a real curveball. Real-world situations call for adaptable solutions. Think about it: a regular flashing meant for a flat surface just isn’t going to snugly fit the contours of corrugated iron. You need specialized flashings made for these profiles.
It’s like trying to jam a square peg into a round hole. That’s what using standard flashing on a corrugated roof feels like. You can make it fit, sure, but it won’t be a proper seal. Water will find a way in. You absolutely need corrugated roof flashings that match the profile and create a solid barrier against the elements. Much like important infrastructure such as the Hoover Dam requires expert management, so too do roof penetrations require careful flashing.
Retrofitting and Real-World Limitations
Retrofitting flashings on existing structures? Now that’s a whole different ballgame. You’re often dealing with existing structural quirks that can throw a wrench in even the best-laid plans. Suddenly, that perfect installation method in your head becomes completely impractical. So, what do you do?
Adaptability is key. You might need to fabricate custom flashings from sheet metal. Maybe a combination of sealants and flashing tape can bridge those awkward gaps. This is where experience really comes into play. You might even need to factor in tile flashing, which can add another layer of complexity. Check out our guide on tile roof flashing.
Sometimes, you just have to call in the cavalry. Knowing your limits is important. There are times when the smartest move is to consult a professional roofer. They have the specialized tools and know-how that can save you time, money, and potential headaches.
Knowing When to Adapt (and When to Call for Help)
This isn’t just about slapping some metal on your roof and calling it a day. It’s about understanding how water flows, how materials react in different weather conditions, and having the flexibility to adjust when things don’t go exactly as planned. Knowing when to change your approach, and when to get expert help, can be the difference between a successful project and an expensive repair down the line. More importantly, it protects your biggest investment: your home.
Let’s take a closer look at various penetration types and their flashing needs:
Common Penetration Types and Flashing Requirements
This table breaks down different roof penetrations and their specific flashing needs, considering materials and installation challenges.
Penetration Type | Flashing Requirements | Critical Seal Points | Common Failure Modes | Maintenance Needs |
|---|---|---|---|---|
Chimney | High-temp silicone, lead flashing, counterflashing | Chimney-roof intersection, chase flashing | Cracking sealant, rusting flashing | Annual inspection, sealant replacement |
Vent Pipes | Rubber boots, pipe flashing, sealant | Pipe-flashing connection, roof penetration | Deteriorated boot, cracked sealant | Annual inspection, replace worn parts |
Wall Junctions | Wall flashing, apron flashing, sealant | Wall-roof intersection, step flashing | Loose flashing, degraded sealant | Periodic inspection, sealant repair |
Skylights | Pre-formed skylight flashing, sealant | Frame-roof connection, curb flashing | Sealant failure, flashing damage | Regular inspection, sealant and flashing maintenance as needed |
Understanding the specific requirements of each penetration is crucial for long-lasting protection. For instance, a chimney requires high-temperature sealant and specialized flashings due to the heat. Neglecting these specific needs can lead to premature failures.
By paying attention to these details and adapting to the unique challenges of each penetration, you’ll be well on your way to a weathertight roof that stands the test of time.
Catching Problems Before They Become Expensive Disasters
Even with a flawless installation, things can go wrong with roof flashings. It’s just the way it is. But catching flashing problems early can save you a lot of hassle and money. It’s like that little oil leak in your car – fix it now, or face a much bigger engine repair later.
Trust me, I’ve seen it happen. A small water stain on the ceiling can quickly become a major headache if ignored. A little rust on the wall near the roofline? That’s another potential warning sign. And, of course, a steady drip is a clear indication of a problem that needs immediate attention. Each of these symptoms tells a story about what might be happening beneath your corrugated roof’s flashings.
Diagnosing the Issue
So, how do you track down the culprit? You need to think like a detective. First, figure out the general location. Is the problem near the ridge flashing, the wall flashing, or around something like a vent pipe (a penetration)? Narrowing down the location helps focus your investigation.
Next, examine the flashing itself. Look for obvious gaps or cracks. Is the sealant cracked, peeling, or missing entirely? Is the flashing loose or pulling away from the roof? These visual clues are often key to finding the source of the problem.
The cause could be anything from a simple installation error (like not enough sealant or incorrect overlap) to something more serious like corrosion, UV damage, or even the house settling. Each problem has a different solution. Tightening a loose screw is a five-minute job, while replacing corroded flashing is a much bigger project.
Repair or Replace?
That’s the big question, isn’t it? And the answer isn’t always clear-cut. I’ve known people who spent good money patching old flashings, only to have the same problem reappear a few months later. Sometimes, a simple repair is all you need. A small tear in the rubber boot around a pipe is easily patched. But if the flashing is heavily corroded or damaged, replacement is usually the best option in the long run. It might seem more expensive upfront, but it can prevent more costly repairs and water damage down the road.
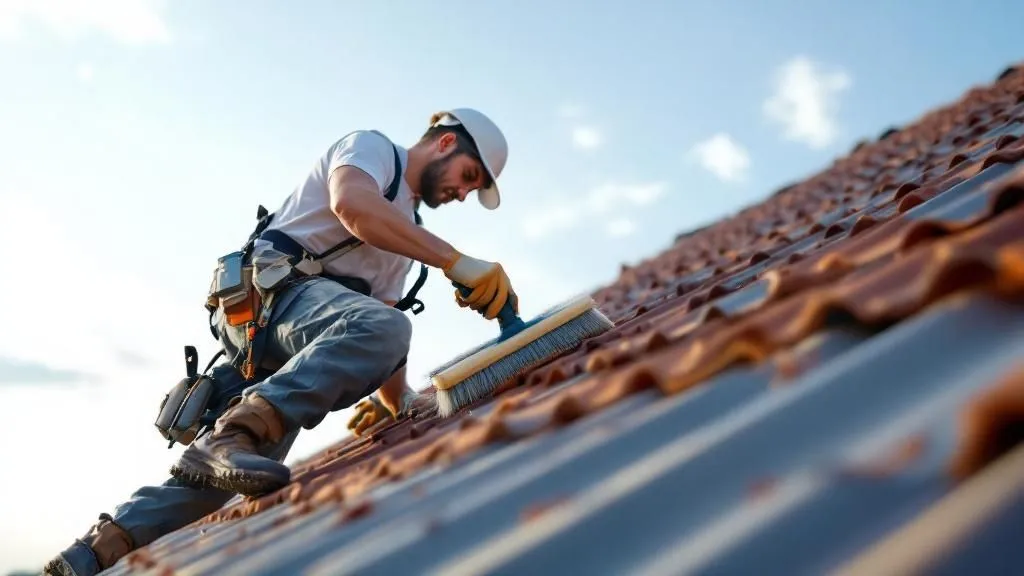
Preventing Future Problems
Think of it like regular car maintenance. A little preventative care for your flashings goes a long way. Keeping debris out of valleys and around penetrations will help water flow properly. Regularly inspect the sealant and reapply it as needed to maintain a watertight seal. And it’s always a good idea to have a professional check your roof every few years. They can often spot small issues before they become major problems.
Keep in mind that different materials and installation methods have different lifespans. For instance, Colorbond® steel flashing is known for its durability, but even that needs occasional inspection. Understanding your specific roof and the climate you live in will help you anticipate potential issues. Being proactive about roof maintenance gives you peace of mind, knowing your roof is protecting your home.
Achieving Results You Can Be Proud Of
Let’s talk about the finer points of flashing a corrugated roof – the kind of details that make the difference between a job that lasts a decade and one that causes headaches down the line. I’ve learned a lot from seasoned roofers over the years, and I’m happy to share some of their wisdom. It all boils down to prioritizing quality at every stage.
Realistic Timelines and Practical Checklists
First things first: be realistic about how long the project will actually take. Patching a small section might only take an afternoon, but flashing an entire roof could take several days, especially if it has a complex design. A good checklist for each phase – material prep, installation, and final inspection – is a lifesaver. It keeps you organized and helps avoid those frustrating moments when you realize you’re missing something crucial halfway through. For instance, before you even think about climbing that ladder, double-check you have all the right materials and tools at your fingertips.
Once you’re up on the roof, take breaks to step back and assess your progress. Are the flashings lying flat against the corrugations? Are all the seams properly sealed? Is the overlap consistent? These quick visual checks are key for catching potential problems before they turn into major repairs.
Ongoing Maintenance and Knowing Your Limits
Even with top-notch flashings, your roof still needs regular TLC. As your house settles over time, things shift and move. Regular inspections, especially after a big storm, are crucial. Keep an eye out for any signs of movement, corrosion, or sealant failure. Something as simple as reapplying sealant can prevent much bigger problems later on. Tools like drone roofing inspection software can make regular maintenance easier.
Just as important as knowing how to do the job yourself is knowing when to call in a pro. Some repairs are straightforward, but others require specialized skills and equipment. If you’re ever unsure, getting a professional opinion is always the best route. It’s not about admitting defeat; it’s about protecting your investment and ensuring the job is done right.
Speaking of professional installations, if you’re considering adding a skylight, check out Vivid Skylights. Their skylights are designed for easy installation, and their flashing kits for tiled roofs ensure a weathertight seal. A well-installed skylight can truly transform a space.