

Considering a solar-powered skylight? Whether you’re eyeing one at Bunnings or another specialist supplier, you’re onto a smart idea. These aren’t just holes in the roof; they blend the beauty of natural light with genuine modern convenience. Thanks to a dedicated solar panel, they power handy features like remote-controlled openers and automatic rain sensors without needing an electrician to run a single wire.
Why a Solar Powered Skylight Is a Smart Home Upgrade
Australia’s love affair with solar energy is changing how we light our homes. We’ve moved beyond simply slashing power bills; now it’s about transforming once-gloomy hallways and living rooms into spaces that feel bright, airy, and welcoming. A solar-powered skylight does exactly that, bathing a room in natural light that makes it feel bigger and more alive.
This simple tech packs a punch, offering benefits far beyond aesthetics. When you flood your main living areas with daylight, you naturally flick on fewer light switches. It’s a small change in habit that adds up to a real drop in your energy use and a step towards a more sustainable home.
The Tangible Energy and Lifestyle Benefits
The real magic is how these units harness the sun for both light and function. An integrated solar panel and battery system ensure you have enough juice to operate the skylight’s features, even on overcast days. This self-sufficiency makes it a seriously reliable and hassle-free addition to your home.
It’s the same principle that’s making rooftop solar a game-changer across the country. Rooftop PV now generates an incredible 12.4% of Australia’s total electricity, saving households a whopping $6 billion a year. A solar-powered skylight taps into that same powerful tech, flooding your rooms with free light and potentially cutting daytime electricity use by up to 20-30% in those darker spots of the house.
Beyond the dollar savings, the impact on your home environment is huge:
Better Atmosphere: It’s no secret that natural light lifts our spirits and makes a space feel more positive and comfortable.
Fresh Air on Tap: Vented skylights are brilliant for letting warm, stale air escape, creating natural airflow that freshens up the whole house.
Boosted Property Value: A bright, energy-efficient home is a massive drawcard for potential buyers.
A solar-powered skylight is a genuine investment in your home’s appeal and functionality. If you’re looking for more ways to add value, it’s worth checking out other smart upgrades to increase home value.
A Modern Solution for Any Home
It doesn’t matter if you’re renovating an old classic or building from scratch—a solar skylight is a forward-thinking choice. They’re the perfect solution for brightening up those hard-to-reach areas like internal bathrooms, kitchens, or central living areas where windows just aren’t an option.
When you opt for a model with smarts like rain sensors and remote controls, you’re adding a layer of convenience that truly elevates your home. It’s a straightforward upgrade that delivers real, tangible value every single day.
DIY vs Professional Installation: Which is Right For You?
So, you’ve picked out the perfect solar-powered skylight. The next big decision is how to get it from the box onto your roof. Do you roll up your sleeves and tackle it yourself, or do you call in a professional? There’s no single right answer here—it really boils down to your budget, your timeline, and just how comfortable you are with home renovations, especially when a ladder is involved.
Let’s break down the pros and cons to help you figure out the best path for your project.
The Appeal of a DIY Skylight Installation
Going the DIY route is tempting, and for good reason. There’s a massive sense of pride that comes from completing a major home project on your own, not to mention the very real savings on labour costs. If you’re no stranger to a ladder and have a bit of experience with projects that involve cutting, sealing, and basic structural work, a solar skylight kit is definitely within your grasp.
But it’s important to be realistic. This isn’t a simple weekend job like painting a spare room. It means getting up on your roof, which always carries a degree of risk. A successful installation demands precision. Get the sealing wrong, and you’ve got a recipe for leaks and serious water damage down the track.
Are You Ready to DIY?
Before you commit to installing it yourself, it’s time for an honest chat with, well, yourself. You’ll need more than just a basic toolbox; you need a solid grasp of how your roof works.
Ask yourself these questions:
What’s my experience level? Have you confidently handled jobs like replacing roof tiles or installing flashing before?
What’s my roof like? A steep pitch, a second-storey height, or tricky materials like slate can ramp up the difficulty from “challenging” to “don’t even think about it.”
Do I have the right gear? We’re talking proper safety equipment, like a sturdy ladder and harness, plus all the specific tools needed for cutting and creating a watertight seal.
If you find yourself hesitating on any of these, it’s a good sign to pause and think. It can be helpful to get some perspective on which home improvement jobs are best left to the experts. This article on DIY jobs you shouldn’t attempt yourself gives a great overview. For a deeper dive into the specifics of this project, our own guide covers all the steps involved in a DIY skylight installation.
The Case for Calling in a Professional
Hiring a professional installer buys you one thing above all else: peace of mind. These experts install skylights every single day. They know the ins and outs of every roof type, from corrugated metal to classic tiles, and they know exactly what it takes to create a weatherproof seal that will last for years.
A pro handles absolutely everything. They’ll safely cut the opening, perfectly integrate the flashing with your roofing material, and wire it all up. A job that could easily eat up your entire weekend might only take them a few hours.
A professional installation almost always comes with a warranty on the labour itself. When you combine that with the product’s leak-free warranty, you get complete protection against any potential issues. You’re paying a premium for a guaranteed, stress-free result.
To make the choice clearer, here’s a side-by-side look at what you can expect from each approach.
DIY vs Professional Skylight Installation
| Factor | DIY Installation | Professional Installation |
|---|---|---|
| Cost | Lower upfront cost (product only). | Higher upfront cost (product + labour). |
| Time | Can take a full weekend or longer, depending on your skill. | Typically completed in a few hours to half a day. |
| Skill & Tools | Requires specific tools, safety gear, and roofing knowledge. | No skills or tools required from you. The expert has everything. |
| Risk | Higher personal safety risk; risk of improper installation (leaks). | Minimal risk. Professionals are insured and experienced. |
| Warranty | Product warranty only. Any installation errors are on you to fix. | Product warranty plus a labour warranty for guaranteed work. |
| Convenience | You work on your own schedule but handle all the cleanup and logistics. | Completely hands-off. The installer manages the entire process. |
Ultimately, this decision is about balancing cost against risk and convenience. A DIY job can save you a good chunk of money, but a single mistake could end up costing you thousands in repairs. A professional installation has a higher price tag, but it delivers a flawless, guaranteed outcome without you ever having to step foot on a ladder.
A Practical Walkthrough of a Solar Skylight Installation
Putting in a new skylight can feel like a pretty big job, but when you break it down into clear stages, it’s far more manageable. Whether you’re planning to tackle this as a DIY project or just want to know what the pros will be doing up on your roof, this guide will walk you through the key phases.
The success of the whole project really comes down to getting the placement spot-on. This isn’t a decision you can make just by looking up from inside the room; it needs a bit of investigation from both sides of the ceiling.
Planning Your Skylight Placement
First, you’ll need to get up into your attic or roof space. Have a good look directly above where you want the light to come in and check for any obstructions. You’re scanning for things like rafters, trusses, and any stray electrical wiring or plumbing that could get in the way. Shifting the location by even a few centimetres at this stage can save you a world of pain later.
Next, it’s time to get up on the roof to check the exterior. The spot you’ve picked needs to be clear of roof vents, chimneys, or satellite dishes. It’s also a good idea to think about the sun’s path across the sky to make sure you’re capturing as much light as possible. A perfectly placed skylight avoids obstacles both inside and out.
Creating and Framing the Opening
Once you’ve locked in the perfect spot, the real work begins. This is where you carefully mark out the skylight’s dimensions on your interior ceiling and the roof itself. Precision is everything here—a bad cut is a massive headache to fix.
With everything marked, you’ll cut the opening through the roofing material and then the ceiling plaster. If you’re doing this yourself, this is probably the most nerve-wracking part. You’ve got to use the right tool for the job: think an angle grinder for a metal roof or proper cutters for tiles. After the hole is made, the opening is usually framed out with timber. This gives the skylight a solid, stable base to sit in.
Installer’s Tip: Always measure twice and cut once. It’s the oldest rule in the book for a reason—it prevents the biggest stuff-ups. A good carpenter’s square and a spirit level will be your best mates here to keep everything perfectly straight and aligned.
As you can see, even the DIY route requires a serious assessment of the job’s complexity. There’s always the option to call in a professional if you feel it’s getting beyond your skill set.
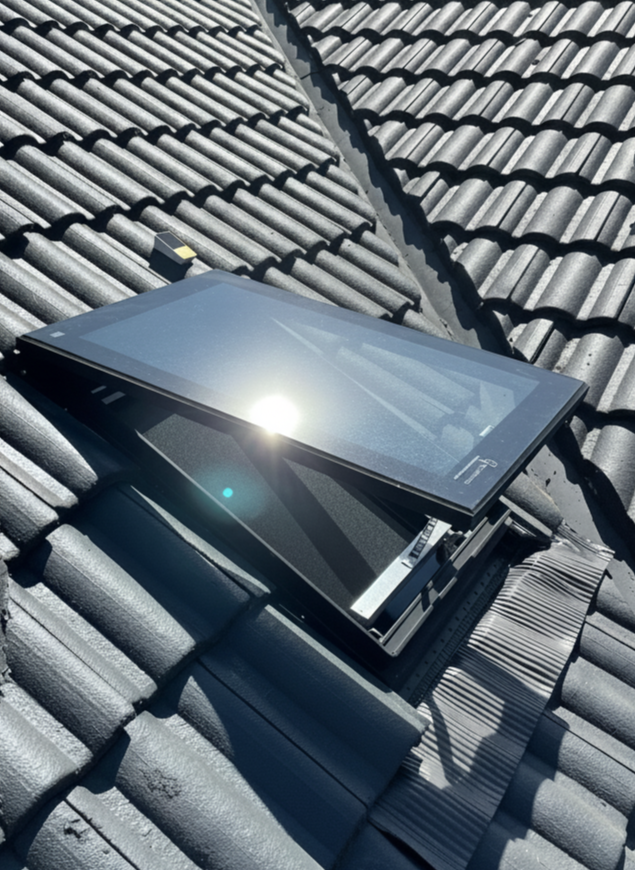
Securing the Skylight and Weatherproofing
With the opening prepped, the skylight unit is carefully lowered into position and fastened securely to the roof structure. Now for the most critical step of the entire job: installing the flashing kit. Flashing is a set of purpose-made metal pieces designed to integrate with your specific roof material to create a totally watertight seal.
You absolutely cannot rush this step. Given Australian conditions, using a top-quality, neutral-cure silicone sealant is vital for a durable, flexible bond that can handle our scorching sun and torrential rain. Every piece of flashing has to be layered correctly with the roofing material—picture the overlapping scales on a fish—to make sure water is always channelled away from the opening.
For Tiled Roofs: The flashing is carefully woven between individual tiles. This often means some tiles need to be cut or ground down to get a perfect fit.
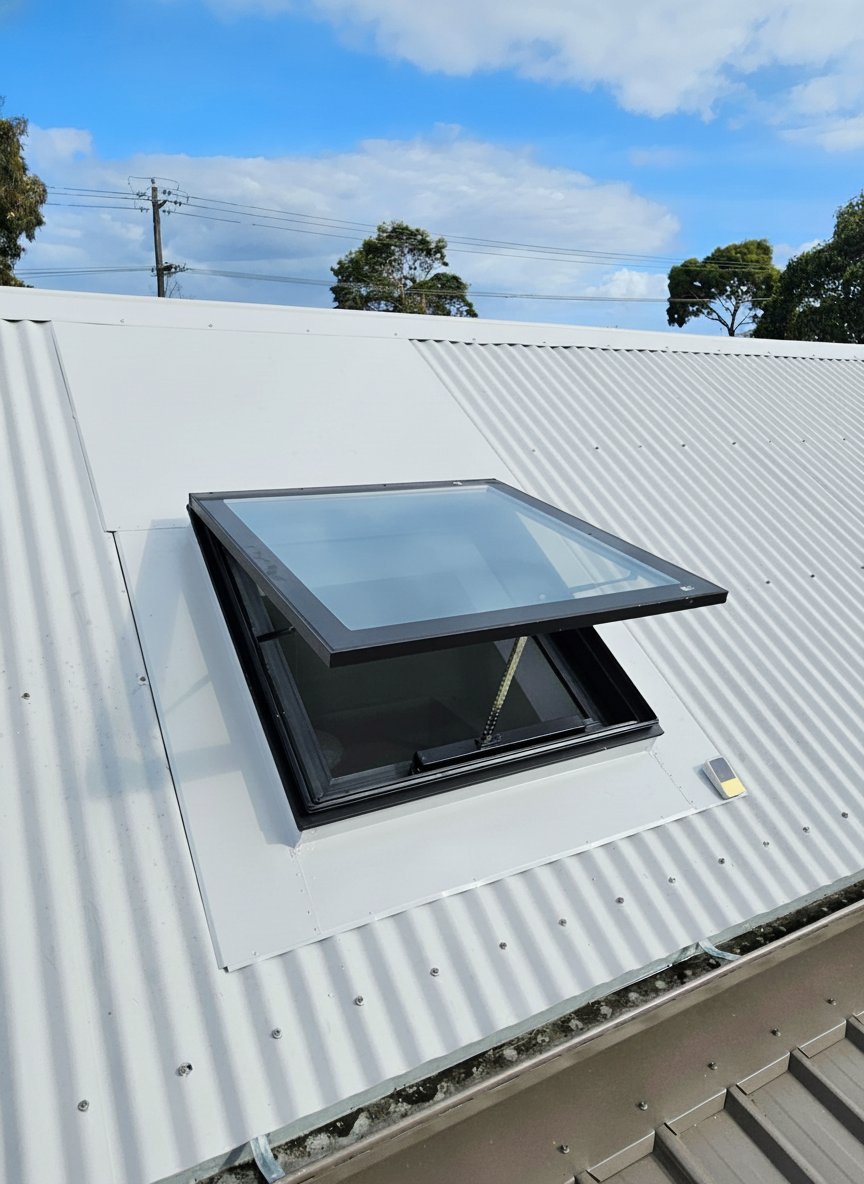
For Metal Roofs: This involves sealing the flashing directly to the contours of the corrugated or standing seam profile, creating a barrier that water just can’t get through.
Getting the seal right is what separates a successful job from a future leak. It’s where a professional’s experience really shows, but it’s definitely achievable for a skilled DIYer who pays meticulous attention to the manufacturer’s instructions. Once the outside is sealed up tight, the final interior jobs like plastering and painting around the new light well will finish it off.
How to Choose the Right Solar Skylight for Your Needs
Walking into Bunnings or browsing a specialist supplier’s range of solar skylights can be a bit overwhelming. To make a smart choice, you need to look past the price tag and really dig into the features that will deliver long-term performance and genuine value for your home.
The first big decision you’ll face is whether you need a fixed or an opening (sometimes called venting) skylight. This choice really comes down to the room you’re putting it in and what that space needs.
For a dark hallway or living area, a fixed skylight is a brilliant, budget-friendly way to flood the space with natural light. But for rooms that battle moisture and stale air—think kitchens and bathrooms—an opening model is a total game-changer. Being able to vent out hot, humid air makes a massive difference to air quality and overall comfort.
Glazing Options and Frame Materials
The type of glass you choose has a huge impact on your home’s energy efficiency. While single glazing is out there, double-glazing is the standard for quality skylights in Australia, and for very good reason. It provides far better thermal insulation, helping to keep your home cooler in summer and warmer in winter, which you’ll definitely notice on your energy bills.
There are a couple of key features to look for that really boost performance:
Low-E Coating: This is a microscopic, transparent coating that reflects heat, keeping your room comfortable without sacrificing any of that beautiful visible light.
Laminated Inner Pane: This is a non-negotiable safety feature. If the glass ever breaks, the laminate holds all the pieces together, so nothing falls into the room below.
The frame material is just as crucial for longevity. Powder-coated aluminium is an excellent choice because it’s tough, corrosion-resistant, and built to handle the harsh Aussie sun without fading or cracking.
A small but vital design detail to keep an eye out for is frameless top glazing. This clever design lets rainwater run straight off, preventing it from pooling around the edges and stopping dirt and grime from building up over time.
Matching Size and Accessories to Your Space
Picking the right size is all about finding the sweet spot. A skylight that’s too small won’t make much of a difference, but one that’s too large might create too much heat and glare, especially if the room faces north.
A good rule of thumb is that the skylight’s glass area should be no more than 5-10% of the room’s total floor area. So, for a 20-square-metre living room, you’d be looking for a skylight with around 1-2 square metres of glass. To get a better handle on the perfect dimensions for your space, you can learn more about how to choose a skylight size and placement in our detailed guide.
Finally, think about the accessories that will make your skylight work for your lifestyle.
Integrated Block-Out Blinds: These are an absolute must for bedrooms or media rooms. Having the ability to completely darken the room whenever you want gives you total control over the light.
Fly Screens: If you’re going for an opening skylight, a fly screen is essential for enjoying that fresh air without letting all the bugs inside.
By focusing on these key areas—the type, glazing, frame, size, and accessories—you can confidently pick a solar-powered skylight that’s a perfect match for your needs and will be a fantastic addition to your home for many years to come.
Keeping Your Skylight Performing at its Best
Now that your solar-powered skylight is in and bathing your room in beautiful, natural light, a little bit of straightforward care will keep it working perfectly for years. It’s no different from any other part of your home’s exterior—a quick look-over a couple of times a year can prevent bigger headaches later on.
The main thing to watch for is debris. Over time, leaves and twigs can get stuck in the flashing channels around the skylight. This can trap water and, if left unchecked, lead to problems. A quick brush-off with a soft brush a few times a year is usually all that’s needed to keep everything flowing freely.
A Simple Care Routine for Peak Performance
While you’re checking for debris, it’s a good idea to gently wipe down the small solar panel with a soft, damp cloth. Just like the larger panels you might have for your whole house, this little one works best when it’s clean and has a clear view of the sun. This simple step ensures the battery stays charged, keeping your remote control and rain sensor powered up and ready to go.
Here’s a quick checklist for your maintenance routine:
Clear the Flashing: Sweep away any leaves, gum nuts, or other debris from around the skylight’s base.
Wipe the Solar Panel: Use a soft cloth to gently clean off any dust and grime.
Clean the Glass: Most modern skylights have special coatings that help them stay clean, but a quick wipe from the inside with a regular glass cleaner will keep your view crystal clear.
Check the Seals: Give the seals around the frame a quick visual inspection to make sure they’re intact and don’t show any signs of cracking.
This isn’t just about maintenance; it’s about getting the most out of your investment. A clean, well-maintained skylight doesn’t just function better—it delivers the maximum amount of light to keep your home feeling bright and welcoming.
Making the Most of Your New Light Source
Beyond basic upkeep, think about how you can use your new skylight to really enhance your home. If you’ve installed an opening model, use it to create natural airflow. On a hot day, opening the skylight is a brilliant way to vent that hot, stale air that naturally rises to the ceiling. It makes the whole house feel fresher and more comfortable.
Pay attention to how the light moves through the room during the day. You might find yourself rearranging furniture to create a sun-drenched reading spot or moving your indoor plants to soak up the direct sunlight. Your skylight is more than just a window in the roof; it’s a dynamic feature that can completely change how you live in and enjoy a space.
Still Have Questions About Solar Powered Skylights?
Even after seeing all the benefits, it’s completely normal to have a few questions before you commit. We get it – installing a skylight is a big decision. To make sure you feel confident, we’ve put together answers to some of the most common things homeowners ask us.
Think of this as the final check-in, clearing up any last doubts about how they perform, what installation is like, and whether they’re a good long-term investment.
Do Solar Powered Skylights Work on Cloudy Days?
Yes, absolutely. People often picture the solar panel needing direct, blazing sun to work, but the system is much smarter than that. It includes a high-capacity battery that stores plenty of energy.
This built-in battery holds more than enough charge to open and close the skylight and power the rain sensor many times over, even if you have a long stretch of grey, overcast weather. More importantly, the main job of a skylight – letting in natural light – happens anytime the sun is up, rain or shine. You’ll still get that beautiful, diffused light filling your room.
Is Installing a Skylight Likely to Cause Leaks?
This is probably the number one concern we hear, and it’s a valid one. But here’s the good news: a modern, high-quality skylight that’s installed correctly will not leak. Period. The magic is in the custom-engineered flashing kit that comes with every unit.
These kits are purpose-built to create a completely watertight seal with your specific roofing material, whether you have standard tiles or a metal roof.
A leak-free finish all comes down to the quality of the installation. Following the manufacturer’s instructions to the letter—or even better, hiring a professional who’s done it a hundred times—is the best way to guarantee a perfect, weatherproof seal for years to come.
What Is the Main Advantage of a Solar Powered Opener?
The biggest win here is how simple and cost-effective the installation is. Because a solar powered skylight is a totally self-contained unit, you can forget about hiring an electrician.
There’s no need to run complicated wiring through your roof cavity and down inside your walls. This completely sidesteps the cost, time, and mess involved in hardwiring it to your home’s mains power. It makes it a fantastic option for renovations and a much more approachable DIY project.
Can I Add a Block Out Blind to My Solar Skylight?
You certainly can. The best solar skylights are designed as a complete system, which includes perfectly compatible accessories like solar-powered block-out blinds.
They’re designed to be controlled by the very same remote as the skylight opener itself. That means you can plunge a bedroom into darkness for a good night’s sleep or cut the glare in a media room with just the press of a button.
Ready to transform your home with beautiful, free natural light? Explore the full range of options at Vivid Skylights and find the perfect solar-powered solution for your space. Discover our skylights today.