
If you need a replacement skylight dome, it’s time to upgrade to a far more energy efficient double glazed Vivid Skylight. It’s tempting to think a quick dome swap will solve the problem, but from my experience, that’s often a short-term patch that ignores the real issue: an old, inefficient skylight that’s silently costing you in comfort and energy bills.
Spotting the Signs: Is It Time for a Skylight Dome Replacement?
That old acrylic dome on your roof has ways of telling you its time is up. Catching these signals early can save you a world of trouble, from water damage and mould to sky-high heating and cooling costs. Think of it less as a repair and more as an opportunity to genuinely improve your home.
For homeowners in Blackrock, this isn’t just about fixing a leak; it’s a smart investment in your property’s value and year-round comfort. If you need a replacement skylight dome, it’s time to upgrade to a far more energy efficient double glazed Vivid Skylight.
Telltale Warning Signs
You don’t always need to get up on the roof to know there’s a problem. The most obvious signs are often visible right from inside your home. Don’t brush them off—what starts as a small issue can quickly become a major headache.
Keep an eye out for these classic indicators:
- Visible Cracks or Fractures: Even tiny, hairline cracks are bad news. They compromise the dome’s integrity, letting moisture in and precious warm or cool air out.
- Persistent Leaks: This is the big one. Water stains on your ceiling or, worse, drips during a rainstorm are urgent red flags. The dome or its seals have failed, and the clock is ticking.
- Yellowing or Discolouration: Over the years, UV rays wreak havoc on older plastic domes, making them brittle, cloudy, and yellow. It’s not just an eyesore; it drastically reduces the amount and quality of natural light getting into your space.
- Condensation Between Layers: Seeing fog or moisture trapped inside a double-dome skylight? That means the airtight seal is broken, and any insulating benefit it once had is completely gone.
Why It’s More Than Just a Dome Problem
These symptoms usually point to a problem that goes deeper than the plastic dome. A skylight is a complete system—the frame, the flashing, and the seals all age at the same rate. Popping a new dome onto an old, weathered frame is like putting brand-new tyres on a car with a rusted-out chassis. You haven’t fixed the fundamental issue.
This is especially true when it comes to leaks. Here in Australia, water intrusion is the number one reason people seek out skylight replacements. In fact, the replacement market is valued at roughly USD 2.23 billion, with leaks driving the vast majority of those jobs.
Making the switch to a modern, energy-efficient unit doesn’t just stop leaks; it can also cut your home energy use by 10-20%. It’s a decision that pays for itself. If you’re interested in the numbers, you can learn more about the global skylight market insights.
Upgrading to a complete double glazed Vivid Skylight system tackles all potential failure points in one go. It’s a comprehensive solution designed for weatherproofing, energy efficiency, and durability that a simple dome replacement just can’t match.
Quick Fix vs. Long-Term Upgrade
So, what’s the real difference between a quick dome swap and a full upgrade? It often comes down to short-term cost versus long-term peace of mind.
Here’s a practical look at what you get from a simple dome repair versus a full Vivid Skylight upgrade.
| Benefit | Simple Dome Replacement | Vivid Skylight Upgrade |
|---|---|---|
| Leak Prevention | May fix one leak, but old flashing and seals remain vulnerable. | New, integrated flashing system creates a completely weatherproof seal. |
| Energy Efficiency | Minimal improvement. Still loses significant heat in winter and gains it in summer. | High-performance double glazing dramatically reduces energy transfer. |
| Durability | New dome on an old frame. The underlying structure continues to age. | Entirely new, modern unit designed to last for decades. |
| Light Quality | Restores clarity, but acrylic can still yellow over time. | Laminated, UV-coated glass provides clear, beautiful light without fading. |
| Home Value | A minor repair with little impact. | A significant home improvement that adds tangible value and appeal. |
| Cost | Lower upfront cost. | Higher initial investment, but saves money on energy and future repairs. |
As you can see, while replacing just the dome might seem easier on the wallet initially, a complete upgrade is the smarter play for performance, reliability, and long-term savings. It’s about solving the problem for good, not just for now.
The Vivid Skylight Upgrade Advantage
When you find yourself searching for a “replacement skylight dome,” it’s usually because an old, failing acrylic one has finally given up. But this is the perfect opportunity to think bigger than a simple patch job. Choosing a complete Vivid Skylight unit isn’t just swapping out a part; it’s a serious upgrade that protects your Blackrock home from the very problems that plague those old-style domes in the first place.
Let’s be honest—a single-layer acrylic dome is a massive weak spot in your roof. It’s like leaving a window open all year round, forcing your heating and cooling to work overtime just to keep up. If you need a replacement skylight dome, it’s time to upgrade to a far more energy efficient double glazed Vivid Skylight.
Superior Thermal Insulation Year-Round
The real magic of the Vivid Skylight is its double glazed, argon-gas-filled design. This setup creates an insulating pocket that drastically slows the transfer of heat. So, in a chilly Blackrock winter, it keeps that precious warmth right where you want it—inside. Come a summer heatwave, it does the opposite, blocking the sun’s intense heat from baking your home.
This isn’t just about feeling more comfortable; it’s about real, tangible savings. By slashing heat loss in winter and heat gain in summer, your energy use plummets, and your power bills follow. A basic acrylic dome offers next to no insulation, but a double glazed unit can boost thermal performance by 50% or more.
Upgrading from a basic dome to a double glazed Vivid Skylight is the difference between patching a problem and solving it for good. Think of it as an investment in your home’s long-term comfort, energy efficiency, and value.
More Than Just Energy Savings
The perks of a modern skylight go well beyond just thermal performance. It solves all those other common frustrations that come with old acrylic domes, turning a weak point on your roof into a high-performing asset.
Here’s what else you get with the upgrade:
- Noise Reduction: The racket of heavy rain or hail hammering on a thin plastic dome can be deafening. The insulated double glazing of a Vivid Skylight acts as a powerful acoustic buffer, making your home a much quieter, more peaceful sanctuary during storms.
- Crucial UV Protection: That old, yellowed dome isn’t just an eyesore; it’s failing to protect your belongings. Our skylights have laminated glass with a low-E coating that blocks over 99% of harmful UV rays. This stops your furniture, floors, and artwork from fading over time.
- Unmatched Durability: Acrylic domes get brittle and are easily damaged by hail or falling branches. Our skylights are built tough, with laminated safety glass and sturdy, powder-coated aluminium frames. They’re designed to last for decades, so you won’t be looking for another replacement in a few years.
Choosing this path means you’re investing in a permanent fix. To see exactly how a full unit stacks up against a simple dome replacement, you can explore the details of a modern replacement skylight and see the long-term benefits for yourself. It’s about making a smart, forward-thinking choice for your home, not just another temporary patch.
How to Measure for Your New Skylight
Alright, let’s get you ready for your upgrade. The first job on the list is also the most important: getting your measurements spot-on. If you need a replacement skylight dome, this is the perfect time to upgrade to a far more energy-efficient double-glazed Vivid Skylight. Making sure that new unit fits perfectly all comes down to how you measure the existing setup.
Don’t worry, it’s not as complicated as it sounds. We’ll walk through how to measure the external timber frame, which you’ll often hear called a ‘kerb’ or ‘upstand’. Nailing this step is the key to a hassle-free installation.
Gearing Up and Playing it Safe
Before you even touch a ladder, let’s talk about preparation. You’ll need a few basic tools, but more importantly, you need to put safety first.
Here’s what to grab:
- A sturdy ladder: Make sure it’s on solid, level ground before you climb.
- A good tape measure: A locking metal one is your best bet for getting an accurate number.
- Something to write with: Use your phone or a classic notepad and pen. Just don’t trust your memory.
- Safety equipment: Good, non-slip shoes are a must. For any work on a roof, a safety harness is always a wise investment.
Your safety is non-negotiable. If the roof is wet or the wind is up, stay on the ground. And if you’re not completely comfortable with the height or the steepness of your roof, it’s always smarter to call in a professional from the Blackrock area.
Measuring the Skylight Kerb
The one measurement that matters here is the external dimension of the timber kerb—that’s the raised frame your old dome is fixed to. You can completely ignore the old plastic dome for this part; we’re only interested in the timber structure it sits on.
Take your tape measure and get the length and width, measuring from the very outside edge of the kerb to the other outside edge. Do it twice. Seriously, measure twice. A simple mistake here is the number one reason people order the wrong size, and that’s a headache you just don’t need.
Give the Area a Quick Inspection
While you’re up there, take a good look around the skylight. What’s the condition of the roofing material? How does the flashing—the metal seal between the kerb and the roof—look? Keep an eye out for any rot in the timber, rust, or other obvious damage.
Fixing any small issues now will save you from bigger leaks and problems down the track. It ensures your new skylight is being installed on a solid, weatherproof base, making this a genuine, long-term improvement for your home.
This is also a good moment to think about what’s current. More and more Australian homeowners are looking for skylights made from sustainable materials. In fact, demand for solar-powered models is climbing by up to 25% each year as people prioritise better energy performance. If you’re curious, you can explore the latest skylight trends for Australian homes to see what’s popular.
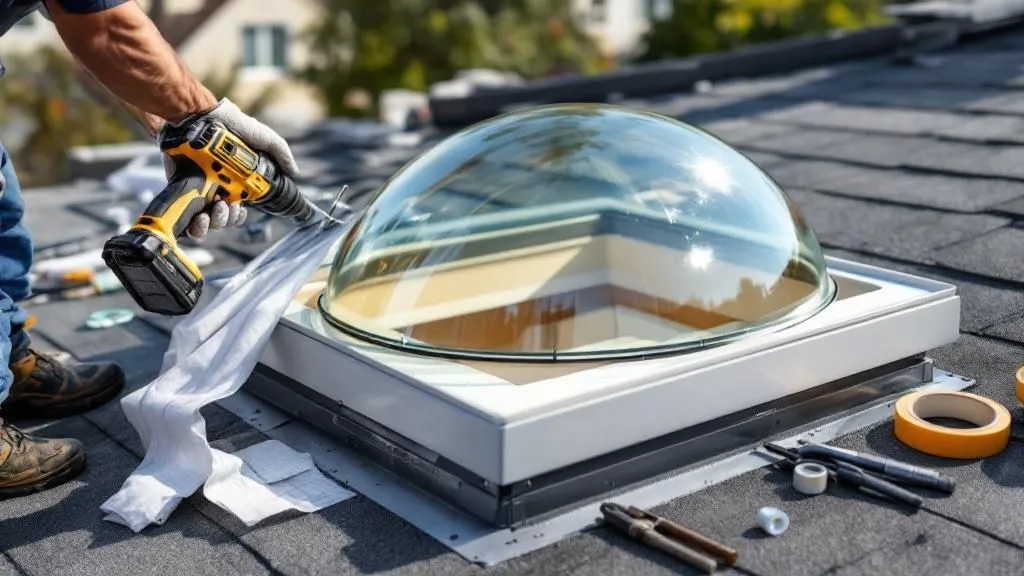
Time to Install Your New Skylight
Alright, this is the exciting part. You’ve done the measuring, your new Vivid Skylight is on site, and you’re ready to get that old unit out and the new one in. If you need a replacement skylight dome, this is the moment you get a serious upgrade to a far more energy-efficient, double-glazed Vivid Skylight that solves those old problems for good.
The installation itself isn’t overly complicated, but as with any roofing job, the devil is in the details. Getting it right comes down to prepping the kerb properly and creating a perfect seal. We’ll walk you through it. For anyone in Blackrock tackling this themselves, following these steps is your key to a secure, professional, and—most importantly—completely leak-proof result.
The infographic below breaks down the core stages into three key phases.
As you can see, a successful installation really hinges on careful prep work, fitting it precisely, and finishing everything off meticulously.
Getting the Old Dome and Frame Out
First things first: the old skylight has to go. Start by carefully removing whatever screws or fixings are holding the old acrylic dome to the timber kerb. Take your time here—old plastic can get incredibly brittle over the years and might shatter when you least expect it.
With the dome off, the old frame and any associated flashing need to be removed. This usually means carefully prying up some roofing material around the kerb’s base. It’s best to work methodically to avoid damaging the surrounding roof surface. Think of it as creating a clean slate for the new installation.
Prepping the Kerb for a Watertight Seal
Once the old unit is gone, you’ll be left with the exposed timber kerb. This is a critical step that a lot of people tend to rush. Your goal here is simple: create a perfectly clean, smooth surface for your new skylight to sit on.
- Scrub it Clean: Scrape off every last bit of old sealant, grime, or debris from the top of the kerb. A truly clean surface is non-negotiable for getting the new sealant to form a strong, waterproof bond.
- Check for Damage: Have a good look at the timber itself. Are there any signs of rot or water damage? If you find any soft spots, they absolutely must be repaired or replaced before you move on.
- Make Sure It’s Level: Grab a spirit level and check the kerb in both directions to confirm it’s completely flat. An uneven base can mess with the seal and put unnecessary stress on the new skylight frame.
Applying Sealant and Fitting the New Skylight
Now for the most important part: creating that weatherproof barrier.
Using a high-quality, neutral-cure silicone sealant, apply a continuous and generous bead around the entire top edge of the timber kerb. Don’t even think about using a cheap sealant here; it’s a surefire recipe for leaks down the track.
One of the most common mistakes I see is people using the wrong type of sealant. Always, always opt for a neutral-cure silicone that’s designed for outdoor and roofing applications. Acid-cure silicones can actually react with and corrode the powder-coated aluminium frame of your brand-new skylight.
With the bead of sealant in place, carefully lift and position your new Vivid Skylight onto the kerb. Settle it down gently, making sure it’s centred and sitting flush on all sides. The natural weight of the unit will press down into the sealant, creating that crucial primary seal.
Finally, secure the skylight to the kerb with the screws provided. The trick is to tighten them until they are just snug. Do not overtighten them! Cranking them down too hard can warp the frame or damage the internal seals, creating a potential weak spot for water to get in.
If you’d like a more detailed walkthrough, our guide on how to install a skylight offers more in-depth instructions. While this process is definitely manageable for a skilled DIYer, remember that when it comes to working on a roof, calling in a professional is always the smartest move if you feel the slightest bit unsure.
Common Installation Mistakes to Avoid
Even what looks like a simple installation can go sideways if you miss a few crucial details. I’ve seen it happen plenty of times. Learning from these common missteps is the best way to make sure your replacement skylight dome project gives you a perfect, leak-proof finish, not a weekend of frustrating callbacks.
Think of this as a pre-flight checklist. Getting it right, especially for homeowners in places like Blackrock, means you can look forward to years of beautiful natural light without a single worry. Dodging these common pitfalls is the real secret to a professional-quality job that stands the test of time.
The Problem of Inaccurate Measurements
Easily the most frequent—and costly—error happens before you even pick up a tool: getting the measurements wrong. It’s tempting to rush this part, but being off by even a centimetre or two can cause a world of pain. A skylight that doesn’t fit properly will never create a perfect seal.
From there, it’s a domino effect of problems:
- Poor Sealing: Gaps are inevitable, becoming obvious entry points for water, wind, and drafts.
- Structural Stress: Trying to force a slightly wrong-sized unit into place puts unnecessary strain on the frame, which can lead to cracks and material fatigue down the track.
- Wasted Time and Money: There’s nothing worse than being up on the roof, ready to go, only to find your brand-new skylight won’t fit.
My best advice? Measure the external dimensions of your timber kerb twice. It’s a simple habit that will save you a massive headache and ensure your new Vivid Skylight sits exactly as it should.
Using the Wrong Sealant
This is a classic blunder, and it’s almost always the culprit behind a leaky skylight. It’s easy to assume all sealants are pretty much the same, but using the wrong type for the job can completely undermine your whole installation. The sealant and your skylight materials have to be compatible.
A mistake I see all too often is people using an acid-cure silicone. This type of sealant can have a chemical reaction with the powder-coated aluminium frame on a Vivid Skylight, causing corrosion and, eventually, a total failure of the seal. Always use a high-quality, neutral-cure silicone that’s specifically designed for roofing.
Applying it unevenly is another common issue. You need to lay down a continuous, generous bead around the entire kerb to form an unbroken waterproof barrier. Skimping on the sealant or leaving tiny gaps is basically sending an open invitation for the next downpour to come inside.
Overtightening Screws and Fixings
When you’re securing the new skylight, the instinct is to make it as tight as possible. But cranking down on those screws with too much force is a critical error. Overtightening can cause serious damage that you might not even notice at first.
You can actually crack the frame or damage the internal seals of the double-glazed unit. This creates a hidden weak point that completely compromises the weatherproofing you’ve just worked so hard to achieve.
The goal is to get the screws snug and secure, not to torque them down with all your might. A firm, gentle pressure is all you need to hold the unit securely in place against the sealant.
To explore different options and make sure you have the perfect fit for your home, take a look at our range of skylight replacement covers.
Your Skylight Upgrade Questions Answered
When it comes to swapping out an old skylight dome, homeowners around Blackrock tend to run into the same questions. We’ve put together some clear, practical answers to help you feel confident about making the switch to a modern, energy-efficient double glazed Vivid Skylight.
Can I Just Replace the Plastic Dome on My Skylight?
It’s a tempting thought, but honestly, it’s usually just a temporary fix. If your plastic dome is cracked, yellowed, or leaking, it’s a sure sign that the rest of the unit—the frame, seals, and flashings—is just as old and probably on its last legs.
Swapping out the entire unit for a complete double glazed Vivid Skylight tackles all these potential failure points in one go. You’re not just getting a new dome; you’re getting a completely new, high-performance system with superior weatherproofing and durability that a simple piece of plastic can’t ever match.
How Much More Efficient Is a Double Glazed Skylight?
The difference is night and day. A standard, single-layer acrylic dome has almost zero insulating properties. In summer, it lets heat pour in, and in winter, it lets all your expensive warmth escape right through the roof.
A double glazed Vivid Skylight, on the other hand, creates an insulating air gap between the panes of glass. This simple feature cuts that energy transfer by 50% or more, which translates directly into lower power bills and a home that stays comfortable no matter the season.
The real takeaway is that moving from a single dome to a double glazed unit isn’t just a minor improvement; it’s a fundamental change in performance that pays for itself in comfort and savings.
Is This a Manageable DIY Project?
For the confident DIYer who is comfortable and safe working at heights, absolutely. We’ve designed our Vivid Skylight units to be fitted onto an existing kerb without too much fuss.
That said, if you have any hesitation about working on your roof or getting that weatherproof seal perfect, our advice is always to call in a professional. A qualified installer, especially for our customers in the Blackrock area, will ensure a flawless, leak-proof result. It’s a small investment for total peace of mind and protecting your home’s value.
Ready to stop patching problems and start enjoying beautiful, efficient natural light? If you need a replacement skylight dome, it’s time to upgrade to a modern, double glazed solution from Vivid Skylights. Explore our full range of skylights today.