A Guide to How To Install A Skylight

A skylight is a great addition to any space and serves a lot of purpose. It gives an abundant amount of natural light to your home as well as improves ventilation, and simply makes your house spacious and more inviting.
Here’s a quick and simple guide on how to install a skylight and the things you need to know before the installation:
- Choose high quality skylights: Not all skylights are created equal. Skylights are made from either glass or plastic. Plastic scratches easily while laminated skylights are more durable and safer to install. Other factors that you need to consider are outside noise reduction, wind resistance, and water tightness. Vivid Skylights supplies premium quality skylights with strong and durable frames.
- Carefully choose the placement: The placement of skylights is primarily determined by the rafter of your roof. Make sure to plan accordingly and that you have the blueprint ready before you begin cutting out parts of your roof.
- Best to install skylights during summer time: Like any other house improvement projects, bad weather can seriously affect the outcome of your skylight installation.
- Identify the flashing needed for your roof: Different roof pitch requires specific type of flashing so make sure that you have all the right information before buying a flashing kit. Vivid Skylights products come with an easy to install flashing kit but custom flashing is not included.
What Should Be in Your DIY Skylight Kit?
As soon as you’ve chosen the type of skylight you want and identify its placement on your roof, it’s time to bust out your DIY skylight kit. You’ll need a harness for your safety, a drill, a hammer, a chalk line, a roofing nailer, a drill, a circular saw, and a utility line. Simply follow the instructions included in the Vivid skylight kit so you can identify your cutting measurements.
DIY Skylights | What Are Your Options?
There are a lot of ways on how you can incorporate skylights in your home to make the most out of it. Here are some DIY skylights design you can consider:
- Curbed skylight: It’s a great idea for a bedroom roof window. You can install it near your desk for that added brightness while you work. It also looks cool at night to look at when you want to gaze at the stars.
- Blockout blinds skylight: Installing a blockout blind with your skylight will allow you to control the amount of natural light that enters your home. We offer skylight blinds with a pre-installed electric motor and remote that can be fitted to both fixed and operable skylights.
- Modern themed skylight: If you have a modern designed home, having floor to ceiling windows plus skylights paired with minimalist interiors is the perfect modern house.
- Pitched Skylight: Skylights can be customised depending on the slope and pitch of your roof. Opt for a pyramid designed skylight for that eye-catching design, perfect for the garden or foyer or any space in your home where the indoors meet the outdoors.
How To Install A Skylight On A Tile Roof

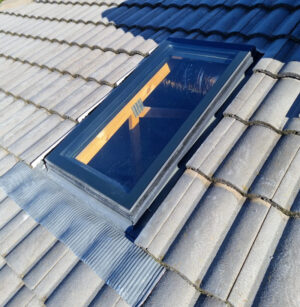
Vivid Skylights are easy to install and come with a flashing kit so all you need is the other tools of the trade and you’re good to go. Take note that if structural members of your roof require adjustment to suit the opening size required, you need to consult a structural engineer before altering the opening.
Our skylights are designed to be installed at a minimum recommended 3 – 60 degrees. Here’s the step-by-step guide on how to install a skylight on a tile roof (Note that there’s a separate guide for the installation of a flashing kit):
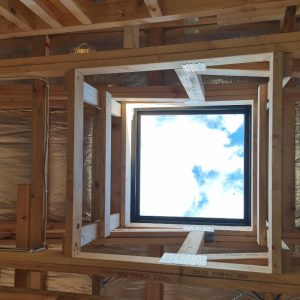
- Frame the opening to the size required. The skylight needs to be supported by roofing rafters; trim out all four sides if needed. Make sure the opening on each corner is square.
- Install roof battens 5mm short of the frame opening size on all four sides. (Skylight is fixed into position on top of roof battens for both tiled and metal roofs).
- Using 20mm metal self-tapping screws, install the mounting brackets provided with your skylight into the skylight frame. Install two brackets on each side, 100mm from each end of the skylight.
- Place the skylight on the roof frame opening. Make sure that it is properly placed from underneath to suit the internal cladding of the skylight shaft.
- Using the 30mm timber screws provided, fix the brackets into positions.
How To Install A Skylight On A Corrugated Metal Roof
The process of installing skylights in corrugated metal roofs is different compared to tile roofs. But like installing a skylight on a tile roof, the first thing you need to do is prepare the part of the roof where you wish to install the skylight. Follow the steps on how to install a skylight on a corrugated metal roof in our Vivid Skylights installation guide.
How to Install a Skylight on a Flat Roof
A custom flashing is needed to install skylights on flat or low pitch roofs. We don’t provide custom flashing; this should be done by a registered plumber. Nevertheless, our skylights can be installed on flat roofs. We provide all necessary information on how to install a skylight on a flat roof. It is best to install skylights at a minimum of 3- 5 degrees in order to avoid condensation and pooling of water on the glass.
Waterproofing tape still needs to be installed with a custom flashing, following our standard flashing kit installation guide.
Where to Buy Skylights for DIY Skylight Installation?
If you wish to do a diy skylight installation project, Vivid skylights supplies premium skylights perfect for residential homes. All our skylights come with an easy to install flashing kit and step by step instruction guide.
Vivid Skylights offer four standard sizes for both fixed and electric opening skylights variation but more sizes will be added soon. All our products come with a 10-year leak-free warranty period. If you want to know more about skylights, contact us now and we’ll be happy to assist you.
